Clothes Dryer Owner’s Help Guide: Real-World Use, Care, And Fixes
Quick start you can finish fast
Your Clothes Dryer doesn’t need a ceremony, just a quick setup so it runs safely and dries well from day one.
Fast setup checklist
- Remove all packaging, tape, and cardboard from inside and around the Clothes Dryer drum.
- Check that the drum turns freely by gently spinning it by hand.
- Confirm the Clothes Dryer is level using a small bubble level or a rolling object that doesn’t move on its own.
- Connect the exhaust duct firmly and as straight as possible to the vent outlet, with no big kinks.
- Plug into a suitable outlet and make sure the cord is not pinched or stretched.
- Clean the lint filter once before first use to remove any factory dust.
First empty run (worth the few minutes)
A short empty run helps burn off any manufacturing residues and lets you learn the controls when nothing important is inside.
- Close the Clothes Dryer door fully until you hear or feel a click.
- Select a medium heat or “Normal” cycle, around 30–40 minutes.
- Start the cycle and stay nearby to listen for any unusual sounds.
- Let it run for at least 10–15 minutes, then you can stop once any new-plastic smell fades.
- Clean the lint filter again after this run.
First real use example: everyday cotton load
Here is a simple starting point for common laundry like t‑shirts, socks, and underwear.
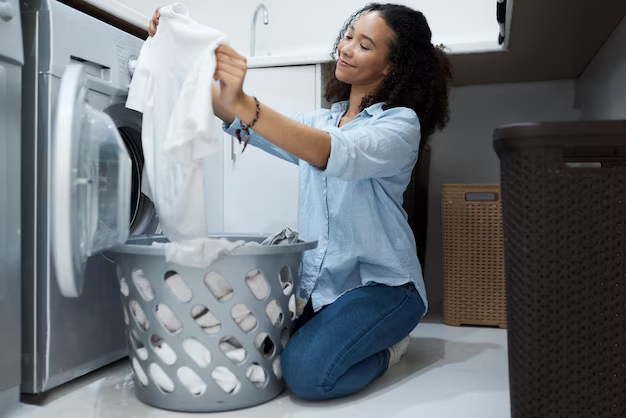
- Load the Clothes Dryer drum no more than about two-thirds full and keep items untangled.
- Choose a “Normal” or “Cotton” cycle with medium heat, typically around 50–70 °C (125–160 °F).
- Set time between 40–60 minutes, or choose an auto-sense “Normal Dry” option if available.
- Check dryness a few minutes before the end: items should feel dry but not hot and stiff.
- Remove clothes promptly to reduce wrinkles and hang or fold right away.
Know your parts without guessing
The names below match what you will actually see and touch on a typical Clothes Dryer. Once you know what’s what, troubleshooting gets easier and a lot less stressful.
Most units have
- Door and door latch – Lets you load and unload; the latch tells the control that the door is closed so the Clothes Dryer can run.
- Drum – The large rotating cylinder where you place laundry; it tumbles clothes through warm air.
- Lint filter / lint screen – A mesh screen that catches lint, fuzz, and small fibers so they don’t clog the exhaust path.
- Control panel – Buttons, knobs, or a display where you choose cycle, temperature, and options.
- Start / Pause control – Begins or temporarily stops a cycle; often must be held briefly.
- Exhaust outlet – Rear or side port where moist air leaves the Clothes Dryer to the vent duct.
- Power cord or terminal block – Supplies electrical power to the Clothes Dryer.
- Adjustable feet – Allow you to level the Clothes Dryer to reduce vibration and noise.
Some units have
- Moisture sensors – Metal strips inside the drum opening that detect how wet clothes are to stop the cycle automatically.
- Interior light – Helps you see socks hiding in the back of the Clothes Dryer drum.
- Wrinkle-prevent or tumble-only options – Periodically turn the drum without heat to keep clothes from creasing.
- Low-heat / delicate cycles – Designed for lighter fabrics to reduce shrinkage and damage.
- Air fluff / no heat cycle – Uses room-temperature air to freshen or dust off items without additional heat.
- Stacking kit brackets – Hardware used to stack a Clothes Dryer safely on top of a washer.
- Condenser unit or water tank (for ventless dryers) – Collects moisture instead of venting it outdoors.
Safety that actually prevents problems
A few focused habits keep your Clothes Dryer running smoothly and avoid the kind of problems that ruin weekends.
- Do not block the exhaust. Poor venting overheats the Clothes Dryer and makes drying very slow.
- Clean the lint filter before every load. A clogged filter makes the unit run hotter and longer than it should.
- Avoid drying items with solvents, oils, or strong chemicals on them; wash thoroughly first so fumes do not circulate.
- Check labels on delicate fabrics; high heat can shrink wool, melt synthetics, or damage prints.
- Do not run the Clothes Dryer with the vent hose crushed behind it; keep at least a small gap from the wall for airflow.
- Keep the area around the Clothes Dryer clear; piles of laundry can cover vents and make access harder in an emergency.
- Unplug or disconnect power before doing any internal cleaning beyond the lint filter or external vent hood.
- Use only compatible venting materials; avoid makeshift hoses that tear easily or trap lint excessively.
- Supervise use if children can reach the controls; a full drum of wet clothes is not a toy.
- Stop the Clothes Dryer if you notice strong burning odors, loud grinding sounds, or visible smoke from the vent and investigate from a safe distance.
Daily use for better results
Think of using your Clothes Dryer as a short routine: prep, load, choose, and finish. Once you get the flow, you will rarely have to run loads twice.
- Sort laundry by fabric weight and type: heavy towels together, light synthetics together, mixed loads kept reasonable.
- Shake out items from the washer so they do not clump or knot in the Clothes Dryer drum.
- Clean the lint filter before you start each load.
- Load the Clothes Dryer drum loosely, leaving space at the top for clothes to tumble.
- Choose a cycle that matches the load: normal for cottons, low heat for delicates, high heat for sturdy towels if labels allow.
- Use automatic moisture-sensing cycles for most loads when available; reserve timed cycles for special situations.
- Start the cycle and let it finish without repeatedly opening the door, which drops temperature and adds time.
- Remove clothes promptly at the end, while still slightly warm, and fold or hang right away.
- Every few loads, glance at the vent hood outside (or condenser unit) to confirm good airflow.
| Load type | Starting settings / range | How to tell it is done | Common mistakes |
|---|---|---|---|
| Everyday cottons (t‑shirts, underwear) | Normal cycle, medium heat, 40–60 minutes | Fabric dry to the touch, still slightly warm, not stiff | Overloading, causing damp patches in thicker seams |
| Towels and heavy linens | Heavy or towel cycle, medium to high heat, 60–90 minutes | Edges and centers of towels feel equally dry | Mixing with light items that dry early and overdry |
| Delicates and synthetics | Delicate or low heat, 30–45 minutes | Items dry but not hot; thin fabrics still soft and flexible | Using high heat and shrinking or puckering fabrics |
| Jeans and heavy pants | Normal or heavy, medium heat, 45–70 minutes | Waistband and pockets fully dry, not cool or damp | Not turning jeans inside out, leaving pockets bunched and damp |
| Bedding (sheets, duvet covers) | Bedding or bulky cycle, medium heat, 45–75 minutes | No cool or damp clumps when shaken out | Letting sheets ball up into a knot inside the Clothes Dryer |
| Quick refresh (worn-briefly clothes) | Air fluff or very low heat, 10–20 minutes | Clothes feel aired out with fewer wrinkles | Using full heat when not needed, causing extra wear |
Cleaning and maintenance that doesn’t ruin parts
A Clothes Dryer does not ask for much, but ignoring basic cleaning is the fastest way to poor performance and premature repairs.
After each use
- Remove the lint filter and wipe off lint with your hand or a soft brush; do not wash it every time, only when it looks coated.
- Check the drum for items left behind, especially small garments or tissue remnants.
- Leave the door slightly open for a short time to let moisture and warmth dissipate.
Weekly or every few loads
- Inspect the area around the Clothes Dryer for lint buildup and vacuum gently if needed.
- Wipe the drum interior with a soft, damp cloth if you use dryer sheets or fabric softeners, which can leave a light film.
- Check the exhaust hose for obvious kinks or crushed sections and adjust if necessary.
When it smells strange or dries poorly
- Wash the lint filter in warm, soapy water if water beads up on it; residue can block airflow even when it looks clean.
- Clean the vent duct from the Clothes Dryer to the outside if you see heavy lint, especially at bends.
- For condenser or ventless models, empty and rinse the water tank and clean the condenser element following its access design.
- Use a mild cleaner only on accessible surfaces; keep liquids away from electronic controls and heating components.
What not to do
- Do not use abrasive pads, steel wool, or harsh chemicals on the drum or front panel; they can scratch surfaces and coatings.
- Do not push the Clothes Dryer tightly against the wall; this can crush the vent and damage connections.
- Do not pull on the door or slam it hard to close; this stresses hinges and latches.
- Do not open panels or covers marked for service access only; many components retain charge or heat inside.
Two common maintenance complaints and quick checks
If your Clothes Dryer is acting up, these two issues cover a large share of real-world complaints.
Complaint: “Clothes are still damp at the end.”
- Confirm the lint filter is fully clean.
- Check that the load is not overstuffed; run fewer items as a test.
- Inspect the vent hood outside: is air flowing strongly during operation?
- If using a timed cycle, increase time or switch to an auto-sense cycle.
Complaint: “The Clothes Dryer takes much longer than it used to.”
- Clean the lint filter and wash it with warm soap if it looks coated or shiny.
- Check the exhaust hose and vent for lint buildup and clear blockages.
- Ensure the room is not extremely cold or damp, which slows drying.
- Inspect moisture sensor strips (if present) and gently wipe them with a damp cloth to remove film.
Troubleshooting that gets you unstuck fast
Use the pattern “symptom → likely cause → quick fix” to narrow things down without tearing your laundry room apart.
| Symptom | Likely cause | Fix |
|---|---|---|
| Clothes Dryer will not start | No power, door not fully closed, or start button not held long enough | Check outlet or breaker, firmly close door, then press and hold Start as indicated on the panel. |
| Runs but no heat | Wrong cycle selected (air fluff), tripped internal safety, or power supply issue | Verify heat setting, try a heat cycle, and if still cold, stop use and have electrical and safety systems checked. |
| Very long drying times | Clogged lint filter or blocked vent path | Clean lint filter fully, inspect duct and outside vent hood, remove lint and straighten hose. |
| Clothes hot but still damp | Overloaded drum or mixed heavy/light fabrics | Dry fewer items at once or separate heavy towels from light clothing. |
| Clothes come out wrinkled | Left sitting in Clothes Dryer after cycle, or over-dried on high heat | Remove promptly at cycle end, use lower heat, or add wrinkle-prevent / cool-down options. |
| Loud banging or thumping | Large item balled up, or Clothes Dryer not level | Pause, redistribute load, then adjust leveling feet so the unit is stable. |
| Squeaking or squealing sound | Worn drum support parts or misaligned belt | If noise persists over several loads, stop and schedule service before more parts wear. |
| Burning or very sharp odor | Lint near heater or clothing trapped in drum seal | Stop the Clothes Dryer, unplug, check for trapped fabric and excess lint; do not resume until resolved. |
| Clothes Dryer stops mid-cycle | Overheating safety triggered or door switch issue | Clean lint filter and vent, let the unit cool for at least 30 minutes, then try again. |
| Display shows filter/vent warning | Airflow sensor detecting restricted exhaust | Thoroughly clean lint filter and entire vent path, then reset by starting a new cycle. |
| Static cling is very strong | Drying too long, very dry air, or no softener used | Use slightly shorter cycles, lower heat, or dryer sheets/balls if suitable. |
Mini decision path: if the Clothes Dryer will not start
- Check the power: test another device in the same outlet, and reset any tripped breakers.
- Check the door: open and close it firmly until you feel the latch engage; look for lint or fabric caught in the door area.
- Check the controls: confirm a cycle is actually selected and press Start, holding if the label says to.
- Check delay features: some Clothes Dryers have “delay start” or “child lock”; make sure those are not active.
- If nothing happens at all after these checks, stop trying and arrange service; further attempts will not magically fix a failed component.
Mini decision path: if clothes keep coming out damp
- Look at the load size: reduce it to about half and run again as a test.
- Clean the lint filter and, if vented, check outside for strong airflow during a run.
- Switch to an automatic moisture-sensing cycle with medium heat and check results.
- If the Clothes Dryer still leaves items damp and airflow seems weak, schedule a vent cleaning or service check.
When to stop and get service
There is a sensible point where home troubleshooting ends and a trained technician should take over.
- Repeated tripping of circuit breakers or fuses when the Clothes Dryer runs.
- Strong burning or chemical smells that return immediately after basic cleaning.
- Drum does not turn at all, even though you hear the motor trying or humming.
- Grinding, scraping, or metal-on-metal sounds that continue after you redistribute the load.
- Visible damage to the power cord, plug, or outlet used for the Clothes Dryer.
- Water leaking from a condenser or heat pump Clothes Dryer that does not stop with simple tank emptying or hose checks.
- Error codes on a digital display that do not clear after unplugging for a few minutes and restarting once.
Smart habits that save time
A few small routines make your Clothes Dryer faster, gentler on clothes, and less of a hassle long-term.
- Keep a small basket or shelf for lint brushes, clothespins, and a flashlight near the Clothes Dryer so you can quickly find lost items in the drum.
- Pair your washer settings with your Clothes Dryer plan: higher spin speeds in the washer mean shorter dry times.
- Use dryer balls for large loads if desired; they can help separate items and improve tumbling without added chemicals.
- Group similar fabrics so you can reliably use the same cycle and time, instead of guessing for every single load.
- Once or twice a year, add a calendar reminder for a full vent check and clean; prevention beats deep-dive troubleshooting.
- Store user guides or key cycle summaries in a plastic sleeve near the Clothes Dryer so every person in the household can choose appropriate settings.
For ventless Clothes Dryer types:
- Empty water tanks promptly after they fill; letting them overflow can cause inconvenience and extra cleaning.
- Keep condenser elements clean according to their design, as blocked fins slow moisture removal dramatically.
For vented Clothes Dryer types:
- Use rigid or quality semi-rigid vent ducting where possible; it traps less lint and is easier to clean.
- Check that exterior vent flaps move freely and are not blocked by landscaping or debris.
Quick FAQ
Can I dry everything on high heat to save time?
Not a good idea. High heat is fine for sturdy items like towels, but many fabrics shrink, fade, or wear out faster. Medium or low heat is usually safer for everyday clothes.
How full should I load the Clothes Dryer?
About half to two-thirds of the drum is a good target. Clothes need space to tumble; if they are packed tight, they will dry slowly and wrinkle more.
Do I really need to clean the lint filter every time?
Yes. A clean filter keeps airflow strong, speeds up drying, and reduces stress on the Clothes Dryer components.
Why are my clothes still damp on an automatic cycle?
Heavy fabrics may bunch up and fool the moisture sensors. Try smaller loads, separate heavy and light items, and avoid leaving items in tight balls.
Is it okay to vent a Clothes Dryer indoors?
Vented dryers are designed to exhaust moisture outside. Venting indoors adds humidity and lint to your living space, which is usually not recommended.
Can I dry shoes in the Clothes Dryer?
Only if the shoes’ care label allows it. Use low heat or air-only, and consider a rack or bag so they do not bang around excessively.
What is that rubbery or chemical smell on first use?
A mild new-appliance odor is common during the first empty run as manufacturing residues warm up. It should fade quickly; if it gets worse later, stop and investigate.
How often should I clean the vent duct?
For typical households, checking and cleaning at least once a year is a good baseline. Heavy use, long or complex ducts, or thick lint buildup call for more frequent cleaning.
Why does my Clothes Dryer sometimes stop and then restart later?
Wrinkle-prevent or cool-down functions can tumble clothes briefly after the main cycle ends. This helps reduce wrinkles but can be turned off on some models if you prefer.
Is it bad to interrupt a cycle and restart it?
Occasional interruptions are fine. Just avoid constantly opening the door, because it drops temperature and can confuse moisture sensing on some Clothes Dryer designs.
You and your Clothes Dryer are now on much better terms. With these habits and checks, you should see faster drying, fewer surprises, and far less arguing with a machine that only has one job.
Discover More
- Air Conditioner
- Air Fryer
- Air Purifier
- Automatic Soap Dispenser
- Barbecue Grill
- Beverage Cooler
- Beverage Dispenser
- Beverage Fridge
- Blender
- Boiler
- Bread Maker
- Bread Slicer
- Bread Toaster Oven
- Can Opener
- Carpet Cleaner
- Ceiling Fan
- Ceiling Heater
- Ceiling Mounted Heater
- Ceiling Mounted Vent Fan
- Central Vacuum
- Charcoal Grill
- Citrus Juicer
- Clothes Steamer
- Coffee Grinder
- Coffee Maker
