Solar Panel Owner’s Guide: Practical Help From First Sunbeam To Long-Term Use
Quick start you can finish fast
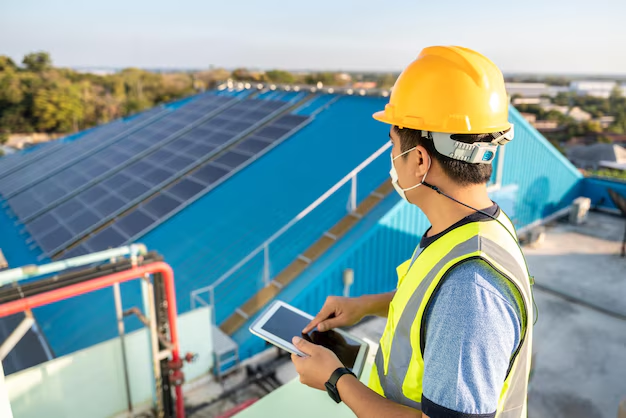
Your new Solar Panel looks simple, but getting good power out of it starts with a clean, well-placed setup. Here’s the fast-track version so you can get on with your day.
- Unpack the Solar Panel carefully and remove all plastic films, cardboard, and labels from the frame and junction box.
- Inspect the glass (or clear surface) for cracks, chips, or deep scratches before mounting.
- Wipe the front of the Solar Panel with a soft, slightly damp microfiber cloth to remove dust from shipping.
- Check the cable ends and connectors for dirt, bent pins, or obvious damage.
- Place the Solar Panel in full sun on a stable surface with the front facing the sun as directly as possible.
- Connect the Solar Panel to a compatible charge controller or portable power station, not directly to a bare battery unless designed for that use.
- Confirm correct polarity: positive to positive, negative to negative, before making final connections.
First-use example: charging a small battery or power station
This example assumes a typical Solar Panel in the 50–200 W range connected to a small battery or power station.
- Place the Solar Panel outdoors in clear sun between about 10:00 and 15:00 when the sun is reasonably high.
- Tilt the Solar Panel so it faces the sun directly; as a rough guide, an angle of about 20–40° from horizontal works well in many locations.
- Connect the Solar Panel to your charge controller or power station input labeled for solar or DC charging.
- Check the display or indicator lights for input power; many units show watts or amps after about 10–60 seconds.
- Let it charge for at least 30–60 minutes and watch how the power input changes with clouds and panel angle.
You now know the basics: sun angle matters, shade kills output, and the Solar Panel is more “plant” than “appliance” – it thrives in the light.
Know your parts without guessing
Most units have
- Solar cells: The dark, grid-like squares or rectangles that turn sunlight into electricity. These are the working heart of the Solar Panel.
- Front glass or protective layer: Clear cover that shields the cells from weather while letting light through.
- Aluminum or composite frame: Surrounds and stiffens the Solar Panel, providing mounting points and edge protection.
- Backsheet: The solid back layer that seals and insulates the Solar Panel from moisture and physical damage.
- Junction box: Small box on the back where the cell wiring comes together. Often contains bypass diodes to reduce losses in partial shade.
- Cables and connectors: Usually a pair of leads (positive and negative) with locking connectors to plug into charge controllers or other panels.
- Rating label: Sticker on the back listing power rating (watts), voltage, current, and safety markings.
Some units have
- Folding design or hinges: Portable Solar Panel models may fold for easier storage and transport.
- Built-in kickstand or legs: Lets you tilt the Solar Panel toward the sun without extra hardware.
- Pre-drilled mounting holes or rails: For permanent roof or ground installation with brackets.
- Integrated charge controller: On small Solar Panel kits for trickle charging, the controller may be attached directly to the panel or cable.
- USB or DC output ports: Some portable Solar Panel units include direct USB or DC outputs for charging devices.
- Handle and carrying case: Common on portable Solar Panel styles for camping or backup power.
Safety that actually prevents problems
- Always treat the Solar Panel as live in sunlight. It generates voltage whenever light hits it, even if it is not plugged in yet.
- Keep connections covered or unplugged when working on wiring so you are not handling live connectors in bright sun.
- Match voltage and current ratings. Use a charge controller or power device that is compatible with the Solar Panel’s open-circuit voltage and maximum current.
- Do not short the Solar Panel leads together; it can cause heating and stress on the internal components.
- Mount securely so wind cannot tip, slide, or lift the Solar Panel; a “flying panel” is bad for roofs, cars, and moods.
- Avoid stepping or sitting on the Solar Panel, even if it feels sturdy. Hidden micro-cracks can silently reduce output over time.
- Keep the front surface clear of metal tools and sharp objects to avoid scratching or chipping the glass.
- Do not hose high-pressure water directly into the junction box or cable seals.
- Check for frayed cables or cracked connectors and stop using the Solar Panel if you see exposed conductors.
- Work gently at heights. If the Solar Panel is roof-mounted, use appropriate fall protection and secure footing.
Daily use for better results
Think of your Solar Panel as a “light eater.” The more direct and unobstructed the sunlight, the better it performs.
- Place or aim the Solar Panel where it receives the longest stretch of direct sun across the day.
- Adjust tilt and direction occasionally so the Solar Panel faces the sun more directly, especially in the morning and early afternoon.
- Keep the Solar Panel front surface free of noticeable dust, leaves, bird droppings, or snow.
- Use a properly sized charge controller or solar input on your power station between the Solar Panel and batteries.
- Check cables and connectors for firm, click-in connections; loose plugs are a very common power thief.
- Look at your charge controller or power station display occasionally to learn what “normal” output looks like in clear sun.
- Disconnect the Solar Panel at the controller or power station side before rearranging it in bright sun.
Common uses and starting points
| Use | Typical Solar Panel size | What to set or watch | “Done” or success cue | Common mistake |
|---|---|---|---|---|
| Charging a small power station | 80–200 W | Select “solar” input mode; confirm voltage range matches input spec. | Input power (W) appears within about 1 minute and stays stable in full sun. | Using a panel voltage that is too high for the power station input. |
| Trickle charging a 12 V battery | 10–50 W | Connect Solar Panel → charge controller → battery; set battery type (e.g., AGM, LiFePO4) on the controller if available. | Battery voltage slowly rises over several hours; controller shows “charged” or float mode later in the day. | Connecting Solar Panel directly to battery with no controller and overcharging it. |
| Running a small DC load (lights, fan) | 20–100 W | Panel → controller or power station → load; make sure load watts are comfortably below panel output. | Lights stay bright or fan speed stable in full sun without frequent shutoffs. | Oversizing the load so everything shuts off when a cloud passes. |
| Supplementing a home battery bank | 200–600 W per string | Match Solar Panel series/parallel wiring and voltage to your solar charge controller spec. | Controller shows healthy charge current during mid-day with no error codes. | Mixing different Solar Panel models in one string and losing efficiency. |
| Portable camping setup | 60–160 W folding Solar Panel | Use built-in kickstand and move the panel a few times per day to chase the sun. | Power station or battery gains noticeable charge (e.g., 20–50%) during daylight hours. | Leaving the Solar Panel flat on the ground so early/late sun hits at a poor angle. |
Cleaning and maintenance that doesn’t ruin parts
After each active use day
- Visually check the Solar Panel front for obvious dirt, bird droppings, or leafy debris.
- Brush off loose material with a soft brush or clean, dry cloth.
- Inspect cables for strain, kinks, or pinched spots, especially where the Solar Panel is moved often.
Weekly or regular light cleaning
- Clean the front surface with clean water and a soft microfiber cloth or soft sponge.
- For light film, use a small amount of mild dish soap in plenty of water, then rinse thoroughly.
- Wipe gently; pressing hard can grind in grit and create micro-scratches that reduce performance.
- Let the Solar Panel air-dry or wipe with a clean, lint-free cloth.
When it smells weird or performs poorly
- If you notice a hot plastic or electrical smell near the Solar Panel, junction box, or connectors, disconnect from the system immediately and let everything cool.
- Inspect the junction box and connectors for discoloration, melting, or burn marks.
- Check for moisture intrusion under the glass, such as fogging or water droplets inside the Solar Panel.
- Look for any new cracks or chips in the glass that might have occurred from impact or hail.
- If output has dropped sharply in clear sun, compare cables and connectors to a known-good set if possible.
What not to do
- Do not use abrasive pads, powders, or harsh solvents on the Solar Panel front; they can permanently haze the surface.
- Avoid metal scrapers or hard-edged tools for removing bird droppings or sap; soak with water first and wipe gently.
- Do not pull on the cables to move the Solar Panel; lift from the frame instead.
- Keep high-pressure washers away from the edges, junction box, and connectors to prevent water intrusion.
- Do not attempt to open the Solar Panel frame or junction box seals; this can allow moisture in and void warranties.
Quick maintenance checklists for common complaints
Complaint: “My Solar Panel used to produce more power.”
- Clean the front surface thoroughly and recheck output in similar sun conditions.
- Inspect for new shade sources: growing trees, new structures, antenna shadows, or nearby parked vehicles.
- Check connectors for corrosion, dirt, or loose locking tabs and reseat them firmly.
- Verify that your charge controller or power station settings have not changed (e.g., battery type or input mode).
Complaint: “Output keeps cutting in and out.”
- Gently wiggle connectors one at a time while watching output; if power flickers, that connector likely needs attention or replacement.
- Look for crushed or sharply bent cable sections that may be breaking internally.
- Ensure the Solar Panel is not overheating from being placed directly on a hot metal surface with no airflow.
- Confirm that the controller or power station is not hitting its maximum input limit and briefly shutting down.
Troubleshooting that gets you unstuck fast
Use the patterns below: symptom → likely cause → simple fix. Start with the easiest checks first.
| Symptom | Likely cause | Fix |
|---|---|---|
| No power showing at controller or power station | Loose or reversed connectors, panel in shade, or controller input not set correctly | Confirm polarity, reseat connectors until they click, put Solar Panel in clear sun, and verify controller is set to use the solar input. |
| Very low output in bright sun | Dirty panel surface, poor angle, partial shading from branches or poles | Clean the front, point the Solar Panel more directly at the sun, and move it clear of any shadows. |
| Output drops sharply when a small area is shaded | Cells wired in series being shaded; bypass diodes doing their job but reducing power | Remove the shade or reposition the Solar Panel so all cells receive light; even a small shadow can cut power heavily. |
| Controller shows “over-voltage” or “input too high” | Solar Panel or string voltage exceeds controller limits | Reduce the number of panels in series or use a controller compatible with the Solar Panel’s voltage rating. |
| Cables feel hot to the touch | Undersized cable, loose connections, or damaged insulation | Stop using the Solar Panel, upgrade to thicker cable, tighten or replace connectors, and fix any damaged sections. |
| Intermittent output with wind or movement | Connector or cable is loose or internally broken | Secure wiring, replace suspect connectors or cables, and strain-relieve cables so they do not dangle and flex excessively. |
| Power station charges very slowly | Solar Panel wattage is low relative to battery size, or conditions are hazy or late in the day | Use a larger Solar Panel array if possible, charge during mid-day hours, and adjust panel angle then to maximize input. |
| Battery seems overcharged or boiling | No charge controller or controller set incorrectly for battery type | Disconnect Solar Panel immediately, add a proper charge controller, and set it for the correct battery chemistry. |
| Fogging or moisture visible inside the Solar Panel | Seal failure allowing water vapor inside | Remove the Solar Panel from critical use and contact a service professional; internal seals are not user-repairable. |
| Cracked glass but panel still produces some power | Impact damage; cells may be partially intact | Retire the Solar Panel from primary duty. Cracks can spread and allow moisture in; replacement is usually the best path. |
If your Solar Panel “just stopped working”
- Check the sun: Is it behind clouds, low on the horizon, or is the Solar Panel in unexpected shade?
- If sun is good, unplug the Solar Panel from the controller or power station.
- Inspect all visible cables for damage, cuts, or pulled-out connectors.
- Reconnect firmly, making sure positive goes to positive and negative to negative.
- Try the Solar Panel with another controller or power station if available to isolate the issue.
- If the Solar Panel remains dead while in full sun and known-good wiring, it is time to involve a service technician.
Mini decision path: when the system will not charge
- If the Solar Panel is in full sun but no watts show on the display, look for shade patterns or dirt first.
- If cleaning and repositioning do nothing, unplug and inspect cables and connectors for damage or a poor fit.
- If a second cable or connector fixes it, the original wiring is the culprit.
- If swapping cables does not restore power, try a different Solar Panel or controller to see which part is failing.
- If the Solar Panel is the only piece that does not work in any setup, stop using it and arrange for professional evaluation or replacement.
When to stop and get service
- Visible burn marks, melted plastic, or charring on the junction box, connectors, or cable ends.
- Cracked, shattered, or badly chipped front glass, even if the Solar Panel still produces some power.
- Persistent electrical smell or hot-plastic odor from the Solar Panel area, even after disconnecting and cooling.
- Moisture, fogging, or water drips visible inside the Solar Panel layers.
- Repeated tripping or error codes on a correctly sized controller when only this Solar Panel is connected.
- Loose or broken junction box on the back of the Solar Panel that moves or pulls away from the panel body.
- Cable insulation that is cracked, flaking, or missing, exposing inner conductors.
In these situations, continuing to use the Solar Panel risks further damage to your system. Let a qualified technician or service center take it from there.
Smart habits that save time
- Store portable Solar Panel units in a dry, cool place away from heavy items that could bend or crush them.
- Coil cables loosely in wide loops; tight wrapping near connectors is a shortcut to cable failure.
- Label Solar Panel cables and extension wires so you can quickly match them in future setups.
- Use gentle cable clips or ties to keep wiring off the ground and away from foot traffic or pets.
- In dusty or pollen-heavy areas, set a reminder to wipe the Solar Panel front weekly during the sunniest seasons.
- Group Solar Panel output data with notes: jot down typical watts at mid-day in good weather. That makes it easier to spot future declines.
Accessories can be helpful when used thoughtfully.
- Use only weather-rated extension cables and connectors designed for Solar Panel systems.
- If you add mounting brackets or rails, ensure they do not shade any significant part of the Solar Panel surface.
- For roof systems, occasional professional inspection can catch seal or mounting issues before they become leaks or loose panels.
Quick FAQ
Can I use my Solar Panel indoors by a window?
You can, but output is usually a fraction of outdoor performance. Window glass, tint, and imperfect angles all cut the power significantly.
Does the Solar Panel still work on cloudy days?
Yes, but expect much lower output. Light clouds might give around half power, while heavy overcast can drop output to a small percentage of the rated watts.
Should my Solar Panel feel hot?
The front can feel quite warm in direct sun. Warm is normal; surfaces so hot you cannot touch comfortably may signal poor airflow or an overly hot mounting surface.
Can I connect the Solar Panel directly to a battery?
Only if it is a very small Solar Panel specifically intended for that purpose. In general, use a charge controller between the Solar Panel and any battery to prevent overcharging.
How often should I clean the Solar Panel?
In most places, a light cleaning every few weeks during dusty or pollen-heavy seasons is enough. If you can see dirt from the ground, it is time for a quick wipe.
Is partial shade really that bad?
Yes, it can be. Even a small shadow on part of the Solar Panel can cut output sharply, depending on how the cells are wired.
Can I repair a cracked Solar Panel myself?
Surface cracks in the glass are not practical to repair at home. Taping or sealing the outside does not fix internal damage or prevent long-term moisture problems.
Why is my 100 W Solar Panel not giving 100 W?
Power ratings are measured under ideal lab conditions. Real-world heat, angle, dirt, and wiring losses usually reduce output. Seeing around 60–90 W in strong, clear sun is normal.
Can I mix different Solar Panel sizes together?
It is possible but not ideal. When wired together, the whole string tends to behave like the weaker or mismatched panel, reducing overall efficiency.
Do I need to disconnect the Solar Panel at night?
No, as long as you are using a proper charge controller or power station. These devices prevent backflow and protect the Solar Panel and battery automatically.
Will snow damage my Solar Panel?
Light snow generally does not harm the panel but blocks light completely. Gently brush it off with a soft tool when it is safe to do so; avoid sharp tools that can scratch the surface.
Discover More
- Air Conditioner
- Air Fryer
- Air Purifier
- Automatic Soap Dispenser
- Barbecue Grill
- Beverage Cooler
- Beverage Dispenser
- Beverage Fridge
- Blender
- Boiler
- Bread Maker
- Bread Slicer
- Bread Toaster Oven
- Can Opener
- Carpet Cleaner
- Ceiling Fan
- Ceiling Heater
- Ceiling Mounted Heater
- Ceiling Mounted Vent Fan
- Central Vacuum
- Charcoal Grill
- Citrus Juicer
- Clothes Dryer
- Clothes Steamer
- Coffee Grinder
