Countertop Oven Practical Owner’s Guide
Quick start you can finish fast
You got the Countertop Oven. Now you just want it to work without drama. Here’s the fast path.
- Place the Countertop Oven on a stable, heat‑resistant surface with about 4–6 inches of space around the sides and back for airflow.
- Remove all packaging inside and out, including any tape, plastic films, and cardboard spacers.
- Take out removable racks, crumb tray, and any pans or trays.
- Wash removable parts in warm, soapy water, then dry well.
- Wipe the interior and exterior with a damp cloth, then a dry cloth. Do not soak or spray directly into the controls or heating elements.
Most people find it helpful to do a short empty preheat run to burn off new-appliance odors.
- Close the door, plug in the Countertop Oven, and set it to a bake or toast setting at about 350–400°F for 10–15 minutes with nothing inside.
- Turn it off, open the door, and let it cool completely before your first real food run.
First-use example: simple toast
Toast is the “hello world” of Countertop Oven cooking.
- Place slices of bread on the center of the rack.
- Select toast or bake at about 375–425°F for 4–7 minutes, depending on how dark you like it.
- Check through the door near the end; when edges are golden and the center is dry but not hard, you’re done.
- Turn the knob or button to off, remove toast with tongs or an oven mitt, and let the oven cool.
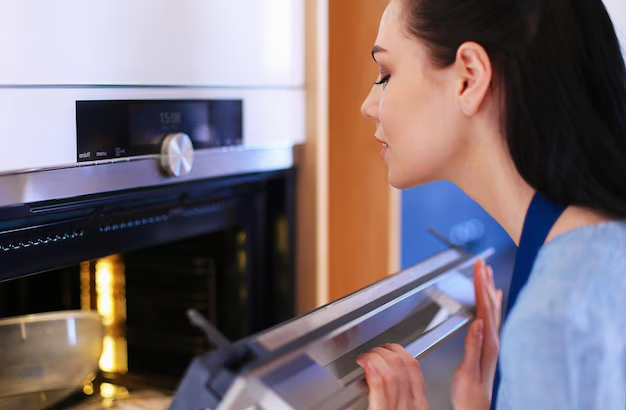
Know your parts without guessing
Most units have
- Housing / body: The outer shell that holds everything together and gets warm during use. Keep it clear of clutter.
- Door with handle: Usually hinged at the bottom. Lets you load food and watch it cook. The handle is the cool-ish part; the glass and frame get hot.
- Cooking cavity: The interior where the heat and your food live. Racks slide in and out at different positions for different results.
- Heating elements (top and bottom): Metal or quartz bars that glow when heating. They create the temperature and browning.
- Control panel: May use knobs, buttons, or a simple digital display. This is where you set mode, temperature, and time.
- Rack(s): Metal grids that hold pans or food. Position closer to the top for more browning, lower for gentler heat.
- Crumb tray: A removable tray at the bottom that catches crumbs and drips. Regular emptying keeps smoke and smells down.
- Power cord: Always plug directly into a wall outlet (not into an extension cord) whenever possible.
Some units have
- Baking pan or tray: Sized to fit the Countertop Oven for cookies, sheet meals, or reheating leftovers.
- Wire basket or mesh tray: Useful for crisping foods like fries because air can circulate all around.
- Convection fan: Circulates hot air for faster, more even cooking. Usually controlled by a “convection,” “fan,” or “air” setting.
- Rotating or sliding rack system: Lets you adjust height or remove pans more smoothly.
- Interior light: Helps you watch browning without opening the door and losing heat.
- Preset programs: Buttons or icons labeled for toast, pizza, bake, broil, etc., that set typical times and temperatures automatically.
Safety that actually prevents problems
- Keep space around it: Give your Countertop Oven at least a few inches of clearance on all sides so heat can escape and surfaces around it stay safer.
- Use a proper surface: Place it on a flat, heat‑resistant countertop, not on top of a stove, microwave vent, or unstable cart.
- Watch what’s above it: Avoid shelves, plastic wrap boxes, or paper towels hanging low over the oven; rising heat can warp or damage them.
- Respect hot surfaces: The door, sides, and handle area can get very hot. Use oven mitts or dry towels when moving racks or pans.
- Keep cords tidy: Route the power cord where it cannot be pulled, snagged, or draped over the hot top of the Countertop Oven.
- Avoid covering vents: Do not block vents with foil, food, or accessories. Blocked airflow can cause overheating and poor cooking.
- Use proper cookware: Choose oven‑safe metal, glass, or ceramic dishes that fit freely inside. Avoid plastic or paper touching elements or walls.
- Never line the bottom directly: Do not cover the crumb tray or bottom of the oven with solid foil; it traps heat and can damage the unit.
- Unplug for cleaning: Always switch off and unplug before wiping, scrubbing, or removing parts.
- If something smells truly wrong: Strong chemical or burning-plastic odors are a signal to turn it off, unplug, and let it cool before investigating.
Daily use for better results
This routine keeps your Countertop Oven predictable and your meals less “mystery outcome.”
- Check the interior: empty crumb tray, remove stray foil, and make sure a rack is in the position you need before preheating.
- Place the Countertop Oven-safe pan or food in the center of the rack for even heating.
- Select a mode such as toast, bake, broil, or convection based on what you’re cooking.
- Set temperature within a reasonable range (often 250–450°F), using lower for gentle cooking and higher for browning or quick reheats.
- Set time, starting at the low end of recommended ranges; you can always add more time, but you cannot un-burn dinner.
- Check progress near the end of cooking by looking through the door. If you must open the door, keep it brief to avoid losing much heat.
- Turn off the Countertop Oven when finished. Remove food with heat protection and let the unit cool before moving or cleaning.
Common foods and starting settings
| Food / Task | Mode & Temp (start range) | Typical Time Range | Doneness / Finish Cues | Common Mistakes |
|---|---|---|---|---|
| Toast (white or wheat) | Toast or bake at 375–425°F | 4–7 minutes | Even golden color, dry surface, still soft inside | Setting too high, not watching near the end, crowding slices |
| Frozen pizza (personal size) | Bake at 375–425°F | 10–18 minutes | Cheese fully melted and bubbling, crust browned and crisp at edges | Leaving cardboard under pizza, rack too close to top causing burnt cheese |
| Frozen fries or nuggets | Convection or bake at 375–425°F | 12–20 minutes | Crisp exterior, center hot and steaming | Not spreading in a single layer, skipping a shake or turn halfway |
| Chicken pieces (bone‑in) | Bake at 350–400°F | 25–40 minutes | Juices run clear, no pink at the bone, skin browned | Cooking from very cold extra‑thick pieces without adjusting time |
| Vegetable roasting (peppers, broccoli, etc.) | Convection or bake at 375–425°F | 12–25 minutes | Edges caramelized, fork-tender, some brown spots | Too much oil causing smoke, piling veggies too deep in the pan |
| Reheating leftovers (casserole) | Bake at 300–350°F | 12–25 minutes | Center hot when probed or stirred, edges just starting to bubble | Using high heat that burns edges while center stays cool |
| Open-face sandwich melt | Broil or top heat at medium setting | 3–8 minutes | Cheese melted and lightly browned, bread warm but not charred | Rack too close to top elements, walking away during broil |
Cleaning and maintenance that doesn’t ruin parts
After each use
- Let the Countertop Oven cool completely before cleaning.
- Slide out the crumb tray, discard crumbs and drips, and wipe it with a damp cloth or wash in warm, soapy water.
- Wipe interior splatters with a soft, damp cloth or non‑abrasive sponge.
- Wipe the exterior around the controls and handle to remove fingerprints and grease.
About once a week (or frequent use)
- Remove racks and pans and wash them in warm, soapy water; soak stuck‑on bits rather than scraping aggressively.
- Wipe the interior walls more thoroughly to prevent buildup that can cause smoke or smells.
- Check that vents and fan openings (if present) are free of crumbs and debris; gently wipe around them.
When it smells weird or cooks poorly
- Look for grease buildup on the crumb tray, racks, interior roof, and near the heating elements.
- Clean greasy areas with a little dish soap on a soft cloth, then wipe with a damp cloth to remove residue.
- Run the Countertop Oven empty at about 350–375°F for 10–15 minutes after a deep cleaning to burn off remaining odors, then cool and wipe lightly again.
What not to do
- Do not soak the entire Countertop Oven: Water inside the controls or heating areas can permanently damage it.
- Do not use steel wool or harsh abrasives: These scratch the interior coating and racks, causing sticking and rust over time.
- Do not spray cleaner directly inside: Instead, spray onto a cloth, then wipe, to avoid getting liquid into vents or electrical parts.
- Do not bend or scrub heating elements: Just wipe gently when cool with a slightly damp cloth if needed.
Two common maintenance complaints and quick checks
| Complaint | Quick checklist |
|---|---|
| “It’s smoking a lot” |
|
| “It doesn’t get hot like it used to” |
|
Troubleshooting that gets you unstuck fast
Use this section when your Countertop Oven starts acting like it has a personality. It doesn’t — it just needs a little diagnosis.
Quick decision path: if it won’t start at all
- Check that the Countertop Oven is plugged into a working outlet; test with a small lamp if you’re not sure.
- Confirm the door is fully closed; some units will not run with the door ajar.
- Verify knobs or buttons are actually set to a mode and time, not just temperature.
- Let the unit cool fully if it has been running heavily; some models pause when overheated until they cool down.
- If it still does nothing, stop using it and arrange for service rather than repeatedly cycling power.
Common symptoms and fixes
| Symptom | Likely cause | Fix |
|---|---|---|
| Unit does not turn on | Outlet has no power, loose plug, or timer/mode not engaged | Check outlet with another device, reseat plug, set a cooking mode and time, and ensure door is fully closed. |
| Heats, but food stays undercooked | Temperature too low, insufficient preheat, door opened too often | Allow 5–10 minutes for preheat, use a slightly higher temperature, and minimize door opening during cooking. |
| Top burns, bottom stays pale | Rack too close to top elements, broil or strong top heat selected | Move rack lower, switch from broil to bake/convection, reduce temperature a bit and extend time. |
| One side of food darker than the other | Uneven loading or hot spot near elements or walls | Center the pan on the rack, rotate the pan halfway through cooking, and avoid pans that touch the walls. |
| Loud whooshing or fan noise (with fan feature) | Normal convection fan sound or obstruction near fan | Remove loose foil or paper, keep foods and pans clear of fan openings, and listen for changes; smooth, steady noise is usually normal. |
| Strong smoke while cooking | Old grease on crumb tray or walls, food too close to top elements, excess oil on food | Clean interior and crumb tray thoroughly, lower the rack, and use a bit less oil or fat on foods. |
| Chemical or burning-plastic smell | New unit burn‑off, packaging left inside, or non‑oven‑safe items used | Turn off and cool. Remove any leftover packaging or non‑oven‑safe items. After cleaning, run an empty heat cycle to clear odors. |
| Door does not close fully | Rack or tray misaligned, crumbs or debris at the hinge or door seal | Re-seat racks properly, remove and clean crumb tray, and gently wipe door edges and hinge area. |
| Display or indicator lights flicker | Loose plug or overloaded circuit | Firmly plug the Countertop Oven into a dedicated outlet and avoid running multiple high‑draw appliances on the same circuit. |
| Timer knob or button unresponsive | Mechanical wear or stuck control | Unplug, gently clean around the control, then try again. If it remains stuck or unreliable, stop using and seek service. |
| Excess condensation on door | High‑moisture food, low temperature, or poor ventilation around unit | Increase temperature slightly, allow more clearance around the oven, and wipe door after cooling. |
When to stop and get service
Here are times when your Countertop Oven needs professional attention instead of more experimentation.
- The power cord is cracked, melted, or hot to the touch in normal use.
- You see sparks inside that are not caused by foil or metal touching elements.
- The door glass is cracked, significantly chipped, or coming loose from the frame.
- The Countertop Oven repeatedly shuts off during normal use even after cleaning vents and allowing cool-down time.
- Controls do not respond, or settings change on their own.
- You smell a persistent sharp electrical odor whenever the unit heats, even after cleaning and an empty test run.
In these situations, stop using the Countertop Oven, unplug it, and arrange for service or replacement.
Smart habits that save time
- Keep a dedicated small pan and rack set that lives with the Countertop Oven, so you’re not hunting for cookware that fits.
- Use reusable baking mats or parchment sheets cut to size on pans (never directly on elements or the bottom) for easier cleanup.
- Preheat only when needed; for simple toast or thin items, your Countertop Oven may not need a long preheat.
- Group small baking or reheating tasks back‑to‑back while the oven is already warm to save time and energy.
- Store accessories like racks, trays, and baskets inside the oven only when it is cool and unplugged, and remove them before preheating.
- Keep a simple log of go‑to foods and settings that worked well so you can repeat successes without guessing.
Quick FAQ
Can I use aluminum foil in my Countertop Oven?
Yes, but only on pans or loosely over food, leaving space around the sides and never touching heating elements or blocking vents or the entire crumb tray.
Does the Countertop Oven need to be preheated every time?
Not always. For toast or thin reheats, preheat is less critical; for baking, roasting, or frozen items, a 5–10 minute preheat helps with even cooking and better texture.
Why does my Countertop Oven cook faster than my big oven?
The smaller space and closer heating elements transfer heat more directly, so foods reach temperature and brown more quickly; start with shorter times and adjust.
Can I bake cakes or brownies in it?
Yes, if you use pans that fit with room around them and bake at moderate temperatures, usually around 325–350°F, checking a few minutes earlier than standard recipes.
Is it okay to push the Countertop Oven against the wall?
Leave at least a few inches of space at the back and sides so heat can escape; pressing it tight to a wall can trap heat and affect both safety and performance.
Why does the outside get so hot?
The walls are close to the heating elements, and the compact design radiates heat; this is normal, so keep items and hands away from the sides during cooking.
Can I use glass dishes?
Yes, if they are clearly labeled oven‑safe and fit freely inside; avoid sudden temperature shocks like adding cold glass directly into a very hot oven.
What should I do about lingering food smells?
Clean the crumb tray, racks, pans, and interior surfaces, then run the Countertop Oven empty at about 350–375°F for 10–15 minutes and let it air out.
Is it safe to leave the Countertop Oven plugged in?
Many people do, but always turn it fully off after use. Unplug it if you will not use it for a long time or whenever you are cleaning or moving it.
Can I use it under a cabinet?
Yes, as long as there is enough space above and around it for heat to escape; if the underside of the cabinet gets hot to the touch, increase clearance.
Why is there condensation on the door?
Moisture from food hits the cooler glass and condenses; it usually clears as the session continues. Wipe it off after the oven cools if it bothers you.
How do I know if the Countertop Oven is still heating correctly?
Try a simple, repeatable test like making toast or baking a small pizza using your usual settings. If times or browning change dramatically, it may need service.
Discover More
- Air Conditioner
- Air Fryer
- Air Purifier
- Automatic Soap Dispenser
- Barbecue Grill
- Beverage Cooler
- Beverage Dispenser
- Beverage Fridge
- Blender
- Boiler
- Bread Maker
- Bread Slicer
- Bread Toaster Oven
- Can Opener
- Carpet Cleaner
- Ceiling Fan
- Ceiling Heater
- Ceiling Mounted Heater
- Ceiling Mounted Vent Fan
- Central Vacuum
- Charcoal Grill
- Citrus Juicer
- Clothes Dryer
- Clothes Steamer
- Coffee Grinder
