Egg Cooker Owner’s Guide: Practical Help For Everyday Use
Quick start you can finish fast
You unpacked an Egg Cooker because you want easy eggs, not a new hobby. Here’s how to get from box to breakfast with minimal fuss.
First things to do
- Remove all packaging, tapes, and stickers from the Egg Cooker and its parts.
- Take out the egg tray, poaching tray, and measuring cup if included.
- Wash removable parts in warm soapy water, then rinse and dry.
- Wipe the heating plate and base with a slightly damp cloth only; keep water out of any electrical areas.
- Place the Egg Cooker on a flat, heat-resistant surface with open air around it, away from walls and cabinets.
Simple first-use run
This quick “test run” helps remove factory residues and gets you comfortable with the Egg Cooker.
- Fill the measuring cup with water to the “hard” or highest fill line, then pour it onto the heating plate.
- Place the empty egg tray on the base and put the lid on securely.
- Plug in the Egg Cooker and turn it on or press the start button.
- Let it steam until it automatically shuts off or the buzzer sounds.
- Unplug, let it cool, then wipe away any water spots on the heating plate.
First real batch: classic hard-boiled eggs
Most Egg Cooker units use water volume instead of a temperature dial. The actual temperature usually stays around gentle steam range, roughly between about 194°F and 212°F, until the water evaporates.
- Use the “hard” water line on the measuring cup for about 6 eggs.
- Prick a tiny hole in the fat end of each egg with the pin (often built into the bottom of the measuring cup), if your Egg Cooker includes one.
- Place eggs pointy-end down in the egg tray, add the lid, and start the Egg Cooker.
- Cooking usually takes about 10–15 minutes, depending on quantity and unit power.
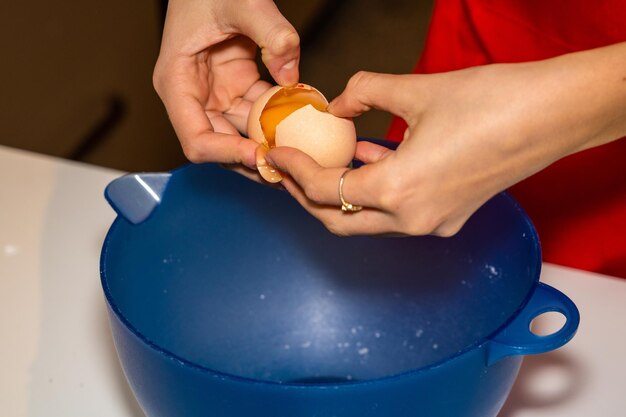
- When it shuts off or beeps, immediately cool eggs in cold water for easy peeling.
Know your parts without guessing
Most units have
- Base with heating plate – The main body that generates heat to turn water into steam. Keep this dry and never submerge it.
- Egg tray or rack – Holds eggs upright so they cook evenly. Usually marked for how many eggs it can hold.
- Lid – Often clear plastic or glass. Traps steam inside and should fit fully down on the base.
- Measuring cup – Shows water levels for soft, medium, and hard eggs, and sometimes omelets or poached eggs.
- Power cord – Sometimes fixed, sometimes detachable. Needs a stable outlet without extension cord chains.
- On/off switch or start button – Controls the cooking cycle. Some units start when plugged in and a switch is flipped.
- Indicator light – Shows when the Egg Cooker is heating or powered.
Some units have
- Poaching tray – Small cups or wells to cook cracked eggs without shells, handy for poached-style eggs.
- Omelet tray – Shallow tray for beaten eggs, veggies, or cheese to make mini omelets.
- Audible buzzer – Signals that the water has evaporated and cooking has finished.
- Auto shutoff – Stops heating when water is gone to prevent overheating.
- Cord storage – A space under or behind the base to wrap the cord neatly.
Safety that actually prevents problems
- Always keep the base dry. Water in the electrical parts can damage the Egg Cooker and create hazards.
- Use the Egg Cooker only on stable, heat-resistant surfaces away from edges where it could be pulled or bumped.
- Keep the lid vent facing away from you; steam escapes quickly and can be very hot.
- Do not overfill with water; extra water can boil over and cause sputtering or mess around the heating plate.
- Unplug the Egg Cooker after each use and before moving, cleaning, or filling it.
- Let the unit cool before wiping the heating plate to avoid damage and discomfort.
- Do not cover the top vents; the Egg Cooker needs a way to release steam safely.
- Use only eggs and simple egg mixtures; avoid thick sauces or high-sugar mixtures that can burn onto the heating plate.
- Do not use metal tools inside nonstick trays; they can scratch coatings and shorten the life of the Egg Cooker.
- Keep cords away from hot surfaces and from places where they can be pulled by children or caught on objects.
Daily use for better results
Once you get the rhythm, your Egg Cooker becomes a set-it-and-do-something-else tool. Here’s a practical flow.
- Check that the base, heating plate, and trays are clean and dry.
- Add the correct amount of water using your measuring cup for your desired doneness.
- Prepare eggs: prick shells if recommended, or crack into poaching or omelet trays as needed.
- Load trays carefully so they sit flat and stable on the base.
- Secure the lid fully so steam does not escape around the edges.
- Start the Egg Cooker and stay within hearing distance for the buzzer or shutoff cue.
- As soon as the cycle ends, remove eggs and cool or serve, depending on the style you want.
- Let the unit cool, then quickly wipe and dry to avoid mineral buildup.
Common settings and cues
| Use / Food | Water amount / Range | Approx. time range | Doneness / Finish cues | Common mistakes |
|---|---|---|---|---|
| Soft-boiled eggs | Use “soft” line on measuring cup for your egg count | About 6–10 minutes | White set, yolk runny; Egg Cooker shuts off or beeps once | Using cold eggs straight from fridge with “soft” water can give extra-runny yolks; warm eggs slightly first if you prefer firmer yolks. |
| Medium-boiled eggs | Use “medium” line | About 8–12 minutes | Yolk jammy but not dry; easy to slice with slightly soft center | Pulling eggs too early because they “look” done from the outside; rely on the cycle finish, not the shell appearance. |
| Hard-boiled eggs | Use “hard” line | About 10–15 minutes | Fully set yolks; no visible wobble when spun | Leaving eggs on the hot tray after shutoff, which can overcook and cause greenish yolks. |
| Poached eggs (in tray) | Usually “soft” or slightly more for 2–4 eggs | About 7–12 minutes | Whites opaque, yolk still soft when touched lightly | Not greasing the poaching cups, causing sticking and broken yolks during removal. |
| Mini omelet / egg bites | Often between “medium” and “hard” line | About 10–16 minutes | Egg set in center, no runny liquid on top | Overfilling tray with extras (cheese, veggies) so the top stays undercooked. |
| Small batch (1–2 eggs) | Use markings for fewer eggs if available; otherwise slightly less than usual line | About 7–12 minutes | Same texture targets as above but faster due to less mass | Using full water for a large batch, which can overcook small batches. |
Cleaning and maintenance that doesn’t ruin parts
After each use
- Unplug the Egg Cooker and let it cool until the heating plate is comfortable to touch.
- Remove trays, lids, and cups; wash them in warm soapy water and rinse well.
- Wipe the heating plate with a damp cloth or sponge; dry it to prevent mineral spots.
- Leave the lid slightly ajar while drying so moisture does not get trapped inside.
Regular weekly care
- Check the heating plate for chalky white spots; these are mineral deposits from water.
- Descale by applying a small amount of white vinegar to the plate, letting it sit for about 5–10 minutes, then wiping clean and drying.
- Inspect trays and cups for cracks or peeling coatings and replace them if damaged.
When it smells weird or performs poorly
- If you notice a lingering egg smell, soak trays and lids briefly in warm water with a bit of baking soda, then wash.
- If cooking suddenly takes much longer, descale the heating plate with vinegar and scrub gently with a soft cloth.
- Check vents in the lid and any drain channels for blockages from dried egg overflow.
What not to do
- Do not submerge the base. Water can damage the electrical components inside.
- Do not use steel wool, abrasive powders, or sharp scrapers on the heating plate or nonstick trays.
- Do not run the Egg Cooker dry repeatedly; this can discolor or damage the heating plate.
- Do not use harsh chemicals like bleach on food-contact parts.
Most common maintenance complaints checklist
If your Egg Cooker is acting up, these two issues cause a lot of the headaches:
- Mineral buildup on heating plate
- Look for white or gray chalky spots or rough areas.
- Descale with vinegar, wipe clean, and dry thoroughly.
- Consider using filtered or low-mineral water in the future.
- Sticky, hard-to-clean trays
- Lightly oil trays before cooking poached eggs or omelets.
- Soak stuck-on bits in warm soapy water instead of scrubbing hard.
- Switch to silicone tools to protect nonstick coatings.
Troubleshooting that gets you unstuck fast
Here’s a quick way to interpret what your Egg Cooker is trying to tell you.
Quick decision path for “won’t start”
- Check that the power cord is fully inserted into the outlet and, if detachable, into the Egg Cooker.
- Confirm the outlet works by trying another small appliance.
- Make sure the lid and tray are seated properly if your unit has a safety interlock.
- Verify the on/off switch is in the correct position or that you have pressed the start button firmly.
- If the unit feels very hot, let it cool fully, then try again with the right water amount.
- If there is still no sign of power, stop using it and contact a service professional.
Common issues, causes, and fixes
| Symptom | Likely cause | Fix |
|---|---|---|
| Egg Cooker does not turn on | Loose power connection or faulty outlet | Firmly plug into a working outlet, avoid power strips if possible, and check any switch on the outlet. |
| Indicator light on, but no heating | Internal heating issue or severe scale on heating plate | Descale the heating plate thoroughly; if there is still no heat, discontinue use and seek service. |
| Eggs undercooked | Too little water or very cold eggs | Add slightly more water next time or let eggs sit at room temperature for about 10–15 minutes before cooking. |
| Eggs overcooked or dry | Too much water or leaving eggs in hot tray after cycle | Reduce water level slightly and remove eggs promptly when the Egg Cooker finishes. |
| Eggs crack during cooking | No pinhole in shell, or eggs jostled when loading | Use the pin to prick the fat end of each egg and place eggs gently into the tray without dropping. |
| Strong sulfur smell | Eggs overcooked or sitting too long in warm environment | Reduce cooking water next time and cool eggs quickly in cold water after the cycle ends. |
| Brown or dark spots on heating plate | Buildup from minerals or burned residues from dry heating | Soak the plate with vinegar for several minutes, then wipe gently; avoid running the Egg Cooker with no water. |
| Water boiling over | Overfilled water or too many eggs blocking steam flow | Use only the recommended water level for your number of eggs and ensure the lid is seated correctly. |
| Poached eggs stick badly to cups | No oil or spray used in tray | Lightly grease poaching cups before adding eggs and use a silicone spatula to release edges. |
| Buzzer extremely loud or not stopping | Mechanical style buzzer or stuck button | Unplug the Egg Cooker to silence; for stuck buttons, gently clean around the button area and avoid moisture getting inside. |
| Uneven results in same batch | Egg sizes vary or tray not level | Use similar-sized eggs and ensure the Egg Cooker sits flat on the counter. |
| Steam escaping heavily from sides of lid | Lid not seated properly or warped lid | Reseat the lid fully; if still uneven, inspect for warping and replace if necessary. |
When to stop and get service
An Egg Cooker is simple, but there are times to let a professional or the manufacturer handle it.
- Stop using immediately if you see smoke from the base or smell burning plastic.
- Stop if the power cord is cracked, frayed, or feels loose where it enters the Egg Cooker.
- Stop if the unit trips your breaker or repeatedly blows fuses.
- Stop if the Egg Cooker gets excessively hot on the outside of the base, not just the lid area.
- Stop if water or liquid has gotten inside the base through cracks or damage.
- Stop if the heating plate is severely pitted, bubbled, or peeling.
Do not open the base or attempt electrical repairs yourself. Replacement of cords, heating elements, or internal parts should be handled by qualified service.
Smart habits that save time
Storage tips
- Store the Egg Cooker with the lid off or slightly ajar so moisture does not get trapped and cause odors.
- Keep the measuring cup and egg pin clipped or nested together so they do not go missing in a drawer.
- Wrap the cord loosely; avoid tight bends near where it meets the base.
Using accessories wisely
- Silicone cup liners (if you use them) should be food-safe and kept below the lid height so steam can circulate.
- A small silicone spatula or spoon is ideal for removing delicate eggs without scratching trays.
- Use a separate trivet or plate near the Egg Cooker so you have a safe place to set the hot lid when checking eggs.
Habits for less mess and better eggs
- Rinse the measuring cup right away so dried-on minerals do not cloud the markings.
- Consider using filtered water if your tap water leaves heavy spots or scale.
- Keep a small bowl of ice water ready when doing larger batches of hard-boiled eggs for easy peeling later.
Quick FAQ
Can I cook different egg doneness levels in one batch?
You can, but it is tricky. The Egg Cooker finishes the whole batch at once. For more control, cook one style at a time or remove some eggs a little early and cool them while the rest continue in a second cycle.
Why are my yolks turning green or gray?
That ring around the yolk is usually from overcooking. Reduce water slightly or remove eggs from the hot tray immediately and cool them in cold water.
Do I have to prick the eggs?
If your Egg Cooker provides a pin, pricking the fat end helps reduce cracking. You can skip it, but expect a few extra cracks now and then.
Can I use extra-large or small eggs?
Yes, though results shift slightly. Extra-large eggs may need a bit more water; smaller eggs may need a bit less. Make tiny adjustments and note what works best for you.
Can I cook other foods besides eggs?
Some people warm small amounts of vegetables or dumplings in the Egg Cooker, but it is designed for eggs. Anything that drips, melts, or overflows can burn on the heating plate and shorten its life.
Is it safe to leave the Egg Cooker unattended?
It is designed to cycle off when water is gone, but staying nearby is best. Listen for the buzzer and remove eggs promptly for best texture and safety.
Why does the Egg Cooker get louder over time?
Louder bubbling or hissing often comes from mineral buildup on the heating plate. Descale with vinegar and wipe clean to quiet it down.
How do I stop eggs from sticking to the shell?
Cool hard-boiled eggs in cold or ice water right after cooking, then peel under a thin stream of water. Slightly older eggs also peel more easily than very fresh ones.
Can I wash the base in the sink?
No. The base of the Egg Cooker contains electrical components. Wipe it with a damp cloth only and keep all liquid away from openings and seams.
Why are my poached eggs watery on top?
They likely need a bit more cooking time or slightly more water. Also, make sure the lid is fully seated so steam is trapped efficiently.
Can I run multiple cycles back-to-back?
Yes, but let the Egg Cooker cool a bit between long runs and always add fresh water. Continuous dry heating wears the plate and can affect timing.
Your Egg Cooker does not have to be mysterious. With a little care and a few small habits, it becomes a quiet, reliable breakfast teammate.
Discover More
- Air Conditioner
- Air Fryer
- Air Purifier
- Automatic Soap Dispenser
- Barbecue Grill
- Beverage Cooler
- Beverage Dispenser
- Beverage Fridge
- Blender
- Boiler
- Bread Maker
- Bread Slicer
- Bread Toaster Oven
- Can Opener
- Carpet Cleaner
- Ceiling Fan
- Ceiling Heater
- Ceiling Mounted Heater
- Ceiling Mounted Vent Fan
- Central Vacuum
- Charcoal Grill
- Citrus Juicer
- Clothes Dryer
- Clothes Steamer
- Coffee Grinder