Electric Skillet Owner’s Help Guide: From First Plug-In To Confident Cooking
Quick start you can finish fast
You want to cook, not study. Here’s how to get your Electric Skillet ready and actually make something with it right away.
Unpack and prep
- Remove all packaging, twist ties, and cardboard from the Electric Skillet and lid.
- Detach the temperature control probe if it’s plugged into the skillet.
- Wash the skillet pan and lid in warm, soapy water using a soft sponge, then rinse and dry well.
- Wipe the outer base and the temperature control probe with a slightly damp cloth only.
First warm-up run
A short empty warm-up helps burn off factory residues and reduces first-use odors.
- Place the Electric Skillet on a stable, heat-resistant surface with at least 4–6 inches of space on all sides.
- Insert the temperature control probe firmly into the side socket, then plug the cord into a grounded outlet.
- Set the dial to around 300–325°F and let it heat for about 10–15 minutes with the lid on.
- Turn the dial to “Off,” unplug, and let cool completely before touching or moving.
First easy meal example: basic sautéed chicken or vegetables
Use this as a simple first “real” run to get a feel for your Electric Skillet.
- Lightly coat the skillet surface with about 1–2 tablespoons of oil.
- Preheat the Electric Skillet to 325–350°F until the indicator light shows it has reached temperature.
- Add chicken cutlets, sliced vegetables, or both in a single layer without crowding.
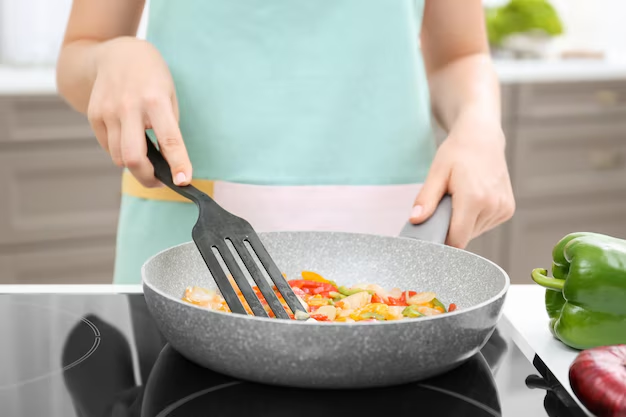
- Cook chicken for about 6–10 minutes per side, or vegetables for about 5–10 minutes total, stirring occasionally.
- Look for chicken to be browned on the outside and fully cooked inside, and for vegetables to be tender-crisp with light browning.
- Turn dial to “Off,” unplug, and let the skillet cool before cleaning.
Know your parts without guessing
Most units have
- Skillet pan (cooking base) – The main pan with built-in heating underneath. This is where all cooking happens.
- Lid with handle – Traps heat and moisture, helps with simmering, braising, and reducing splatter.
- Temperature control probe / power cord – Plugs into the Electric Skillet and your outlet. The dial adjusts cooking temperature.
- Heat indicator light – Turns on when heating and usually cycles off and on to maintain set temperature.
- Side walls and corners – Higher sides hold liquids for stews and deep dishes; corners are good for pushing food aside while you sear.
- Feet or base legs – Keep the hot pan slightly elevated from the counter for safe airflow.
Some units have
- Nonstick coating – Helps reduce sticking and makes cleaning easier. Needs gentle utensils and cleaners.
- Pour spout or corner notch – Makes it easier to drain oil or pour sauces without dribbling everywhere.
- Steam vent in lid – Lets steam escape to reduce pressure and prevent rattling or excess condensation.
- Detachable pan from base – The skillet portion lifts off a separate heating base for easier cleaning and storage.
- Keep-warm mark on dial – A lower setting designed to hold food hot after cooking without rapid overcooking.
Safety that actually prevents problems
- Place the Electric Skillet on a stable, flat, heat-resistant surface with clear space around it to avoid heat damage and tipping.
- Keep the power cord away from hot surfaces and edges so it cannot be pulled or melted.
- Do not immerse the heating base or control probe in water; moisture in electrical parts can cause failure and hazards.
- Always insert the temperature control probe fully and firmly into the skillet before plugging into the wall to prevent arcing or loose contact.
- Use only wooden, silicone, or plastic-safe utensils on nonstick surfaces to avoid scratching and flaking.
- Lift the lid away from your face to avoid steam blasts that can surprise you or cause discomfort.
- Turn the dial to “Off” and unplug by gripping the plug, not the cord, once cooking is finished.
- Let the Electric Skillet cool before moving or cleaning to prevent spills, burns, and accidental drops.
- Keep the Electric Skillet out of reach of small children while in use, especially the cord and hot sides.
- Do not use the Electric Skillet outdoors in wet conditions or near water sources like sinks that can splash onto the plug or probe.
- Do not cover the entire skillet with foil or anything that blocks vents, as trapped heat can stress components.
Daily use for better results
Once you know the rhythm, the Electric Skillet becomes one of the easiest tools in your kitchen.
Simple cooking workflow
- Set up the Electric Skillet on a clear, sturdy surface and plug the temperature control probe into the skillet first, then into the wall.
- Preheat for several minutes until the indicator light cycles off, signaling the pan is at the chosen temperature.
- Add a thin layer of oil or fat for sautéing or frying, or a bit of water or broth for simmering and steaming.
- Arrange food in a single layer when possible; for crowded dishes, stir or turn regularly to cook evenly.
- Use the lid to retain moisture for stews, rice dishes, and braises, and cook without the lid for crisping or browning.
- Adjust the temperature dial gradually if food is cooking too fast or too slowly rather than swinging from low to maximum instantly.
- Once food is done, turn the dial to the lowest “warm” setting if serving soon, or to “Off” and unplug if you are finished cooking.
- Allow the skillet to cool, then clean before storing so residue does not harden onto the surface.
Typical foods and starting settings
| Food / Use | Suggested Temp | Typical Time Range | Doneness / Finish Cues | Common Mistakes |
|---|---|---|---|---|
| Pancakes | 300–325°F | About 2–4 minutes per side | Bubbles across surface, edges look set, golden underside | Setting heat too high so pancakes brown outside but stay raw inside |
| Scrambled eggs | 250–275°F | About 4–8 minutes total | Soft curds, glossy but not runny | Cooking on high heat, causing rubbery texture and sticking |
| Stir-fried vegetables | 325–350°F | About 5–10 minutes | Tender-crisp, bright color, light browning | Overcrowding pan so vegetables steam instead of sear |
| Burgers or chops | 325–350°F | About 5–8 minutes per side | Browned exterior, center reaches safe internal temperature | Pressing down on meat, squeezing out juices and drying it out |
| Grilled cheese sandwiches | 275–300°F | About 3–5 minutes per side | Bread golden and crisp, cheese melted through | Heat too high, bread burns before cheese melts |
| Shallow frying (cutlets, fritters) | 325–350°F | Varies with thickness, often 3–6 minutes per side | Deep golden crust, center fully cooked | Oil level too shallow or not preheated, causing greasy results |
| Stews and braises | 200–250°F | About 45–120 minutes | Meat fork-tender, liquid slightly thickened | Boiling hard instead of gentle simmer, leading to tough meat |
| Keep warm at table | Warm or 180–200°F | Up to about 1–2 hours | Food stays hot but not bubbling rapidly | Using medium heat to “hold” food and overcooking it |
Cleaning and maintenance that doesn’t ruin parts
After each use
- Turn the dial to “Off,” unplug the Electric Skillet from the outlet, and allow it to cool until warm but touchable.
- Remove the temperature control probe and set it aside in a dry place.
- Pour off excess oil or liquids using any corner pour spout if available.
- Wipe out loose food bits with a paper towel before washing.
- Wash the skillet pan and lid in warm, soapy water using a soft sponge or cloth, then rinse and dry thoroughly.
- Wipe the exterior and underside of the skillet with a damp cloth; keep water away from electrical contacts.
Weekly or regular deeper care
- Inspect the power cord and temperature control probe for cracks, heat damage, or loose parts.
- Check the bottom of the Electric Skillet for built-up grease or residue and wipe it clean to prevent smoking and odors.
- Look at the nonstick surface for scratches or peeling; switch to gentler utensils if you see wear starting.
- Clean around the probe socket carefully with a dry cloth so that oil does not build up where the probe connects.
When it smells strange or performance drops
- If you notice persistent burnt smells, disconnect and allow the Electric Skillet to cool fully.
- Clean all cooking surfaces thoroughly, including corners and where the sides meet the base, to remove trapped grease.
- Check the underside and outer surfaces for baked-on spills and wipe with a damp cloth and mild detergent.
- If the Electric Skillet heats unevenly or takes too long, make sure the pan is seated properly on the base and the probe is firmly inserted.
What not to do
- Do not scrape with metal tools, scouring pads, or abrasive powders on the cooking surface, especially if it is nonstick.
- Do not immerse the heating base or control probe in water or put them in a dishwasher.
- Do not store the Electric Skillet while it is damp; residual moisture can lead to smells and corrosion.
- Do not use oven cleaner or harsh chemicals on any part of the Electric Skillet.
Two common maintenance complaints and quick checks
If your Electric Skillet is acting up, it is often something small and fixable.
- “Food is sticking more than it used to” checklist:
- Confirm you are preheating for several minutes before adding food.
- Use a small amount of oil or fat, even with nonstick coating.
- Switch to soft utensils and non-abrasive sponges to avoid further damage.
- Check for visible scratches or worn coating; if heavily damaged, consider replacing the skillet pan.
- “It smells burnt even when I cook gently” checklist:
- Clean the skillet thoroughly, including the underside and edges.
- Remove any residue from previous high-heat cooking.
- Make sure no food bits are trapped under the lid rim or around the probe socket.
- Use slightly lower heat settings for oils with lower smoke points.
Troubleshooting that gets you unstuck fast
Use this to match what you see with a likely cause and an easy fix.
| Symptom | Likely cause | Fix |
|---|---|---|
| Electric Skillet will not turn on | Probe not fully inserted, outlet issue, or dial set to “Off” | Firmly insert probe into skillet, check outlet with another device, and set dial to a cooking temperature. |
| Indicator light never comes on | Loose or faulty power connection | Unplug, reinsert probe tightly, try a different outlet; if still dark, the control probe may need service. |
| Heats unevenly with hot and cool spots | Pan not sitting flat, warped base, or very large food load | Place on a fully flat surface, avoid extremely heavy loads, and rotate or stir food regularly. |
| Food burns on one side but not the other | Food too close to hottest zone or not stirred | Spread food more evenly, reduce heat slightly, and stir or turn more often. |
| Food is taking much longer than expected | Temperature set too low or lid left off when it should be on | Increase temperature slightly and use the lid for simmering or stewing tasks. |
| Excessive steam and water pooling on counter | Lid condensation running off or no steam vent used | Angle lid slightly so steam escapes inside the skillet or position vent away from the counter edge. |
| Persistent smoking at normal cooking temperatures | Old oil residue or oil with low smoke point | Thoroughly clean the skillet and switch to a higher smoke point oil for high-heat cooking. |
| Food sticks badly even with oil | Surface not preheated, damaged coating, or very sugary sauce | Preheat longer, use gentler recipes if coating is worn, and lower heat when cooking sugar-heavy sauces. |
| Dial seems very “off” from real temperature | Internal thermostat variation or heavy cold load | Allow more preheat time and test by cooking a small piece of food to “feel out” the best dial spot. |
| Clicking sound during cooking | Thermostat cycling on and off | This is usually normal as the Electric Skillet maintains temperature, unless accompanied by sparks or burning smell. |
| Oil or sauce leaking over the sides | Skillet overfilled or boiling too vigorously | Reduce the amount of liquid or food, lower the temperature, and allow more headspace at the top. |
If it will not heat: quick decision path
- Check that the Electric Skillet is plugged into a known-working outlet and that any power switch on the outlet or strip is on.
- Confirm the temperature control probe is pushed fully into the skillet until it feels snug and secure.
- Turn the dial to a higher cooking temperature and wait several minutes for the light to come on or for heat to build.
- Feel the outer sides carefully to see if any warmth is present after several minutes; do not touch the cooking surface directly.
- If there is still no heat, no light, and the cord is intact, stop using the Electric Skillet and seek professional service or replacement of the control probe or unit.
If food keeps burning: quick decision path
- Check the dial and lower the temperature by 25–50°F from where you usually set it.
- Use more oil or liquid if you are cooking lean, dry ingredients.
- Stir more often and avoid leaving food unattended for long stretches, especially on higher heat.
- If burning continues at low settings, inspect the bottom for scorched residue; deep-clean before using again.
When to stop and get service
Most Electric Skillet issues are minor, but some are worth treating seriously and calmly pausing for.
- You see sparks, charring, or melting on the plug, cord, or temperature control probe.
- The Electric Skillet emits a strong electrical or chemical smell that persists after thorough cleaning.
- The cord is visibly damaged, frayed, or loose at either end.
- The unit repeatedly trips a breaker or blows a fuse when you plug it in or heat it.
- The skillet body is cracked or warped so it no longer sits flat and stable.
- Any part of the heating base or probe has been submerged in water or heavily soaked.
- The temperature control dial spins freely without changing heat or does not click or stop where it should.
In any of these situations, stop using the Electric Skillet until it has been inspected or replaced.
Smart habits that save time
Storage and setup tips
- Store the Electric Skillet with the lid upside down inside the pan and the probe stored separately to save space and protect the cord.
- Place a soft cloth or paper towel between stacked pans or lids to protect nonstick surfaces from scratches.
- Keep the temperature control probe coiled loosely rather than tightly wrapped to avoid stress on the cord.
Accessory and liner tips
- If you use any removable silicone or fabric liners designed for skillets, make sure they do not block air vents or drape over the sides.
- A small, heat-safe rack inside the Electric Skillet can lift food slightly above the surface for steaming or resting.
- A splatter screen, if sized correctly, can reduce mess when cooking uncovered at higher heat.
Habits that reduce mess and improve cooking
- Preheat the Electric Skillet with a thin layer of oil for most sauté and fry tasks to encourage even browning and easy flipping.
- Wipe up drips on the outer rim before they burn and turn into stubborn crust.
- Plan batches: cook proteins first, then use the flavorful browned bits for a quick pan sauce or vegetables.
- Use the keep-warm setting as a “buffet” mode for family-style meals, but add a splash of liquid if food starts to dry.
Quick FAQ
Can I use metal utensils in my Electric Skillet?
It is best to avoid metal utensils, especially with a nonstick Electric Skillet. Use wood, silicone, or plastic-safe tools to protect the surface.
Is it okay to put the whole Electric Skillet in the dishwasher?
No. Only removable pans and lids that are labeled as dishwasher-safe should go in the dishwasher. The heating base and temperature control probe must never be immersed.
Do I need to use oil in a nonstick Electric Skillet?
A small amount of oil still helps with browning and flavor. You can use less than with an uncoated pan, but completely dry cooking often leads to sticking or pale results.
Why does my Electric Skillet’s temperature light turn on and off?
The light usually indicates the heating element cycling to maintain the set temperature. It is normal for it to go on and off as the thermostat works.
Can I use my Electric Skillet as a deep fryer?
You can shallow fry and, in some cases, deep fry small amounts, but never fill oil higher than about halfway up the sides. Monitor temperature carefully and never leave hot oil unattended.
Can I cook rice or pasta in the Electric Skillet?
Yes, you can simmer rice dishes and cook pasta as long as there is enough water and space. Use lower to medium heat and keep the lid on for rice to maintain a gentle simmer.
Is it safe to use the Electric Skillet on a wooden or laminate counter?
Yes, as long as the counter is heat-resistant and you keep adequate clearance around the skillet. For extra protection, place a thick, heat-safe mat or trivet underneath.
Why does food near the center brown faster?
Many Electric Skillet models are slightly hotter near the middle, where the main heating element runs. You can rotate or stir food, or place delicate items toward the edges.
Can I preheat with an empty Electric Skillet?
Yes, short preheating for several minutes is expected. Just avoid leaving it empty on high heat for long periods, as that can stress the surface or coating.
How long can I safely use the keep-warm setting?
As a general household guideline, aim to keep food hot for about 1–2 hours. Stir occasionally and add a little liquid if food begins to dry out.
Does my Electric Skillet replace a regular stovetop pan?
It can handle many of the same jobs—sautéing, frying, stewing, and more. It will not replace every pan, but it often becomes the easiest option for family-sized, even-heat cooking.
Discover More
- Air Conditioner
- Air Fryer
- Air Purifier
- Automatic Soap Dispenser
- Barbecue Grill
- Beverage Cooler
- Beverage Dispenser
- Beverage Fridge
- Blender
- Boiler
- Bread Maker
- Bread Slicer
- Bread Toaster Oven
- Can Opener
- Carpet Cleaner
- Ceiling Fan
- Ceiling Heater
- Ceiling Mounted Heater
- Ceiling Mounted Vent Fan
- Central Vacuum
- Charcoal Grill
- Citrus Juicer
- Clothes Dryer
- Clothes Steamer
- Coffee Grinder