Handheld Vacuum Help Guide: Use, Care, and Fixes Without the Hassle
Quick start you can finish fast
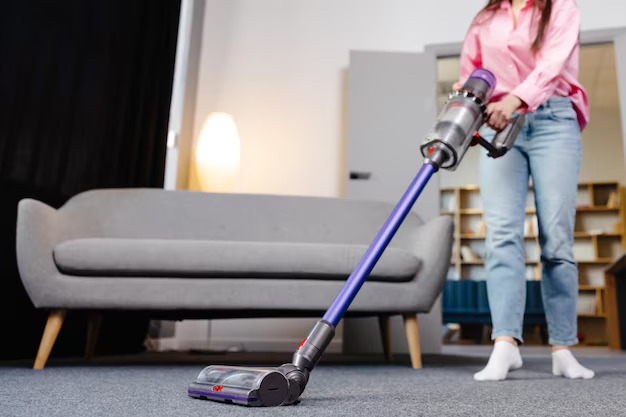
You finally got the Handheld Vacuum out of the box; let’s get you actually using it, not just admiring it from the counter.
- Remove all packaging from the Handheld Vacuum, charging base, and accessories.
- Check the dirt cup, filter, and any removable nozzles are seated firmly.
- If your Handheld Vacuum is cordless, place it on the charger until it reaches a full charge light, usually after about 3–5 hours.
- If your Handheld Vacuum has a washable filter or dust cup, rinse those parts in lukewarm water, then let them dry completely before use.
- Inspect the intake opening and any brush tools to make sure no packing foam or plastic is blocking airflow.
For a first-use test, try a simple, real-world cleanup:
- Sprinkle a small amount of dry crumbs or rice on a hard floor or table.
- Attach a basic nozzle (no brush or extension yet) to keep things simple.
- Turn the Handheld Vacuum on at normal power and move in steady passes over the debris.
- Watch the dirt cup: confirm debris is collecting, and there is no unusual sound or smell.
- Empty the dirt cup afterward so you start “real” use with a clean container.
Know your parts without guessing
Most units have
- Main body / handle: Where the motor, controls, and battery or power cord connect. This is what you hold during use.
- On/off or power button: Starts and stops suction. Some Handheld Vacuum models use a trigger you must hold down.
- Dirt cup or dust container: Clear or opaque bin that collects dust and debris. Usually removable for emptying and cleaning.
- Filter or filter set: Often a combination of a pre-filter and a fine filter to trap dust. Helps suction and protects the motor.
- Nozzle opening: The front opening where air and debris are sucked in. Accessories attach here.
- Charging base or charging cable (for cordless): Powers the internal battery between uses.
- Power cord (for corded): Supplies power directly from the outlet instead of an internal battery.
Some units have
- Crevice tool: Long, narrow attachment for corners, baseboards, window tracks, and car seats.
- Dusting brush: Nozzle with soft bristles for shelves, keyboards, blinds, and delicate surfaces.
- Pet hair tool: A small nozzle with rubber blades or bristles designed to grab fur from upholstery.
- Extension hose: A flexible tube to reach under seats, into drawers, or around tight areas.
- Wall mount: Bracket that holds the Handheld Vacuum and sometimes the charger, keeping it off the floor or counter.
- Multiple power settings: Buttons for low, medium, or high suction to balance noise, battery life, and cleaning power.
If you are unsure what a part does, attach it and try it on a small, easy area like a tabletop. The Handheld Vacuum will quickly “show” you what it’s meant for.
Safety that actually prevents problems
- Unplug or remove the battery before cleaning internal parts. This prevents accidental starts while your fingers are near moving components.
- Avoid vacuuming liquids unless the Handheld Vacuum is clearly labeled for wet use. Moisture can damage the motor and internal wiring.
- Do not pick up hot ashes, lit material, or sharp metal pieces. These damage the dirt cup, filter, and sometimes the motor.
- Keep hair, loose clothing, and jewelry away from rotating brush tools while the unit is on.
- Avoid blocking the air vents or intake; overheating shortens motor life and can cause the Handheld Vacuum to shut off mid-use.
- Empty the dirt cup before it reaches the “max fill” mark. Overfilling reduces suction and can clog the filter quickly.
- Use only dry, properly dried filters. A damp filter can grow mold or restrict airflow dramatically.
- Keep the charger and cord dry and away from sinks or tubs. Treat it like any other small electrical device.
- Store the Handheld Vacuum where children cannot easily power it on unsupervised.
- Stop use immediately if you smell burning, see smoke, or feel unusual heat on the housing. That is a sign of a serious fault.
Daily use for better results
Think of using your Handheld Vacuum as a quick routine, not a big event. Short, frequent cleanups beat one huge, frustrating one.
- Check the battery level or power cord reach before starting so you do not have to stop midway through a mess.
- Choose the right attachment: crevice tool for cracks, brush for dust, plain nozzle for floor spills.
- Power on, then approach debris from the side instead of ramming straight into a pile. This reduces scatter.
- Move the nozzle slowly, overlapping passes a bit so you do not leave a “missed” stripe of crumbs.
- Use higher power for heavier debris or deep upholstery; switch back to lower settings to save battery on light dust.
- After use, empty the dirt cup and tap excess dust from the filter into a trash bag or bin.
- Return the Handheld Vacuum to its charger or storage spot right away so it is always ready.
| Task / area | Suggested attachment & power | How to tell you are done | Common mistakes |
|---|---|---|---|
| Table crumbs and dry spills | Standard nozzle, low or medium power | No visible debris, smooth passes, no gritty feel when you wipe with your hand | Holding nozzle too far away and just “pushing” crumbs around |
| Car seats and floor mats | Crevice tool or pet tool, medium or high power | Fabric looks uniform, seams and cracks are free of grit | Not moving slowly enough for sand and grit to lift |
| Sofa cushions | Brush or pet hair tool, medium power | Loose hair and lint removed, fabric not fuzzed or snagged | Using too much power on delicate fabric, causing fuzzing |
| Stairs (carpeted) | Wide nozzle or pet tool, high power | Edges and treads look clean, no loose debris when you tap with your hand | Skipping the edges and corners where dust collects |
| Kitchen drawers | Crevice tool, low or medium power | Crumbs and bits removed without sucking in utensils or liners | Vacuuming with high power right next to loose papers or wrappers |
| Window tracks and frames | Crevice tool, medium power | Dust and cobwebs gone, corners clear | Pressing too hard and jamming the tool into the track |
Cleaning and maintenance that doesn’t ruin parts
After each use
- Empty the dirt cup into a trash bag, tapping gently so dust falls out instead of billowing into your face.
- Check for hair wrapped around any rotating brush tool and pull it off by hand or cut it carefully with scissors.
- Wipe the outside of the Handheld Vacuum with a slightly damp cloth, then dry.
Weekly care (or after several heavy cleanups)
- Remove the dirt cup and wash it in warm soapy water if it is designed to be washable, then dry it fully.
- Tap the filter gently against the inside of a trash can to knock loose dust. If it is washable, rinse with lukewarm water and let it air-dry for at least 24 hours.
- Inspect the air intake and vents for built-up lint or debris and gently clear it away.
- Check the charging contacts on the Handheld Vacuum and dock; wipe with a dry cloth if dusty.
When it smells odd or performs poorly
- Empty the dirt cup even if it is not full; decaying organic debris (like food crumbs) can smell unpleasant.
- Remove and fully clean the dirt cup and any washable parts with mild dish soap and warm water.
- Clean or replace the filter; a dirty filter is the most common reason for weak suction and strange odors.
- Look for stuck debris in the nozzle, hose, or crevice tool that could be blocking airflow.
What not to do
- Do not use harsh chemicals or abrasive pads on the dirt cup, housing, or accessories; they can scratch or weaken plastic.
- Do not put electrical parts, the motor unit, or the battery pack in water or a dishwasher.
- Do not reinstall a damp filter or dirt cup. Residual moisture can lead to mold growth and clogged airflow.
- Avoid storing the Handheld Vacuum in very hot or very cold locations, such as next to a heater or in a freezing garage.
Quick maintenance checklists for common complaints
Issue: Weak suction
- Check that the dirt cup is empty and properly latched.
- Inspect the filter; clean or replace if dusty or visibly clogged.
- Look through the nozzle and any hose or tool for lodged debris.
- Verify that all seals and gaskets are seated and not cracked or missing.
Issue: Short runtime on cordless models
- Confirm the Handheld Vacuum fully charged; wait for the “charged” indicator before using.
- Use lower power settings for lighter jobs to conserve battery.
- Clean the filter; a clogged filter forces the motor to work harder and drains the battery faster.
- Check that the charging contacts are clean and the charger is firmly plugged into the outlet.
Troubleshooting that gets you unstuck fast
Most Handheld Vacuum problems come down to power, airflow, or overheat protection. The table below narrows things down quickly.
| Symptom | Likely cause | Fix |
|---|---|---|
| Handheld Vacuum will not turn on (cordless) | Battery not charged or not seated correctly | Place on charger until full, then ensure the battery clicks firmly into place if removable. |
| Handheld Vacuum will not turn on (corded) | Outlet issue or loose plug | Try another outlet, confirm the plug is fully inserted, and check for a tripped breaker. |
| Runs for a few seconds, then shuts off | Overheat protection triggered from blocked airflow | Empty the dirt cup, clean filter, remove any clogs, then let cool for about 20–30 minutes before retrying. |
| Very weak suction, motor sounds normal | Dirty filter or partial clog in nozzle/tools | Clean or replace filter; inspect all accessories and the intake opening for blockages. |
| Motor sounds strained or unusually loud | Severe clog or overfilled dirt cup | Stop immediately, empty the dirt cup, and clear any lodged debris from the intake and tools. |
| Dirt leaking from the Handheld Vacuum | Dirt cup not latched or seals damaged | Refit and firmly latch the dirt cup; inspect seals and replace if cracked or missing. |
| Bad smell during use | Dirty filter, old food or pet hair in the cup, or debris stuck near motor intake | Thoroughly clean dirt cup and filter; remove trapped debris; allow all parts to dry fully before reassembly. |
| Brush tool not spinning | Hair or string wrapped around brush, or drive mechanism jammed | Turn unit off, remove tool, cut and remove hair, then test again. Replace the tool if the drive is damaged. |
| Battery not charging | Dirty charging contacts, faulty charger, or worn battery | Wipe contacts with a dry cloth; try another outlet; if no response, battery or charger may need replacement. |
| Static shock when vacuuming | Dry air and synthetic surfaces building static | Lightly touch a grounded metal object before and after vacuuming; avoid dragging the unit across synthetic fabrics. |
Mini decision path: If the Handheld Vacuum will not start
- Check the power source:
- Cordless: Is the battery charged and clicked fully into place?
- Corded: Is the outlet working and the plug firmly inserted?
- Check assembly:
- Is the dirt cup attached and latched? Many units have a safety interlock that prevents operation if it is not.
- Are accessories plugged in correctly, not halfway seated?
- Check for overheat shutoff:
- Did it stop after running hard? Let it rest for about 20–30 minutes, then try again.
- Check the controls:
- On trigger models, hold the trigger down continuously while testing.
- On button models, press firmly once and wait a second for response.
- If it still does not start after these checks, service or replacement parts are likely needed.
When to stop and get service
Sometimes the best “repair” is to stop before things get worse. Use these as clear red flags.
- Visible damage to the power cord, plug, battery pack, or charger.
- Strong burning or electrical smell that returns even after cleaning and cooling.
- Cracked housing around the motor or battery area, especially if you dropped the Handheld Vacuum.
- Repeated overheating shutoffs with light use and clean filters.
- Sparks visible inside the motor vents during normal operation.
- Liquid accidentally pulled through a non-wet Handheld Vacuum, especially if it reached the motor area.
- Any sign of melted plastic or deformation of the body or tools.
In these situations, stop using the Handheld Vacuum until it can be inspected or repaired by qualified service, or replaced.
Smart habits that save time
- Store the Handheld Vacuum on its dock or in a consistent spot so you are not searching for it when a spill appears.
- Keep accessories in a small basket or on a wall mount so you can quickly grab the right tool for the job.
- Empty the dirt cup and tap out the filter before putting it away at the end of the day, especially after big cleanups.
- Vacuum small spills right away instead of waiting for them to spread or get stepped on and ground into surfaces.
- Use the lower suction setting for light dusting and the higher setting only when needed; your battery will thank you.
- In the car, keep the Handheld Vacuum charger or adapter accessible so you can top off charge regularly.
For filters and accessories:
- Keep a spare filter on hand if possible so you can rotate them while one is drying.
- Only use compatible replacement filters and batteries to avoid poor fit or leaks that reduce suction.
- Label your calendar or phone to remind you to deep-clean filters every few weeks if you use the Handheld Vacuum often.
Quick FAQ
Can I use my Handheld Vacuum on wet spills?
Only if it is clearly designed for wet use. If yours is dry-only, stick to dry debris and use towels or a proper wet vacuum for liquids.
How often should I clean the filter?
For regular household use, a quick tap-out every few uses and a deeper clean every 2–4 weeks keeps suction strong.
Do I have to wait a full day for the filter to dry?
Plan on at least 24 hours in a warm, well-ventilated spot. Any remaining dampness can cause odors and airflow problems.
Why does my Handheld Vacuum smell musty?
Moisture and fine dust in the filter or dirt cup are usually to blame. Wash, dry fully, and avoid vacuuming damp material.
Is it bad to leave the Handheld Vacuum on the charger all the time?
Most modern chargers are designed for this and keep the battery topped off. If yours has specific guidance, follow that, but constant docking is usually fine.
Can I pick up pet hair with a regular nozzle?
Yes, but a pet tool or brush usually works better and clogs less. Clean hair from the tool after each use to keep it spinning freely.
Why does the Handheld Vacuum shut off during heavy use?
Overheat protection often kicks in when the filter is dirty, the vents are blocked, or you are running at high power for a long time.
Can I use my Handheld Vacuum for fine dust like drywall or fireplace ash?
That type of very fine dust clogs filters quickly and can damage the motor. It is better to avoid it or use a unit specifically rated for fine dust.
What is the best way to vacuum stairs with a Handheld Vacuum?
Use a wide nozzle or pet tool, start at the top, and work downward, paying extra attention to edges and corners where debris gathers.
How long should the battery last per charge?
Typical runtime ranges from about 8–20 minutes, depending on suction level and model. High power settings use more battery more quickly.
My Handheld Vacuum is loud. Is that normal?
They are usually louder than they look, especially on high power. Sudden new rattling or grinding sounds, however, are not normal and should be checked.
With these tips, your Handheld Vacuum can move from “annoying gadget” to “actually helpful tool.” Keep the filter clean, the dirt cup empty, and the charger handy, and it will be ready whenever life sheds, spills, or crumbles.
Discover More
- Air Conditioner
- Air Fryer
- Air Purifier
- Automatic Soap Dispenser
- Barbecue Grill
- Beverage Cooler
- Beverage Dispenser
- Beverage Fridge
- Blender
- Boiler
- Bread Maker
- Bread Slicer
- Bread Toaster Oven
- Can Opener
- Carpet Cleaner
- Ceiling Fan
- Ceiling Heater
- Ceiling Mounted Heater
- Ceiling Mounted Vent Fan
- Central Vacuum
- Charcoal Grill
- Citrus Juicer
- Clothes Dryer
- Clothes Steamer
- Coffee Grinder
