Home Security Owner’s Guide: Practical Help For a Safer, Calmer Home
Quick start you can finish fast
You do not need to become a security expert to get value from your Home Security setup. This section gets you from “box on the floor” to “basic protection” quickly.
- Unpack everything and lay it out on a table so you can see all parts clearly.
- Check for visible damage on cameras, sensors, and the main hub or keypad.
- If there are batteries, install them with the correct polarity, one device at a time.
- Place the main hub or base station near your router or central area of the home.
- Connect the hub to power, and to your network if it uses Ethernet or similar cabling.
- Power on cameras and sensors and wait for indicator lights to settle into “ready” or “pairing” mode.
- If your Home Security uses an app or on-screen menu, follow the pairing prompts to add each device.
- Mount at least one door sensor on the main entry door and one motion sensor in a central hallway or living area.
- Mount at least one camera covering the main entrance or driveway with a clear, unobstructed view.
First-use example: simple “Night Mode” protection
Here is a simple first configuration that works in most homes for your first night of Home Security use.
- Arm your system in a “home” or “stay” mode so perimeter sensors are active but interior motion sensors are off.
- Include:
- All ground-floor doors.
- Any easily accessible windows (near porches, low to the ground, or hidden by fences).
- The main entry camera or porch camera.
- Set the entry delay for the main door to around 20–45 seconds to give you time to disarm when coming home.
- Set the exit delay to around 30–60 seconds so you can arm and leave without setting off the alarm.
- Do a test:
- Arm “home/stay.”
- After the exit delay ends, gently open the main door to confirm the system starts the entry delay countdown.
- Disarm to stop the alert, confirming your code or disarm method works.
Know your parts without guessing
Most units have
- Hub / base station / main panel – The brain of your Home Security. It talks to sensors, stores settings, and often controls the siren.
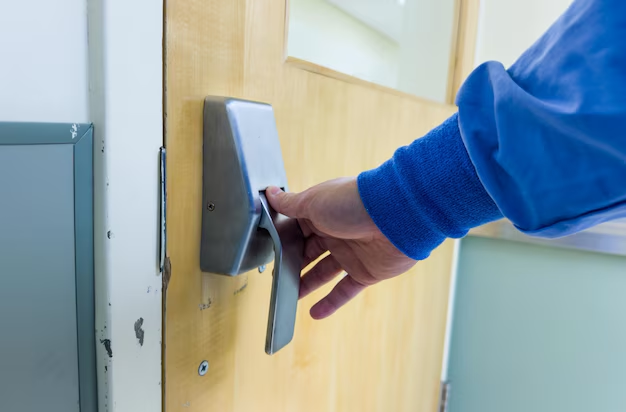
- Keypad or control panel – Where you arm, disarm, and change modes. Sometimes built into the hub.
- Door and window sensors – Usually two-piece magnetic sensors that tell the system when an opening is opened or closed.
- Motion sensors – Detect movement in a room or hallway, usually using infrared to see changes in heat and motion.
- Indoor or outdoor cameras – Provide video of key areas. Often used for checking alerts and confirming what triggered them.
- Power adapter or low-voltage transformer – Keeps the hub or wired devices powered.
- Batteries or backup battery – Let the hub and sensors keep working during short power cuts.
- Siren – Sometimes built in, sometimes separate. Makes a loud noise to alert people nearby.
Some units have
- Glass-break sensors – Listen for the sound profile of breaking glass to detect forced entry at windows.
- Key fobs or remote arming devices – Small remotes to arm/disarm without using a keypad.
- Smartphone or tablet control – Lets you arm, disarm, and view alerts remotely through an app or browser.
- Environmental sensors – Extra detectors such as water leak sensors, temperature or humidity alerts, or other add-ons.
- External sirens or strobe lights – Make the alarm more visible and audible outside the home.
- Network accessories – Range extenders or repeaters that help far-away sensors reach the hub.
Safety that actually prevents problems
- Protect your passcodes. Use a code that is easy for you but not easy for strangers watching you type. Avoid birthdays and repeating digits.
- Test your siren at a reasonable time. Short tests confirm your Home Security works without startling neighbors every weekend.
- Secure devices firmly so they do not fall; loose cameras and sensors can give false alerts and may break on impact.
- Position indoor cameras away from bathrooms and bedrooms to respect privacy while still covering entry paths.
- Do not block motion sensors with curtains, plants, or tall furniture; blocked sensors reduce coverage and can give a false sense of security.
- Keep power cords and low-voltage cables tidy; avoid running them under doors where they can be pinched or damaged.
- Use proper outdoor-rated hardware. Outdoor cameras and sensors should be rated for weather exposure and installed with weather-appropriate fittings.
- Confirm that everyone in the home knows how to arm, disarm, and cancel false alarms to avoid unnecessary stress and loud sirens.
- Review notification and alert settings so you do not miss important alerts or get spammed into ignoring them.
- Keep ladders and tools used for installation stored afterward so they are not left as helpful equipment for potential intruders.
Daily use for better results
Think of using your Home Security like locking your door: quick, repeatable, and almost automatic.
- Arm “away” mode when leaving so both perimeter sensors and interior motion sensors are active.
- Arm “home/stay” mode at night so doors and windows are protected while you move around inside.
- Use any “partial” or “custom” mode for situations like having pets roaming or guests sleeping on a couch near a motion sensor.
- Glance at camera views or status lights once a day, just as you would check locks before bed.
- Clear false alarms promptly and note what caused them, then adjust sensitivity, delays, or sensor placement if needed.
- Review alerts in your app or interface to confirm which sensor triggered and at what time.
- Once a week, open and close a monitored door or window to confirm the Home Security system records it correctly.
Common Home Security uses, settings, and pitfalls
| Use | Starting settings / placement | How to tell it is working well | Common mistakes |
|---|---|---|---|
| Front door monitoring | Door sensor at top corner; entry delay around 20–45 seconds | System chimes or logs every open/close, delay gives time to disarm | Sensor halves too far apart or misaligned, causing missed opens |
| Night-time perimeter protection | “Home/stay” mode with all doors and accessible windows armed | No alerts when you move inside; alerts only when doors/windows open | Leaving a window unprotected in a secluded area |
| Indoor hallway motion coverage | Motion sensor around 2–2.4 m high, facing across the hallway | Triggers when someone walks past, not from small pets low to the floor | Aiming directly at windows or heating vents, causing false triggers |
| Outdoor driveway camera | Mount around 2.5–3 m high, angled slightly downward, avoid pointing at the sun | Clear view of people and cars, alerts mostly match real movement | Too wide a motion zone picking up street traffic and tree movement |
| Backyard gate monitoring | Contact sensor or outdoor motion near gate area | Alert only when gate is opened or someone enters yard | Mounting too low where pets or wildlife constantly trigger alerts |
| Guest or cleaner access | Temporary code for keypad or scheduled arming/disarming | Guests can enter without triggering alarm; logs show who entered | Sharing your main code instead of a temporary one |
| Garage door protection | Sensor on side door, tilt or contact sensor on main garage door | System alerts if garage is opened while armed | Mounting sensors on flexible or sagging panels that shift over time |
Cleaning and maintenance that doesn’t ruin parts
Your Home Security will usually run quietly in the background. A little upkeep keeps it reliable and reduces false alarms.
After each use… which is really “ongoing”
- Wipe visible dust or smudges off camera lenses with a soft, dry or slightly damp microfiber cloth.
- Check that sensors on doors and windows are still firmly attached after any slams or hard closes.
- Glance at hub and keypad displays or lights to ensure they show normal “ready” or “armed” states.
Once a week or so
- Review recent alerts and make sure you recognize the cause of each one.
- Test one or two sensors by opening a door or walking past a motion sensor while armed in a test or “chime only” mode if available.
- Check cables and power adapters for kinks, loose plugs, or areas where they are being pinched.
When it smells weird, looks dirty, or performs poorly
- For cameras, gently clean lenses and housings; avoid harsh chemicals or abrasive pads that can scratch plastic or coatings.
- For keypads and panels, wipe buttons or touch screens with a slightly damp cloth; do not let moisture seep into openings.
- If indicators show low battery, replace batteries promptly rather than waiting for them to fully die.
- If video looks foggy or grainy, clean the lens and check for condensation or spider webs around outdoor cameras.
What not to do
- Do not spray cleaners directly on cameras, sensors, or panels; spray onto a cloth first if needed.
- Do not open sealed devices unless they are clearly designed for user battery replacement.
- Do not paint over sensors or cameras; paint can block lenses and tamper with detection.
- Do not yank cords from the wall by the cable; grip the plug body to unplug.
- Do not cover devices with cloth, tape, or decorations; this can overheat them or block detection.
Two common maintenance complaints and quick checks
Complaint: “The camera is blurry or useless at night.”
- Check for fingerprints, dust, moisture, or spider webs on the lens and surrounding area.
- Confirm there is some light source nearby or that any built-in night-vision illumination is not blocked.
Complaint: “This motion sensor goes off for no reason.”
- Look for moving heat sources in its view: vents, radiators, sunny windows with moving curtains, or pet paths.
- Lower the sensitivity one level or slightly angle the sensor away from problem areas rather than turning it off completely.
Troubleshooting that gets you unstuck fast
Use this section when your Home Security is acting up. Follow the symptom, find the likely cause, then try the suggested fix.
| Symptom | Likely cause | Fix |
|---|---|---|
| System will not arm | Open door/window, tamper alert, or sensor offline | Check status screen for which zone is open; close it firmly or check the sensor battery and alignment. |
| Frequent false motion alerts | Sensor aimed at windows, vents, or pet paths; sensitivity too high | Reposition sensor to avoid heat sources and lower sensitivity a level, then retest. |
| No video from a camera | Power loss, network issue, or lens blocked | Confirm power, check Wi‑Fi or cable connection, and make sure nothing is covering the lens. |
| Video is delayed or choppy | Weak network signal or congested connection | Move camera or router closer, reduce video quality settings slightly, or limit other heavy network use. |
| No alert when a door opens | Sensor halves misaligned or too far apart; low battery | Adjust the sensor so the two pieces sit close and parallel; replace batteries if the indicator shows low. |
| Keypad not responding | Power issue, stuck buttons, or wireless link lost | Check power or batteries, gently clean around keys, and confirm it is within range of the hub. |
| Siren does not sound during alarm | Siren disabled in settings or siren device offline | Verify siren volume and enable settings; check siren power or battery and communication with the hub. |
| Too many notifications | All events set to alert, zones too sensitive | Switch less important events to “log only,” adjust motion zones, and limit alerts to meaningful events. |
| App shows system offline | Hub lost internet or power | Check power to the hub and your network; restart router and hub as needed. |
| Battery devices die quickly | Extreme temperatures, constant triggering, or old batteries | Move devices away from hot or very cold spots, reduce unnecessary triggers, and use fresh, quality batteries. |
If your Home Security will not arm at all
- Check the display or app for any warnings like “zone open,” “tamper,” or “device offline.”
- If a door or window shows open, confirm it is fully closed and that the sensor pieces line up closely.
- If a device shows tamper, make sure its cover is seated properly and latched.
- If a device is offline, move slightly closer to the hub or power-cycle that device by removing and reinserting batteries.
- If there are still no clues, restart the hub or base station by safely powering it off, waiting about 10–20 seconds, and powering it back on.
If a camera refuses to cooperate
- Confirm power by checking any status lights or trying another outlet or power adapter if available.
- Check network access by moving the camera closer to the router or hub and testing again.
- If the app shows the camera but no image, try toggling it off and on or performing a soft reset through the menu.
- As a last resort, remove the camera from the system and add it again as a new device, then reassign its location and settings.
If you keep triggering your own alarm
- Increase the entry delay for the main door so you have realistic time to get inside and disarm calmly.
- Place the keypad or main control in a location you can reach easily from the main entry.
- Consider different modes: use “home/stay” for nights so you do not trigger interior sensors when getting up for water.
- Teach everyone in the house the basic arming and disarming steps to avoid surprise alarms.
When to stop and get service
You can solve many issues yourself, but some situations call for professional help or support from your Home Security provider.
- Repeated system restarts, freezing, or random resets of the hub or keypad.
- Physical damage to the hub, wiring, or any device that exposes internal components.
- Persistent false alarms from multiple zones even after repositioning and sensitivity adjustments.
- Siren failure even though tests and settings say it should be active.
- Signs of overheating on any device, such as unusual warmth, discoloration, or a strong odor from the housing.
- Corrosion found on wiring or terminals for wired sensors, especially after water exposure.
- Inability to clear tamper alerts or error codes even after covers are closed and devices are reseated.
Smart habits that save time
- Store spare batteries in a dry, moderate-temperature place and label them with the purchase date.
- Keep a simple diagram or note of where each sensor and camera is located, including any special settings.
- Use mounts and brackets rather than improvising with tape or temporary fixtures; this reduces rework later.
- Schedule a short monthly “Home Security checkup” to test a few devices and review logs.
- When rearranging furniture or renovating, include “check sensors and cameras” on your project list.
- Use privacy modes on cameras when hosting guests, while keeping entry points protected by other sensors.
Quick FAQ
Do I need to arm my Home Security even when I am home during the day?
Arming in a “home” or “stay” mode during naps, showers, or work-from-home sessions adds protection while still letting you move inside normally.
Where should I put my first camera?
If you only have one, start with the main entrance or driveway so you see who approaches and leaves your home.
How often should I change batteries in sensors?
Most last many months or longer, but checking battery status monthly and replacing at the first low-battery warning keeps things stable.
Will pets set off motion sensors?
They can, but many motion sensors can be placed or configured to ignore smaller animals by aiming higher and reducing sensitivity slightly.
Can I turn off the siren and just get notifications?
In many systems you can choose silent alerts or chimes only, but keep in mind that a siren is a strong deterrent and helps get attention quickly.
Why does my camera look fine in the day but bad at night?
Night images depend on infrared or limited light; clean the lens, reduce reflections from nearby walls or glass, and ensure there is at least some ambient light if possible.
Do I need to tell visitors about indoor cameras?
It is a good habit to mention indoor cameras to guests and service workers, and to avoid placing them in highly private areas.
Can I move sensors and cameras after installation?
Yes, as long as they remain within communication range and are mounted securely. After moving anything, always test it in the new spot.
What should I do before going on vacation?
Fully arm your Home Security, test key sensors and cameras, confirm notification settings, and make sure any backup batteries show healthy status.
Is it okay if one window is not covered?
You can start with partial coverage, but prioritize easily reached or hidden windows first, then add more sensors over time for full coverage.
Your Home Security does not have to be complicated to be effective. A few thoughtful placements, realistic settings, and occasional checkups go a long way toward keeping your home calm and covered.
Discover More
- Air Conditioner
- Air Fryer
- Air Purifier
- Automatic Soap Dispenser
- Barbecue Grill
- Beverage Cooler
- Beverage Dispenser
- Beverage Fridge
- Blender
- Boiler
- Bread Maker
- Bread Slicer
- Bread Toaster Oven
- Can Opener
- Carpet Cleaner
- Ceiling Fan
- Ceiling Heater
- Ceiling Mounted Heater
- Ceiling Mounted Vent Fan
- Central Vacuum
- Charcoal Grill
- Citrus Juicer
- Clothes Dryer
- Clothes Steamer
- Coffee Grinder
