Kitchen Mixer Owner’s Guide: Practical Help From First Whisk To Final Cleanup
Quick start you can finish fast
Your Kitchen Mixer is ready to work harder than you do, but it needs a tiny bit of setup first. Here’s the fast path to your first successful mix.
- Place the Kitchen Mixer on a stable, flat counter with some space around it so you can move the bowl and head easily.
- Remove all tape, packaging, and cardboard from the bowl, attachment shaft, and under the mixer head.
- Wash the bowl, beaters, dough hook, whisk, and any splash guard in warm soapy water, then dry thoroughly.
- Wipe the Kitchen Mixer body and cord with a slightly damp cloth, then a dry cloth. Do not immerse the base in water.
- Make sure the speed control is in the “off” position, then plug the Kitchen Mixer into a grounded outlet.
First-use example: Simple whipped cream
This is a good “test drive” for your Kitchen Mixer. It’s quick, low-stress, and very forgiving.
- Chill the mixing bowl and whisk attachment in the fridge for about 10–15 minutes for best results.
- Attach the whisk firmly to the Kitchen Mixer and lock the head in the down position (or attach the bowl if it’s a stand style with bowl lift).
- Pour about 240–360 ml (1–1½ cups) of cold heavy cream into the bowl, plus 1–2 tablespoons of sugar and a splash of vanilla if you like.
- Start at a low speed for several seconds so it doesn’t splash, then move up to a medium–high speed.
- Mix for about 2–5 minutes until the cream forms soft to medium peaks that hold shape on the whisk.
- Stop the mixer before it looks stiff and grainy to avoid turning it into butter.
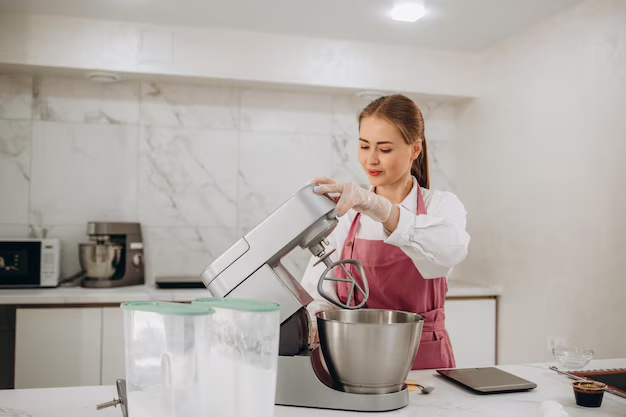
Know your parts without guessing
Most units have
- Motor housing: The main body of the Kitchen Mixer that holds the motor and controls. Keep this dry and clean.
- Mixing bowl: Usually metal or glass. Holds your ingredients while the Kitchen Mixer does the hard work.
- Beaters or flat beater: General-purpose attachment for cake batter, cookie dough, frosting, and mashed potatoes.
- Dough hook: Curved hook used for kneading bread, pizza, and similar doughs so your wrists don’t have to.
- Whisk or balloon whisk: Wire attachment that whips air into cream, egg whites, and light batters.
- Speed control dial or slider: Adjusts how fast the attachments spin. Low for gentle mixing; higher for whipping and fast beating.
- Head tilt or bowl-lift mechanism: Lets you move the Kitchen Mixer head or bowl up and down for easy access to the bowl and attachments.
- Attachment shaft: Where you connect beaters, hooks, or whisks. Attachments must click or lock firmly in place.
- Power cord: Typically a grounded plug. Keep it away from the mixing area and spills.
Some units have
- Splash guard or pouring shield: A ring or lid that helps keep ingredients inside the bowl and guides flour or liquids into the bowl more cleanly.
- Additional bowls: A smaller or second bowl for back-to-back recipes without washing in between.
- Timer or digital display: Helps track mix times for more consistent results.
- Accessory hub cover: A front port on some Kitchen Mixer models for optional accessories such as grinders or slicers.
- Cord wrap or storage clip: A spot on the back or bottom of the Kitchen Mixer to tuck the cord when not in use.
Safety that actually prevents problems
- Unplug before touching attachments. Always disconnect power before changing beaters, scraping the bowl, or cleaning.
- Keep fingers, utensils, and clothing away from moving parts. Use a spatula only when the Kitchen Mixer is off and fully stopped.
- Do not run the Kitchen Mixer with no ingredients for long periods. This adds wear and can overheat the motor without doing anything helpful.
- Use the right attachment for the job. For very heavy dough, use a dough hook instead of a flat beater to avoid strain on the motor and gears.
- Let the motor rest between long mixing sessions, especially for heavy doughs, to prevent overheating.
- Keep the Kitchen Mixer on a sturdy, level surface so it does not walk or tip during thicker mixes.
- Avoid overfilling the bowl. Aim to keep ingredients below about two-thirds of the bowl height when mixing at higher speeds.
- Keep the cord away from the bowl, water, and hot surfaces such as cooktops.
- Do not immerse the motor housing in water or run it under a tap. Use only a damp cloth for cleaning the body.
- If you see sparks, smell burning insulation, or hear grinding metal noises, stop using the Kitchen Mixer and unplug it immediately.
Daily use for better results
Once you get the hang of it, your Kitchen Mixer can make everyday mixing feel pleasantly boring — in a good way. Here’s a smooth workflow.
- Check that the bowl and attachments are clean, dry, and properly locked into place.
- Confirm the speed control is set to “off,” then plug in the Kitchen Mixer.
- Add ingredients to the bowl, starting with softer or liquid ingredients to help dry ingredients blend more easily.
- Lower the head or raise the bowl into mixing position until it locks securely.
- Start on the lowest speed to combine ingredients and reduce splatter, then move to the target speed.
- Pause occasionally to scrape down the bowl with a spatula, but only when the Kitchen Mixer is turned off and fully stopped.
- Listen and watch: when the sound changes or the texture looks right, stop and check the mixture rather than just running for a random time.
- When finished, turn the speed control to “off,” unplug, release the head or lower the bowl, remove the attachment, and then remove the bowl.
Helpful starting points for common Kitchen Mixer tasks
| Task / Recipe | Attachment & Speed (starting point) | Typical Time Range | Doneness / Visual Cues | Common Mistakes |
|---|---|---|---|---|
| Whipped cream | Whisk; low to start, then medium–high | About 2–5 minutes | Soft or medium peaks that hold shape but still look smooth | Running too long and getting grainy, butter-like cream |
| Egg whites (meringue) | Whisk; medium–high | About 4–8 minutes | Glossy stiff peaks that stand straight when whisk is lifted | Greasy bowl or yolk in whites preventing whipping |
| Cake batter | Flat beater; low to medium | About 2–4 minutes after ingredients are combined | Smooth, slightly thick batter with no dry streaks | Mixing on high and overworking, resulting in tough cake |
| Cookie dough | Flat beater; low to medium | About 3–5 minutes total | Evenly mixed dough with chips or nuts distributed throughout | Adding all flour at once and puffing flour all over the counter |
| Yeast bread dough | Dough hook; low to medium-low | About 5–10 minutes kneading | Smooth, elastic dough that pulls away from bowl sides | Running on high speed, making the mixer strain or “walk” |
| Mashed potatoes | Flat beater; low to medium | About 2–4 minutes | Creamy texture with few visible lumps | Mixing on high and turning them gluey and gummy |
| Frosting / buttercream | Flat beater or whisk; medium | About 4–8 minutes | Light, fluffy frosting that spreads easily | Adding too much liquid at once causing a runny frosting |
| Quick bread / muffin batter | Flat beater; low | About 1–2 minutes after adding flour | Ingredients just combined; small lumps are fine | Overmixing, leading to tough or tunneled muffins |
Cleaning and maintenance that doesn’t ruin parts
After each use
- Unplug the Kitchen Mixer before cleaning.
- Remove attachments and the bowl. Wash in warm, soapy water, or place them in the dishwasher if they are labeled dishwasher-safe.
- Wipe the mixer body with a damp cloth, especially around the attachment hub and speed dial where splashes like to hide.
- Dry everything fully before reattaching or storing to prevent spots and hidden rust.
Weekly (or every several uses)
- Give the underside of the mixer head and the attachment shaft a more thorough wipe, removing dried batter or flour.
- Check the cord for kinks or damage and wipe it down if it has any splatters.
- Inspect attachment connection points (where beaters click in) for buildup and clean gently with a soft brush or cloth.
When it smells odd or seems to perform poorly
- Stop using the Kitchen Mixer, unplug it, and let it cool fully.
- Check underneath and around vents for heavy buildup of flour, sugar, or grease; clean with a slightly damp cloth and a soft brush.
- Inspect the bowl and attachments for residue or film; wash again with hot soapy water and rinse carefully.
- For stubborn grease or odors, wipe non-electrical parts with a bit of vinegar solution (about equal parts water and white vinegar), then rinse and dry.
What not to do
- Do not use steel wool or abrasive pads on coated attachments or polished bowls; they scratch and shorten the life of the finish.
- Do not immerse the Kitchen Mixer motor housing or cord in water.
- Do not use harsh solvents, bleach sprays, or oven cleaners on the Kitchen Mixer body or attachments.
- Do not run the Kitchen Mixer to “shake loose” dried batter inside; this just makes the motor work harder.
Quick checks for two common complaints
Complaint: The Kitchen Mixer seems to struggle with dough.
- Confirm you are using the dough hook, not the flat beater.
- Reduce the batch size; try about two-thirds of the flour the recipe allows to see if performance improves.
- Use a lower speed; dough kneads best at slower speeds and this reduces strain.
- Let the mixer rest briefly if the housing feels very warm.
Complaint: Ingredients are not mixing evenly.
- Check that the bowl is seated correctly and the head or bowl-lift is fully locked.
- Pause and scrape down the sides and bottom of the bowl periodically.
- Confirm you are using the appropriate attachment for the recipe (whisk vs flat beater).
- Reduce the total volume if ingredients are higher than about two-thirds of the bowl height.
Troubleshooting that gets you unstuck fast
When your Kitchen Mixer acts up, it is usually complaining about power, assembly, load, or time. Use the patterns below to narrow things down quickly.
Common symptoms, likely causes, and fixes
| Symptom | Likely cause | Fix |
|---|---|---|
| Kitchen Mixer will not turn on | Unplugged, outlet issue, or speed set incorrectly | Check plug at outlet, try another outlet with a known-good device, confirm the speed control is actually moved away from “off.” |
| Motor hums but beaters do not move | Attachment not fully clicked in or internal drive issue | Turn off and unplug; remove and firmly reattach the beaters or hook. If they still do not move, stop using and get service. |
| Kitchen Mixer shuts off during heavy mixing | Thermal protection activated from overload or long run time | Unplug, let it cool for at least 15–30 minutes, reduce batch size or thickness next time, and use lower speed. |
| Burning smell during use | Motor working too hard or ingredients jammed | Turn off, unplug, remove some dough or batter, and check for stuck objects. If the smell continues with light loads, stop and seek service. |
| Excessive wobbling or “walking” on counter | Very heavy mixture at too high a speed or unstable surface | Move the Kitchen Mixer to a more stable surface, reduce speed, and consider splitting heavy dough into smaller batches. |
| Attachments are hard to insert or remove | Dried batter on the attachment shaft or misalignment | Unplug, clean shaft and attachment ends thoroughly, then gently twist while inserting or removing until they click or release. |
| Mixture sticks to bowl bottom and does not mix in | Attachments not reaching low enough or bowl not positioned correctly | Check bowl seating and lock; pause to scrape bottom with a spatula. On some designs, adjust bowl height slightly if supported. |
| White or gray residue on attachments after washing | Mineral deposits or finish reaction from dishwasher | Wash by hand with warm soapy water, then rinse and dry thoroughly; if residue continues or coating flakes, stop using those parts. |
| Loud clicking or grinding noise | Attachment loose, foreign object in bowl, or internal gear issue | Stop immediately, unplug, check bowl for utensils or hard bits, and re-seat attachment. If noise continues, discontinue use and get service. |
| Kitchen Mixer runs but speeds do not change much | Speed control or internal electronics problem | Try cleaning around the speed control. If speeds are still nearly the same, stop using and contact a repair professional. |
| Excessive splatter from bowl | Speed too high at the start or bowl too full | Start at lowest speed, add dry ingredients gradually, and do not fill the bowl more than about two-thirds full for vigorous mixing. |
If it will not start: quick decision path
- Check that the Kitchen Mixer is plugged into a working outlet by testing another appliance in the same outlet.
- Confirm the speed dial or switch is actually moved away from “off” and seated at a specific speed, not between settings.
- Check that the head or bowl-lift mechanism is fully locked down; some Kitchen Mixer designs will not run if they are not secure.
- Feel the housing. If it is very warm and you recently used it, give it at least 15–30 minutes to cool in case of thermal protection shutoff.
- If it still does nothing after these checks, stop trying to run it and seek professional service.
When to stop and get service
Most little issues you can handle at home. The situations below are the “put the screwdriver down” signals.
- Sparks, smoke, or a strong burning insulation smell comes from the Kitchen Mixer even with light loads.
- The motor runs but attachments never move, even with attachments properly seated and the bowl correctly installed.
- The housing develops visible cracks, warping, or melted areas.
- You hear persistent grinding, metal-on-metal scraping, or loud clunking sounds from inside the Kitchen Mixer.
- Any part of the cord is frayed, cracked, or feels loose where it enters the mixer body.
- Attachments shed coating, flake metal, or show deep cracks that contact food.
- Liquid spills heavily into the motor housing through vents or seams.
Smart habits that save time
Once your Kitchen Mixer joins your routine, a few small habits can keep it easy to live with and ready to go.
Storage tips
- Store the Kitchen Mixer on the counter if you use it frequently; easy access means it actually gets used.
- Keep all attachments in a dedicated container or drawer near the mixer so you do not lose the dough hook when you need it.
- Wrap the cord loosely or use built-in cord clips to prevent sharp bends and tangles.
Using accessories wisely
- If your Kitchen Mixer has a splash guard, use it for flour-heavy recipes or when adding powdered sugar. It reduces cleanup time dramatically.
- Chill bowls and whisks when whipping cream or egg whites for faster, more stable results.
- For sticky mixtures, lightly oil or spray the dough hook or beater before use to help dough release more easily.
Habits that reduce mess and improve consistency
- Add dry ingredients gradually with the mixer at low speed to keep flour clouds away from your countertops.
- Use the same bowl placement and speed settings for your favorite recipes and note what works, so you can repeat good results.
- Scrape the bowl at least once mid-mix for thicker batters to avoid pockets of dry ingredients hiding at the bottom.
Quick FAQ
Can I knead all my bread dough in the Kitchen Mixer?
Yes, as long as you use the dough hook, keep speeds on the lower side, and stay within a reasonable batch size so the motor does not strain or overheat.
Why does my Kitchen Mixer smell a little “new” the first few times?
A faint odor at first use is often just new motor parts warming up. It should fade quickly; if it becomes strong or burning, stop and investigate.
Is it okay to wash attachments in the dishwasher?
Many bowls and some attachments are dishwasher-safe, but coatings and finishes last longer with hand washing. If a part shows dulling, chalky residue, or flaking, switch to hand washing and discontinue use of any damaged part.
Which attachment should I use for general baking?
The flat beater (sometimes called a paddle) is the everyday workhorse for cake batters, cookie doughs, frostings, and mashed potatoes.
Why are my egg whites not whipping up?
Even a small amount of fat or yolk in the whites or on the bowl can ruin volume. Use a perfectly clean, dry bowl and whisk, and separate eggs carefully.
Can I use my Kitchen Mixer for very small batches?
If the mixture does not reach the attachment, it will not mix well. For very small amounts, use a smaller bowl if compatible, or mix by hand to avoid overworking the mixer for no gain.
How long can I run the Kitchen Mixer continuously?
For light batters at moderate speeds, several minutes of continuous use is usually fine. For heavy doughs, keep kneading sessions shorter and give the mixer a rest if the housing starts to feel hot.
My Kitchen Mixer is louder than I expected. Is that normal?
Some noise and a change in sound with different loads are normal. Sudden new grinding, clicking, or scraping sounds are not; if you hear those, stop and inspect before continuing.
Can I leave the Kitchen Mixer plugged in all the time?
You can, but unplugging when not in use is safer and eliminates accidental bumps of the speed control starting the mixer unexpectedly.
How do I avoid overmixing baked goods?
Once flour is added to batters, keep speeds lower and mix just until everything is combined, then stop and check. If the texture looks smooth and even, the Kitchen Mixer has done enough.
Your Kitchen Mixer is meant to make life easier, not more complicated. With a few of these habits and tips, it should quietly become the extra pair of hands you wish you had on busy days.
Discover More
- Air Conditioner
- Air Fryer
- Air Purifier
- Automatic Soap Dispenser
- Barbecue Grill
- Beverage Cooler
- Beverage Dispenser
- Beverage Fridge
- Blender
- Boiler
- Bread Maker
- Bread Slicer
- Bread Toaster Oven
- Can Opener
- Carpet Cleaner
- Ceiling Fan
- Ceiling Heater
- Ceiling Mounted Heater
- Ceiling Mounted Vent Fan
- Central Vacuum
- Charcoal Grill
- Citrus Juicer
- Clothes Dryer
- Clothes Steamer
- Coffee Grinder
