Meat Grinder Owner’s Guide: Practical Help From Your Helpful Appliance Coach
Quick start you can finish fast
Your new Meat Grinder looks ready to work hard right away, but give it a short “spa day” first. This prevents metal shavings, packing dust, and odd flavors from joining tonight’s dinner.
Fast setup checklist
- Place the Meat Grinder on a stable, dry, non-slip surface with good lighting.
- Unplug it before doing anything else with the parts.
- Disassemble the food-contact parts: tray, feed tube, auger (screw), blade, grinding plate, locking ring, and food pusher.
- Wash removable parts in warm, soapy water, rinse well, and dry completely with a towel to prevent rust.
- Wipe the main body and motor housing with a slightly damp cloth; do not immerse it in water.
- Lightly oil the blade and plates with a food‑safe mineral oil or a thin coat of cooking oil if they are carbon steel.
- Reassemble the Meat Grinder carefully, making sure the blade faces flat side toward the plate.
First “empty” run
An empty run helps seat parts and confirm everything is aligned.
- Plug in the Meat Grinder.
- Run it for about 10–20 seconds with no food.
- Listen for smooth, even sound. Any grinding, clanking, or strong burning smell means you should stop and recheck assembly.
Simple first-use example: grinding beef for burgers
Here is a straightforward first project that lets you test the Meat Grinder under normal load.
- Chill trimmed beef cubes and the grinding parts in the fridge for about 20–30 minutes. Colder meat grinds more cleanly.
- Cut meat into small chunks roughly 2–3 cm wide so they fit easily in the feed tube.
- Turn on the Meat Grinder.
- Feed meat gently using the food pusher, not your hands or utensils.
- Let the grinder pull the meat in at its own pace; do not force it.
- When done, turn it off, unplug, and perform a quick clean so fat does not harden inside.
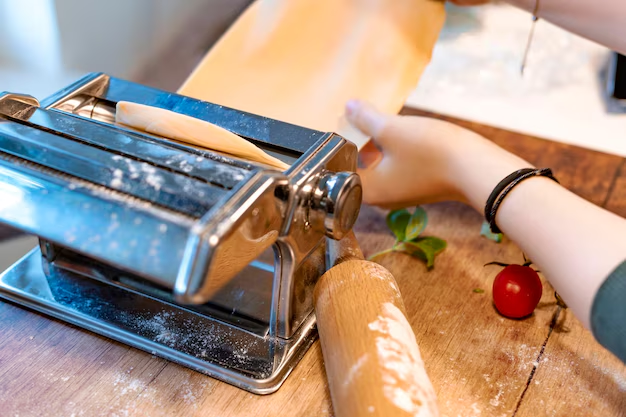
Know your parts without guessing
Most units have
- Motor housing / base – Contains the motor and controls. This is the “no water” zone.
- On / Off (and possibly Reverse) switch – Starts, stops, and reverses the auger to clear jams.
- Feed tube / neck – The vertical or angled tube where you insert meat.
- Food tray – Sits on top of the feed tube to hold meat pieces before grinding.
- Auger (screw) – The spiral piece that pulls meat from the feed tube toward the blade.
- Blade / cutting knife – Cross‑shaped cutter that slices meat before pushing it through the plate.
- Grinding plate / disc – Perforated metal disc that sets the grind size (fine, medium, coarse).
- Locking ring / retaining cap – Holds the blade and plate firmly against the auger.
- Food pusher – Safe tool for pressing meat into the feed tube.
Some units have
- Multiple grinding plates – Different hole sizes for sausages, burgers, or coarse chili meat.
- Sausage stuffing tubes – Hollow tubes that attach to the grinder front for filling sausage casings.
- Kubbe or specialty attachments – Shaped parts for regional dishes or hollow tubes of meat.
- Overload reset button – A safety reset if the Meat Grinder shuts off from overheating or overload.
- Clamp or suction base (manual units) – Fixes a hand‑crank Meat Grinder securely to the counter.
Safety that actually prevents problems
- Always unplug the Meat Grinder before assembling, disassembling, or cleaning. This keeps moving parts from surprising you.
- Use only the food pusher to feed meat; never hands, utensils, or other tools. Fingers and metal blades do not mix well.
- Keep loose clothing, jewelry, and long hair away from the feed tube and moving parts.
- Do not run the Meat Grinder continuously for very long stretches; strong motors still need short breaks to cool.
- Cut meat into chunks that easily fit the feed tube; oversized pieces can stall or strain the motor.
- Remove bones, hard gristle, and large sinews; these can chip blades, jam plates, and damage gears.
- Never grind frozen‑solid meat; lightly frozen on the surface is fine, but rock‑hard blocks can crack parts.
- Do not use the Meat Grinder on wet or unstable surfaces to avoid tipping, slipping, or electrical issues.
- Keep the motor housing dry and away from sinks; water inside the housing can cause electrical faults.
- Stop immediately if you hear grinding, clanking, or smell strong burning. Persistent noise or odor means something is wrong.
Daily use for better results
Think of a smooth session with your Meat Grinder as a simple routine: prep meat, assemble correctly, grind in relaxed batches, then clean before anything dries on.
- Pre‑chill meat, grinder parts, and collection bowls in the fridge for cleaner cuts.
- Trim excess sinew, silverskin, and large chunks of fat; leave some fat for flavor, but avoid thick rubbery strips.
- Set up a clean “in” tray for meat and a separate clean “out” bowl for ground meat.
- Assemble the Meat Grinder with the desired plate and ensure the locking ring is hand‑tight and fully seated.
- Plug in and run the grinder briefly to ensure smooth operation before adding meat.
- Feed small amounts at a time with the food pusher, letting the auger pull meat in at its own pace.
- If the Meat Grinder starts to slow, stop adding meat instead of forcing more in; let it clear.
- Use the reverse function in short bursts if your unit has it and you sense a jam starting.
- For very fine texture, pass meat through the grinder a second time using a finer plate.
- When finished, grind a small piece of bread or a few vegetable scraps to help push out lingering meat, then unplug and clean.
Common grinding tasks and starting guidance
| Task / Food | Typical plate choice | Process notes & finish cues | Common mistakes |
|---|---|---|---|
| Burgers (beef) | Medium plate (about 4–5 mm holes) | Meat should extrude in distinct strands that hold together but are not paste‑like. | Pushing too hard, causing smearing and tough burgers. |
| Meatballs / meatloaf | Fine or medium plate | Look for even, soft crumbles that mix smoothly with breadcrumbs and seasonings. | Using very lean meat and then overworking the mixture until dense. |
| Sausage grinding | Coarse or medium plate | Meat and fat should stay distinct; visible bits of fat, not smeared layers. | Warm meat, which smears fat and leads to crumbly sausages. |
| Sausage stuffing | Special plate or no‑cut plate with stuffing tube | Casings should fill evenly without tearing; steady flow through tube. | Overfilling casings or running the auger too fast. |
| Chili or stew meat | Coarse plate | Chunks should be clearly defined and chewy, not mushy. | Using a fine plate and then simmering too long into paste. |
| Chicken or turkey | Fine or medium plate | Remove skin or use sparingly; ground poultry should be uniform, pale, and moist. | Leaving lots of sinew and skin, leading to long stringy pieces and jams. |
| Fish cakes / patties | Fine plate | Delicate mixture that forms patties but is not gluey. | Over‑processing soft fish into puree. |
| Breadcrumbs | Medium plate | Dry bread should pass easily and break into small, fluffy pieces. | Using very fresh, soft bread that gums up the plate. |
Cleaning and maintenance that doesn’t ruin parts
After each use
- Unplug the Meat Grinder before touching parts.
- Disassemble the tray, feed tube (if removable), auger, blade, plate, and locking ring.
- Scrape off heavy residue with a spatula or paper towel; avoid metal scouring pads on coated or polished surfaces.
- Wash removable parts in warm, mildly soapy water; use a small brush for plate holes.
- Rinse thoroughly and dry completely to prevent rust spots.
- Wipe the motor housing with a damp cloth and then dry; keep moisture away from vents and switches.
- Lightly oil carbon steel blades and plates before storing.
Weekly or frequent-use care
- Inspect blades and plates for dull edges, deep scratches, or rust. Replace if badly worn or pitted.
- Check the power cord for cracks or loose connections at the plug.
- Ensure all screws, clamps, or mounting brackets on manual units are snug.
When it smells weird or performs poorly
- If you notice a stale, rancid, or “old meat” odor, fully disassemble and soak non‑motor parts in hot, soapy water, then rinse and dry well.
- For lingering odors, wipe parts (not the motor) with a weak vinegar solution, rinse, and dry.
- If you smell a strong burning or electrical odor, stop using the Meat Grinder immediately and unplug it; continuing can damage the motor.
- If grinding slows dramatically, check for dull blades or clogged plate holes and clean or replace as needed.
What not to do
- Do not immerse the motor housing of an electric Meat Grinder in water or put it in a dishwasher.
- Do not use harsh abrasives or steel wool on blades and plates; they can remove protective finishes or create rust‑prone scratches.
- Do not store parts while still damp; trapped moisture encourages rust and odors.
- Do not run the Meat Grinder empty for long periods; short test runs are fine, but extended dry running can add unnecessary wear.
Quick maintenance checklists for two common complaints
Complaint: The Meat Grinder is grinding slowly.
- Verify the blade is installed correctly with the sharp side toward the plate.
- Check for clogged plate holes and clean thoroughly.
- Inspect the blade and plate for dullness; sharpen or replace if edges feel rounded.
- Make sure meat and parts are properly chilled before grinding.
Complaint: The Meat Grinder leaves a lot of meat inside after use.
- End each session by feeding a slice of bread to push out remaining meat.
- Confirm the plate and blade are tight against each other; gaps trap more meat.
- Use appropriately sized chunks so the auger can push consistently.
Troubleshooting that gets you unstuck fast
Common issues at a glance
| Symptom | Likely cause | Fix |
|---|---|---|
| Grinder will not turn on | Unplugged, faulty outlet, or safety switch not engaged | Check plug and outlet with another device; ensure the attachment head is fully locked so safety interlocks engage. |
| Motor hums but auger does not turn | Severe jam or stripped internal gear | Unplug, disassemble, remove trapped meat or sinew; if auger still will not turn freely by hand, seek service. |
| Very slow grinding | Dull blade, clogged plate, or warm meat | Clean plate, sharpen or replace blade and plate, and chill meat and parts. |
| Meat comes out mushy | Blade installed backward or plate not tight | Reinstall blade with sharp side toward plate and tighten locking ring firmly by hand. |
| Frequent jams | Too much sinew, skin, or gristle; overloading feed tube | Trim meat more thoroughly; feed smaller amounts at a time; use reverse briefly if available. |
| Clicking or grinding noise from front | Parts cross‑threaded or plate not seated flat | Unplug, disassemble, reassemble carefully, ensuring everything sits flush before tightening. |
| Burning smell during use | Overloading, running too long without breaks, or internal motor issue | Stop immediately, let cool fully, reduce batch size; if smell returns quickly, stop using and get service. |
| Rust spots on blade or plate | Parts stored damp or not oiled | Remove light rust with fine non‑metallic scrub, dry completely, and apply thin food‑safe oil. |
| Meat leaks from side of head | Locking ring loose or gasket missing/damaged (if present) | Tighten ring hand‑firm; inspect and replace any seals or gaskets that are worn. |
| Sausage casings bursting | Filling too fast or casings overfilled | Reduce auger speed if possible, use less back‑pressure on casings, and leave some slack for tying. |
| Ground meat has metal shavings | Severely worn or damaged parts rubbing | Stop use immediately, discard affected meat, inspect parts, and replace damaged components before further use. |
Mini decision path: If the Meat Grinder will not start
- Check that the Meat Grinder is firmly plugged into a working outlet; test the outlet with another appliance.
- Confirm any power switch is fully in the On position.
- Verify that the head, auger, blade, plate, and locking ring are properly assembled and locked; some units will not run if not aligned.
- If there is an overload reset button, unplug, let the unit cool for at least 15–20 minutes, then press the reset and try again.
- If the Meat Grinder still will not start, stop troubleshooting at home and seek professional service.
Mini decision path: If the Meat Grinder keeps jamming
- Pause and unplug before touching any parts.
- Disassemble the front and remove sinew, skin, or tough bits wrapped around the blade and auger.
- Reassemble, then try smaller, better‑trimmed pieces of meat.
- Use short pulses of reverse if your unit has that feature rather than forcing food through.
When to stop and get service
Your Meat Grinder is tough, but there are times to retire the toolbox and call in a professional.
- Any sign of melted plastic, smoke, or strong electrical burning smell from the motor housing.
- Motor fails to start even after checking the outlet, assembly, and any overload reset.
- Auger does not turn freely by hand when disassembled and cleaned.
- Visible cracks in the motor housing or feed tube, especially around mounting points.
- Exposed wiring, damaged plug, or insulation missing on the cord.
- Grinding produces consistent metal flakes or shavings even after replacing blade and plate.
- Unusual loud knocking, clanking, or vibration that persists after careful reassembly.
Smart habits that save time
Storage tips
- Store the Meat Grinder in a dry place; moisture is the enemy of steel parts.
- Keep blades and plates lightly oiled and wrapped in paper or cloth to reduce rust risk.
- Consider storing smaller parts in a labeled container or bag so nothing goes missing between uses.
- If space allows, keep a tray or bin just for your Meat Grinder and its attachments so setup is quick.
Using accessories wisely
- When using sausage stuffing tubes, keep meat coarsely ground and well‑chilled so it flows without smearing.
- If you use plastic funnels or aftermarket attachments, ensure they are rated as food‑safe and fit securely.
- A small, dedicated cleaning brush for plate holes will save time and protect your fingertips.
Habits that reduce mess and improve results
- Lay a washable mat or tray under the Meat Grinder to catch small drips and stray bits of meat.
- Grind into wide, shallow bowls; they are easier to scrape out and spill‑resistant.
- Plan grinding sessions in batches: grind several portions at once, then label and freeze in flat packs.
- Chill or briefly freeze ground meat on a tray before forming patties or stuffing; it holds shape better and is easier to handle.
Quick FAQ
Can I grind bones in my Meat Grinder?
Most household Meat Grinder units are not designed for hard bones. Small, soft poultry bones might pass through sturdier units, but they still increase wear and risk jams. For routine bone grinding, a heavy‑duty, purpose‑built machine is recommended.
Should the meat be frozen or fresh when grinding?
Use meat that is cold but not frozen solid. Slightly firm from the fridge or briefly chilled in the freezer works best; fully frozen blocks can damage the auger or motor.
How often should I sharpen or replace the blade and plate?
For occasional home use, many people sharpen or replace them after every several dozen grinding sessions. If you notice smearing, extra effort, or slow output, that is your cue to sharpen or replace.
Is it safe to wash parts in the dishwasher?
Some stainless parts tolerate the dishwasher, but high heat and detergents can dull or discolor carbon steel and encourage rust. Hand washing and thorough drying are usually safer for Meat Grinder longevity.
Why does my ground meat look gray or smeared?
This usually means the blade is dull, installed backward, or the meat was too warm. Check blade orientation, sharpen or replace, and grind colder meat.
Can I grind vegetables or cheese in the Meat Grinder?
Many vegetables and firm cheeses can be processed, but they can be wetter or stickier than meat. Cut into small pieces, avoid very soft or stringy vegetables that wrap around the auger, and clean thoroughly afterward.
Is it okay to run bread through the Meat Grinder?
Yes. Running dry bread at the end is a common way to push out remaining meat and fat. It also makes handy breadcrumbs.
How long can I run the Meat Grinder continuously?
Short sessions of about 5–10 minutes with brief cooling breaks are typical for household electric units. If the housing feels very hot or the motor sounds strained, stop and let it cool.
Do I really need to oil the blade and plate?
If they are carbon steel, a light coat of food‑safe oil before storage helps prevent rust. Stainless parts benefit less but can still be lightly oiled if you live in a humid climate.
Why is there still meat inside after I “finish” grinding?
Some meat remains between the auger, blade, and plate by design. Grinding a piece of bread at the end pushes most of it out, reducing waste and making cleaning easier.
Can I use my Meat Grinder to make pet food?
Yes, as long as you handle ingredients safely, keep raw and cooked foods separate, and clean the Meat Grinder thoroughly after each batch. Avoid hard bones unless your grinder is specifically built for them.
If you treat your Meat Grinder like a sharp, hardworking helper—kept clean, cool, and correctly assembled—it will pay you back with years of reliable, stress‑free grinding.
Discover More
- Air Conditioner
- Air Fryer
- Air Purifier
- Automatic Soap Dispenser
- Barbecue Grill
- Beverage Cooler
- Beverage Dispenser
- Beverage Fridge
- Blender
- Boiler
- Bread Maker
- Bread Slicer
- Bread Toaster Oven
- Can Opener
- Carpet Cleaner
- Ceiling Fan
- Ceiling Heater
- Ceiling Mounted Heater
- Ceiling Mounted Vent Fan
- Central Vacuum
- Charcoal Grill
- Citrus Juicer
- Clothes Dryer
- Clothes Steamer
- Coffee Grinder
