Outdoor Heater Owner’s Guide: Practical Help For Cozy Evenings
Quick start you can finish fast
You finally brought the Outdoor Heater home and you’d like warmth, not a puzzle. Here’s the fast track.
- Place the Outdoor Heater on a stable, level, non-combustible surface, with at least about 3 ft of clearance on all sides and above.
- Keep it outdoors only, away from overhangs, doors, trees, and anything that can melt or scorch.
- Remove packaging, tags, and any protective films from panels or reflectors.
- Wipe exterior metal parts with a slightly damp cloth, then dry. Do not soak any powered or gas components.
- For gas models: check that all gas connections are hand-tight, the hose shows no cracks, and the cylinder valve is closed for now.
- For electric models: plug the Outdoor Heater directly into a suitable outdoor-rated outlet, not an indoor extension cord.
First “empty run” warm-up
This helps burn off factory oils and lets you learn the controls before guests arrive.
- Make sure the area around the Outdoor Heater is clear and no one is sitting too close.
- Turn the control to low or the lowest heat setting, then ignite or switch on according to the control layout.
- Let it run on low for about 10–15 minutes.
- You may notice a slight smell the first time; this should fade. If it smells harsh or smoke appears, turn it off and let it cool while you inspect for leftover packing material.
First-use example: gentle patio warm-up
Use this as a starter routine for a mild evening on a small patio.
- Set the Outdoor Heater to a medium setting or roughly the mid-point on the heat dial.
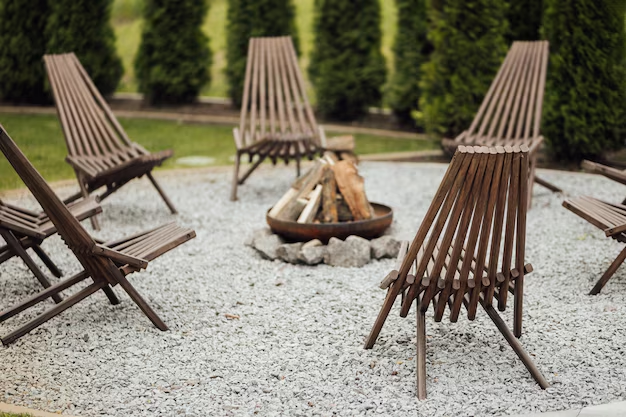
- Position chairs about 3–6 ft away, directly in the main heat pattern (usually in front of or around the heater, not behind the post).
- Allow about 5–10 minutes for the Outdoor Heater to warm up the space.
- If it feels too warm, step back or turn the control down slightly; if it feels too cool, edge the dial up in small bumps.
Know your parts without guessing
Most units have
- Base or stand – Keeps the Outdoor Heater stable. A heavier base reduces tip risk in windy conditions.
- Support pole or body – Connects the base to the burner or heating head and often hides gas hoses or electrical wiring.
- Burner or heating element – The actual source of heat. Gas burners produce a visible flame; electric elements glow.
- Heat reflector or head – Directs heat toward your seating area rather than straight up into the sky.
- Control knob or panel – Lets you adjust heat level, turn the Outdoor Heater on or off, and on some units trigger ignition.
- Ignition button or switch – On gas models, creates the spark to light the burner; on electric models, powers the unit.
- Gas hose or power cord – Supplies fuel or electricity. These need to stay intact, untwisted, and away from high heat.
Some units have
- Tip-over safety switch – Shuts the Outdoor Heater off if it’s tilted or knocked, reducing hazard if it gets bumped or blown over.
- Thermostat or heat level display – Shows an approximate heat setting or temperature to fine-tune comfort.
- Wheels on the base – Make it simpler to roll the Outdoor Heater around instead of dragging or lifting.
- Protective guard or mesh – Provides a barrier between you and the hottest surfaces, but still treat it as very hot.
- Remote or simple timer – On some electric units, allows control from a distance or sets auto shut-off after a period.
- Rain cap or weather cover – Helps protect the top and burner area from direct rain and debris when not in use.
Safety that actually prevents problems
- Only use your Outdoor Heater outdoors in open air, never in enclosed patios, garages, or tents, to prevent dangerous buildup of exhaust gases.
- Keep at least about 3 ft of space around and above the Outdoor Heater clear of furniture, curtains, plants, and decorations to avoid overheating nearby items.
- Place the Outdoor Heater on a firm, level, non-flammable surface so it cannot wobble or tip easily.
- Do not move or tilt the Outdoor Heater while it is operating or still hot; wait for a full cool-down first.
- Keep children and pets from touching or playing near the heater; surfaces can remain hot well after shut-off.
- Check for gas leaks on gas units using soapy water on connections, never an open flame, any time you reconnect or change the cylinder.
- Use only the correct type of gas cylinder or electrical outlet stated on the unit’s ratings label to avoid overloading or faulty operation.
- Do not cover the Outdoor Heater while it is on or still hot; covers are for cool, stored units only.
- Unplug electric heaters and close the gas valve on gas heaters after each use, not just turn the control knob off.
- Keep the area around the base clear of leaves, paper, and other debris so they cannot catch or smolder against hot surfaces.
- If you smell strong gas near a gas Outdoor Heater, close the cylinder valve if safe to do so, move away, and ventilate the area before trying again.
Daily use for better results
Running your Outdoor Heater smoothly is mostly about a simple routine and small adjustments.
- Before each use, give the heater a quick visual check for wobbling, loose panels, or damaged hoses/cords.
- Clear the area of flammable items: cushions pressed against the pole, hanging fabrics, umbrellas too close to the top, and clutter around the base.
- Position seating so people are within the main heat zone, usually 3–8 ft away, not pressed right against the heater.
- Open the gas cylinder valve slowly for gas models, or plug in and ensure the outlet is protected and dry for electric models.
- Ignite or switch on at the lowest heat setting first, then increase gradually until comfortable warmth is reached.
- Check in after about 5–10 minutes and tweak the control slightly; large jumps usually lead to too-hot or too-cold swings.
- During use, glance at the flame or glowing element now and then; it should be steady and even, not sputtering or going out.
- When finished, turn the control to off, then close the gas valve or unplug the unit. Let everything cool completely before covering or moving.
Typical uses and starting settings
| Use / Situation | Starting setting or range | How to know it’s “just right” | Common mistakes |
|---|---|---|---|
| Cool evening on a small patio (up to about 120 sq ft) | Low to medium heat | Comfortable warmth at about 4–6 ft away, no one feels “blasted” on one side | Crowding too close, then turning heat down so far the rest of the patio feels cold |
| Chilly evening on a larger deck | Medium to medium-high heat | People can sit at 6–8 ft and still feel a noticeable warmth | Expecting a single Outdoor Heater to warm a very large open space |
| Spot warming a work area (grill station, outdoor bar) | Medium focused toward the work zone | Front of the body warm without overheating your back or head | Pointing the heater at tools or bottles that can be damaged by heat |
| Short “take the chill off” sessions | Medium for about 10–15 minutes | Air near the seating feels less sharp; people stop hunching shoulders | Cranking to maximum for very short periods, which wastes fuel and can overheat nearby items |
| Windy conditions | Increase one small notch higher than normal | You can still feel warmth through light breeze at normal distance | Running the unit in strong winds where it can tip or the flame keeps going out |
Cleaning and maintenance that doesn’t ruin parts
After each use
- Let the Outdoor Heater cool fully; surfaces that look safe can stay hot for 20–30 minutes.
- Wipe exterior metal and painted surfaces with a soft, slightly damp cloth to remove dust, pollen, and light soot.
- Brush away leaves or debris from around the base and vents with a soft brush.
- Cover the Outdoor Heater only when it is completely cool and dry.
Weekly or regular use cleaning
- Check burner ports or heating element for buildup. Use a soft brush or compressed air to clear dust, insects, or cobwebs.
- Inspect the gas hose or power cord from end to end for kinks, wear, or cracking. Replace if any damage appears.
- Confirm all screws and bolts on the base and pole are snug so the Outdoor Heater does not wobble.
- Clean reflectors and guards with a non-abrasive cloth and mild, non-corrosive cleaner, then dry fully.
When it smells strange or performs poorly
- Turn the Outdoor Heater off, shut the gas or unplug, and allow a full cool-down.
- Check burner or element for soot, black spots, or uneven coloring; gently clean these areas.
- Look for blockages from dust, spider webs, or insects in air inlets and burner openings.
- Verify clearance around the heater; crowding can trap heat and affect performance.
- If flames are yellow or sooty on a gas unit after cleaning and clearing, stop use and arrange for service.
What not to do
- Do not use harsh abrasives, steel wool, or stiff wire brushes on reflectors, burners, or painted surfaces; they can scratch and speed up corrosion.
- Do not spray water directly into burners, ignition areas, switches, or electrical components.
- Do not use household oven cleaners or strong solvents on the Outdoor Heater; they can damage coatings.
- Do not tape or wrap cords and hoses tightly to the hot body or pole; heat can damage them over time.
Common maintenance complaints: quick checks
| Complaint | Quick check list |
|---|---|
| “It doesn’t seem as hot as it used to.” |
|
| “The flame looks odd or patchy.” (gas) |
|
Troubleshooting that gets you unstuck fast
Use this section when your Outdoor Heater seems to have “feelings.” It doesn’t — it just needs a bit of targeted attention.
| Symptom | Likely cause | Fix |
|---|---|---|
| Outdoor Heater will not turn on or ignite | No power, empty gas cylinder, or main valve closed | Check outlet or power, confirm gas cylinder has fuel, and open the main valve slowly before trying again. |
| Igniter clicks but there is no flame (gas) | Gas not reaching burner or igniter misaligned | Verify gas valve is open, hose is not kinked, and burner control is set to ignite. Inspect igniter tip position and gently adjust if obviously out of place. |
| Flame lights but goes out after a few seconds | Thermocouple or safety sensor not being heated correctly, or strong wind | Shelter from wind, ensure flame directly contacts the sensor, and allow a few seconds holding the control in the start position if required. |
| Flame is yellow and sooty (gas) | Insufficient air mixing or blocked burner ports | Turn off the Outdoor Heater, let it cool, clean burner ports, and clear any debris around air inlets. |
| Electric Outdoor Heater trips breaker | Circuit overloaded or moisture in plug/outlet | Use a dedicated outdoor-rated outlet, unplug other heavy loads, and make sure plug and outlet are dry before resetting breaker. |
| Heater feels weak even on high | Too much distance, wind, or low power/gas flow | Move seating slightly closer, reduce exposure to wind, check gas level or try a different outlet on a separate circuit. |
| Outdoor Heater wobbles or feels unstable | Loose base bolts, uneven surface, or missing weights | Retighten all fasteners, relocate to a flat surface, and reinstall any base weights or sand/ballast if your model uses them. |
| Burning or melting smell during use | Debris or items too close to hot surfaces | Turn off, cool, then remove anything touching or too close to the heater; clear any leaves, plastic, or décor from reflectors and guards. |
| Outdoor Heater hums or buzzes (electric) | Normal transformer noise or loose mounting hardware | Tighten mounting screws and brackets. A soft, steady hum is usually normal; sudden loud or irregular noise is not. |
| Outdoor Heater shuts off when bumped or tilted | Tip-over safety switch activating | Confirm the unit stands level and is not being nudged. If it shuts off while fully upright and steady, the safety switch might be faulty and needs service. |
| Condensation or rust spots starting to appear | Stored outside uncovered or in damp conditions | Clean and dry surfaces, then use a protective cover when cool. Light surface rust can often be gently polished away and touched up. |
If it will not start: a quick decision path
- Check power or fuel: confirm plug is firmly seated, breaker is not tripped, or gas cylinder has fuel and its valve is open.
- Check controls: make sure the control knob is in the correct start/ignite position and any safety switch is not locked out.
- Check safety status: ensure the Outdoor Heater is upright, on level ground, and not heavily shaken or recently tipped.
- Allow a rest: if you have tried repeated starts, wait a few minutes with gas off or unit unplugged, then try again calmly.
- If the Outdoor Heater still refuses to cooperate after these checks, stop and arrange professional service.
When to stop and get service
There are times when persistence is not your friend. In these situations, pause and get a qualified technician involved.
- Any smell of gas that does not quickly disappear after closing the cylinder valve and airing out the area.
- Visible damage to the gas hose, regulator, power cord, plug, or switches.
- Burner flames coming out from unexpected places, such as sides of the pole or under the base.
- Repeated breaker trips or visible sparking on an electric Outdoor Heater.
- Structural damage: bent support pole, cracked base, loose or missing critical hardware that cannot be tightened.
- Safety devices defeated or failed, such as a tip-over switch that no longer allows the unit to stay on upright.
- Persistent unusual noises, strong smoke, or burning smells after a careful cleaning and inspection.
Smart habits that save time
- Keep a soft brush and microfiber cloth stored near where you keep the Outdoor Heater so quick cleaning becomes automatic.
- Use a fitted, breathable cover once the Outdoor Heater is cool and dry to reduce dust, bird droppings, and weather wear.
- Roll or carry the unit into a more sheltered spot between uses if you expect strong winds or storms.
- Group your seating in a consistent pattern, so you can quickly set the same comfortable heat level each time.
- Check gas level or power needs before hosting guests; a mid-evening fuel run is rarely part of anyone’s ideal plan.
- At the start of each season, do a slower, top-to-bottom inspection and cleaning so daily use stays easy.
Quick FAQ
Can I use my Outdoor Heater in a garage or covered porch?
Use it only in open-air spaces. Even covered porches need wide open sides and plenty of ventilation, and fully enclosed areas like garages are not appropriate.
How far should furniture be from the Outdoor Heater?
Keep at least about 3 ft of clearance from all sides and above. Aim for seating at roughly 3–8 ft away depending on the heater’s power and your comfort.
How long does it take to feel warm?
Most Outdoor Heater units begin to feel effective within about 5–10 minutes. Larger spaces or wind can stretch that a bit.
Why does the first use have a smell?
Light odor during the first run is often from manufacturing oils or dust burning off. It should fade quickly; if you see smoke or strong chemical smells persist, turn the unit off and inspect.
Can I leave the Outdoor Heater outside all year?
Yes, as long as it is designed for outdoor use, but you will get better life by using a cover and moving it to a more sheltered spot during harsh weather.
Is it okay to use an extension cord with an electric Outdoor Heater?
Use only heavy-duty, outdoor-rated extension cords of the correct gauge, and keep them as short as practical. Whenever possible, plug directly into a suitable outdoor outlet.
How do I know when my gas cylinder needs replacing?
Lower heat output and a flame that weakens at higher settings are common signs. You can also weigh the cylinder and compare with its stamped tare (empty) weight if you want to be more exact.
Do I need to turn off the gas cylinder every time?
Yes. Turn the heater control to off, then close the cylinder valve fully after each use. This is a key habit for safe gas Outdoor Heater operation.
Can I repaint rusty spots?
Light surface rust can often be gently sanded and touched up with high-temperature outdoor paint, away from burner ports and labels. If rust affects structural strength, stop using the heater and get it checked.
Why does my Outdoor Heater keep shutting off in the wind?
Wind can blow out the flame or affect safety sensors. Try relocating it to a more sheltered area, while still keeping all required clearances.
How hot do the surfaces get?
Very hot. Surfaces near the burner and reflector can burn on contact, and guards are only partial protection. Always let the Outdoor Heater cool completely before touching, cleaning, or covering.
Your Outdoor Heater should make your outdoor space more comfortable, not more complicated. With these habits and quick checks, you’ll spend far more time relaxing in the warmth than fiddling with controls.
Discover More
- Air Conditioner
- Air Fryer
- Air Purifier
- Automatic Soap Dispenser
- Barbecue Grill
- Beverage Cooler
- Beverage Dispenser
- Beverage Fridge
- Blender
- Boiler
- Bread Maker
- Bread Slicer
- Bread Toaster Oven
- Can Opener
- Carpet Cleaner
- Ceiling Fan
- Ceiling Heater
- Ceiling Mounted Heater
- Ceiling Mounted Vent Fan
- Central Vacuum
- Charcoal Grill
- Citrus Juicer
- Clothes Dryer
- Clothes Steamer
- Coffee Grinder
