Pressure Cooker Owner’s Help Guide: From Box To Confident Cooking
Quick start you can finish fast
Your Pressure Cooker looks a little intense, but once you learn its rhythm, it’s more dependable than most weeknight plans.
First things to do before cooking
- Remove all packaging from the Pressure Cooker, including cardboard or plastic around the inner pot and lid.
- Take out loose parts: inner pot, steaming rack or trivet, measuring cup, spoon, and any extra accessories.
- Wash the inner pot, lid, silicone sealing ring, and accessories in warm soapy water, then rinse and dry.
- Wipe the outer housing and heating plate gently with a soft, damp cloth; keep water out of the electronics.
- Check the lid: make sure the sealing ring is fully seated in its groove and the float valve and steam release parts move freely.
- Place the inner pot back into the Pressure Cooker, making sure it sits flat on the heating plate.
Simple first-use “water test”
This quick empty run reassures you that your Pressure Cooker can build and release pressure correctly before you trust it with dinner.
- Pour about 2–3 cups of water into the inner pot, staying above the minimum fill line and well below the maximum.
- Close the lid and set the steam release to the sealed position.
- Select a manual or pressure-cook setting at high pressure, with a time between 5–10 minutes.
- Wait for the Pressure Cooker to come to pressure; the float or indicator will rise when it’s sealed.
- When the cooking time ends, let it sit for about 5–10 minutes, then carefully move the steam release to vent for a quick release.
- Once pressure is fully released and the float drops, open the lid away from your face and discard the water.
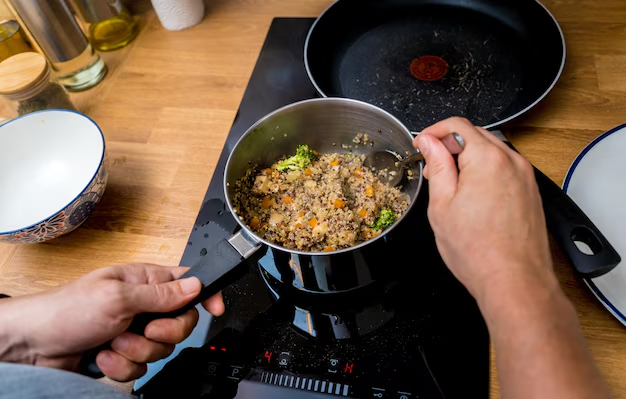
First simple food to build confidence: white rice
Rice is a kind first lesson: it shows you how pressure timing works and gives you a win in a small bowl.
- Rinse 1 cup of white rice until the water runs mostly clear.
- Add the rice and 1–1.25 cups of water to the inner pot with a pinch of salt if you like.
- Close the lid, set the steam release to sealed, and choose a rice program if you have one, or high pressure for 4–8 minutes.
- Let the Pressure Cooker naturally release pressure for 5–10 minutes after cooking, then vent any remaining pressure.
- Open the lid, fluff the rice with a fork, and let it stand for a couple of minutes to finish absorbing steam.
Know your parts without guessing
Most units have
- Outer housing – Contains the heating element and controls; keep this dry and clean on the outside only.
- Inner pot – Removable metal pot that holds food and liquid; usually stainless or nonstick.
- Lid – Locks during pressure cooking and holds valves and seals; correct alignment is essential for pressure.
- Silicone sealing ring – Flexible ring inside the lid that makes an airtight seal; worn or misseated rings cause leaks.
- Steam release handle or valve – Lets you switch between sealed and venting; directs steam during release.
- Float valve / pressure indicator – Small pin that rises when under pressure and drops when safe to open.
- Control panel – Buttons or dial for choosing pressure level, time, and preset programs.
- Condensation cup or drip catcher – Small container on the side or back to collect excess moisture.
Some units have
- Steaming rack or trivet – Holds food above the liquid for steaming or pot-in-pot cooking.
- Secondary lid for non-pressure modes – Used for slow cooking or sautéing without sealing pressure.
- Nonstick-coated inner pot – Easier to clean but needs gentler utensils and cleaning methods.
- Preset program buttons – Labeled for foods like beans, soup, meat, or yogurt, but still adjustable.
- Removable anti-block shield – A small cover near the steam vent that prevents foam or food bits from blocking the vent.
Safety that actually prevents problems
- Never force the lid open. If it resists, pressure is still present; wait for the float to drop and steam to stop.
- Always have liquid in the inner pot when using pressure; most recipes need at least 1–1.5 cups of thin liquid.
- Stay below the maximum fill line, and for foamy foods like beans or grains, stay below about two-thirds full.
- Keep your face and hands away from the steam release path; angle your arm and use a long utensil if needed.
- Use only the supplied inner pot; never place other pots or dishes directly on the heating plate.
- Check the sealing ring, lid, and steam vent for damage or blockages before pressure cooking.
- Avoid covering the steam release or blocking top vents with towels or objects; let steam escape freely.
- Place the Pressure Cooker on a stable, heat-resistant surface with enough clearance above for steam release.
- Unplug the unit before deep cleaning, moving, or inspecting underneath.
- Do not bypass safeties. If sensors, fuses, or locks seem to be fighting you, the solution is repair, not improvising.
Daily use for better results
Once you know the routine, using your Pressure Cooker becomes a quick rhythm rather than a mystery.
- Prepare ingredients and cut them into reasonably even pieces so they cook at the same speed.
- If your Pressure Cooker has a sauté mode, brown meat or soften onions directly in the inner pot before adding liquid.
- Deglaze the pot by adding a splash of liquid and scraping up browned bits to prevent burn warnings.
- Add the rest of your liquid and ingredients, keeping dense foods at the bottom and delicate items on top when possible.
- Check the fill level and stir thick sauces to thin them slightly; very thick mixtures can trigger errors.
- Close the lid, set the steam release to sealed, choose your pressure level and time, and start the program.
- Allow time for pressure build-up; this can take 5–20 minutes depending on the volume and temperature of ingredients.
- When cooking ends, decide on natural release (gentler, good for meats and soups) or quick release (faster, good for vegetables and rice).
- After pressure is fully released and the float pin drops, open the lid slowly, tilting it away from your face.
- Taste and adjust seasoning; pressure cooking can mellow salt, herbs, and spices slightly.
| Food / Task | Starting Settings | Doneness / Finish Cues | Common Mistakes |
|---|---|---|---|
| White rice | High pressure, 4–8 minutes, natural release 5–10 minutes | Grains tender but separate, little to no standing water | Too much water or immediate quick release leads to mushy or broken grains |
| Brown rice | High pressure, 18–25 minutes, natural release | Chewy but cooked through, no hard center | Quick release makes the texture uneven and can cause sputtering |
| Dried beans (soaked) | High pressure, 10–20 minutes, natural release | Beans soft throughout, skins mostly intact | Filling pot too high or using no soak with short time leaves hard centers |
| Chicken thighs (boneless) | High pressure, 8–12 minutes, natural or partial release | Meat pulls apart easily, juices clear | Too little liquid or very thick sauces cause burn messages |
| Tough beef cuts (stew, chuck) | High pressure, 25–45 minutes, natural release | Fork-tender, no chewy strands | Releasing pressure too fast can toughen meat; short times leave it stringy |
| Vegetables (broccoli, green beans) | High or low pressure, 0–3 minutes, quick release | Bright color, tender-crisp | Natural release overcooks to mush and dulls color |
| Hard-boiled eggs | High pressure, 4–7 minutes, quick or short natural release | Firm whites, creamy yolks, easy to peel | Very long times create greenish ring and rubbery whites |
| Soups and stews | High pressure, 10–25 minutes, natural or partial release | Flavors melded, veggies tender, meat cooked | Overfilling with starchy ingredients causes foaming and vent blockage |
Cleaning and maintenance that doesn’t ruin parts
After each use
- Unplug the Pressure Cooker and let it cool fully before cleaning.
- Remove the inner pot and wash it with warm soapy water; avoid abrasive pads, especially on nonstick surfaces.
- Wash the lid, sealing ring, and any removable steam parts by hand; rinse thoroughly to remove odors.
- Wipe the outer housing and control panel with a damp cloth; dry immediately.
- Check and empty the condensation cup or drip catcher as needed.
Weekly care (or every few uses)
- Inspect the silicone sealing ring for cracks, stretching, or strong lingering odors.
- Remove and clean the anti-block shield or steam vent cover if your lid has one.
- Look at the heating plate inside the housing and gently wipe away any spills or food bits once it’s cool and dry.
- Do a quick “sniff test” of the lid and ring; if strong odors remain, soak them briefly in warm water with a little vinegar or baking soda, then rinse well.
When it smells odd or performance drops
- If you notice stronger odors transferring to mild foods like rice, consider keeping a second sealing ring: one for savory, one for neutral or sweet dishes.
- When it takes much longer to reach pressure, check the sealing ring, float valve, and steam vent for wear or blockage.
- Persistent “burn” warnings or uneven cooking often mean food is sticking; look for scorched spots inside the pot and clean thoroughly.
What not to do
- Do not immerse the entire lid if it has fixed electronic or mechanical components that are not designed to be submerged; focus on the underside parts that contact steam.
- Avoid metal scouring pads or harsh cleaners inside the pot, especially on nonstick coatings.
- Do not use sharp utensils directly on the inner pot surface; use wood, silicone, or plastic tools to avoid scratches.
- Never pour water directly over the outer housing or control panel; use a damp cloth instead.
- Do not oil or lubricate valves or seals; they are designed to work dry and clean.
Common maintenance complaints checklist
Problem: Food smells linger in the Pressure Cooker.
- Clean lid, sealing ring, and inner pot thoroughly with warm soapy water.
- Soak the sealing ring in a mix of warm water and a little vinegar or baking soda.
- Store the lid upside down on the cooker body so parts can air out.
Problem: Pressure takes longer to build than before.
- Confirm the sealing ring is fully seated and not stretched or damaged.
- Check the float valve and steam vent area for dried food or starch buildup.
- Make sure the lid is closed correctly and the steam release is set to sealed.
Troubleshooting that gets you unstuck fast
When your Pressure Cooker starts acting stubborn, use the pattern of symptom → cause → fix to calm the situation.
| Symptom | Likely Cause | Fix |
|---|---|---|
| Unit will not turn on | Loose power cord or tripped outlet | Check that the plug is firmly inserted, test a different outlet, and reset any power strips or breakers. |
| Display on but won’t start cooking | Lid not properly closed or not in pressure mode | Close and align the lid again, ensure it’s in the locked position, and set the steam release to sealed. |
| Pressure Cooker never reaches pressure | Insufficient liquid or leaking through seal or vent | Add more thin liquid, reseat the sealing ring, confirm the steam release is sealed, and check for cracks in the ring. |
| Steam constantly escaping from around the lid | Sealing ring missing, damaged, or misaligned | Open when safe, reinsert or replace the sealing ring, making sure it sits evenly in the groove. |
| Steam shooting steadily from steam release in sealed position | Steam release not fully closed or blocked internal parts | Gently adjust the release to a sealed position; once cool, remove and clean the vent components. |
| Burn or food burn warning | Food stuck to bottom or mixture too thick | Stop the cooker, release pressure safely, scrape up stuck bits, add more liquid, and avoid very thick sauces under pressure. |
| Strong sputtering or foamy steam during release | Pot overfilled or very starchy/foamy food | Use a towel beside (not over) the steam path to catch splatter, use natural release next time, and reduce fill level for foamy foods. |
| Float valve never rises | Pressure not building or valve stuck | Check for enough liquid, ensure lid is locked and sealed, and gently clean and move the float to free it. |
| Food undercooked when lid opens | Too short time, early quick release, or low starting temperature | Return lid, add a little more liquid if needed, and cook for a few more minutes at high pressure. |
| Food overcooked or mushy | Time too long or long natural release on delicate ingredients | Reduce pressure time next round and use quick release for vegetables or quick-cooking foods. |
| Odors transferring between recipes | Sealing ring absorbing smells | Clean or soak the ring, or dedicate separate rings for strong flavors and neutral foods. |
| Lid hard to close or open when not under pressure | Sealing ring misaligned or parts sticky | Remove, clean, and reseat the ring, and check that moving lid parts are clean and free of residue. |
If it won’t start: a quick decision path
- Check the power: is the cord fully plugged in at both ends and the outlet working with another device?
- Check the assembly: is the inner pot in place, the lid aligned and locked, and the steam release in a valid position?
- Check the settings: did you actually press start or confirm after choosing a program and time?
- Let it cool: if the Pressure Cooker was just used on a high-heat cycle, wait a bit; some sensors prevent immediate restarts.
- If the display is dead or error codes keep returning after resets, discontinue use and seek professional service.
When to stop and get service
Your Pressure Cooker is tough, but there are moments when it’s time to hand it off to a professional, not your toolbox.
- Visible cracks, warping, or damage to the lid, outer housing, or inner pot.
- Steam escaping from unusual locations on the lid or body rather than the designed vent areas.
- Electrical smells, smoke, or unusual heat from the control panel or power cord.
- Repeated tripping of breakers or blowing of fuses when using the Pressure Cooker.
- Errors that appear immediately on startup and do not clear after unplugging and cooling completely.
- Float valve, steam release, or locking mechanism that will not move freely even after careful cleaning.
- Any sign that the lid will not lock securely during use or unlock properly after pressure is released.
Smart habits that save time
A few simple routines will make your Pressure Cooker feel like a helpful assistant instead of a moody gadget.
- Store the Pressure Cooker with the lid upside down on top or slightly ajar so the interior can air out.
- Keep small parts like the condensation cup, trivet, and extra sealing rings in a basket or bag near the cooker.
- Prep freezer-friendly meals in portions sized for your inner pot to drop in and go with minimal adjustment.
- Get in the habit of quickly wiping the rim of the inner pot before each use; debris on the rim can stop a good seal.
- If you use liners or pot-in-pot containers, ensure they do not block the float valve or prevent the lid from closing.
- Plan release type along with cook time: quick release for delicate foods, natural release for dense or meaty dishes.
| Habit | Why it helps | What to watch out for |
|---|---|---|
| Keeping a spare sealing ring | Reduces odor transfer and keeps a backup ready if one wears out | Label or color-code rings so you remember which is for savory and which is for neutral or sweet foods |
| Batch-cooking staples | Makes weekly meals faster with pre-cooked beans, grains, or shredded meat | Cool foods safely and store promptly; don’t leave food in the inner pot on the counter for long periods |
| Deglazing after sautéing | Prevents burn warnings and improves flavor by lifting browned bits | Use a wooden or silicone utensil so you don’t scratch the pot surface |
Quick FAQ
Can I open the Pressure Cooker to check food while it’s cooking?
No, not under pressure. You must release pressure fully and wait for the float valve to drop before opening. If you need to check often, use a shorter time and re-pressurize as needed.
How much liquid does my Pressure Cooker need?
Most recipes work well with at least 1–1.5 cups of thin liquid. Very small batches may need slightly less, but if in doubt, add a bit more and adjust seasonings later.
Why does my Pressure Cooker say “burn” or “food burn”?
Food is likely sticking to the bottom or the mixture is too thick. Stop the program, release pressure safely, scrape the bottom, add liquid, and avoid very thick sauces during high-pressure cooking.
Can I cook frozen meat in the Pressure Cooker?
Yes, but it will take longer to reach pressure, and you may need to increase cook time slightly. Avoid large solid blocks with no liquid contact in the center; separate pieces cook more evenly.
Do I really need to replace the sealing ring?
Over time, silicone can stretch, crack, or hold strong odors. If you notice difficulty sealing, visible damage, or persistent smells, replacing the ring is a small fix that makes a big difference.
Is a natural release or quick release better?
Neither is “better” overall; they serve different purposes. Natural release is gentler and good for meat, soups, and starchy foods. Quick release is faster and better for vegetables and foods that overcook easily.
Can I use my Pressure Cooker as a regular pot on the stove?
No. The inner pot is designed for the Pressure Cooker’s base only. Do not place it on a stovetop burner, and do not put the outer housing on any heat source.
Why does my food sometimes taste under-seasoned after pressure cooking?
Pressure cooking can slightly mute some flavors. Start with normal seasoning, then taste and adjust with salt, acid (like lemon or vinegar), or fresh herbs after cooking.
Can I double a recipe in the Pressure Cooker?
Often yes, as long as you stay below the maximum fill line and ensure enough liquid. Cooking time usually stays close to the same, but it will take longer to come to pressure and release.
Is it safe to leave the Pressure Cooker unattended?
It’s designed to run on its own, but it’s best to stay nearby the first few times you cook a new recipe to confirm everything behaves as expected and the release settings are correct.
If you keep this guide handy for the first few weeks, your Pressure Cooker will go from intimidating to “why didn’t I use this sooner?” in no time.
Discover More
- Air Conditioner
- Air Fryer
- Air Purifier
- Automatic Soap Dispenser
- Barbecue Grill
- Beverage Cooler
- Beverage Dispenser
- Beverage Fridge
- Blender
- Boiler
- Bread Maker
- Bread Slicer
- Bread Toaster Oven
- Can Opener
- Carpet Cleaner
- Ceiling Fan
- Ceiling Heater
- Ceiling Mounted Heater
- Ceiling Mounted Vent Fan
- Central Vacuum
- Charcoal Grill
- Citrus Juicer
- Clothes Dryer
- Clothes Steamer
- Coffee Grinder
