Smart Thermostat Owner’s Help Guide: From Install To Everyday Comfort
Quick start you can finish fast
Your Smart Thermostat can absolutely behave itself. It just needs a good start. Here’s how to go from box to basic control without drama.
- Carefully unpack the Smart Thermostat and remove any plastic film from the screen and terminals.
- Turn off power to your heating and cooling system at the breaker panel so you are not working on live low-voltage wiring.
- Remove the old thermostat cover and take a picture of the existing wire connections for reference.
- Label each wire using the included stickers or masking tape with the letters from the old thermostat terminals.
- Mount the Smart Thermostat wall plate, pulling the wires through the center opening.
- Connect each labeled wire to the matching terminal on the Smart Thermostat wall plate.
- Gently attach the Smart Thermostat display to the wall plate until it clicks into place.
- Turn the breaker back on and wait for the Smart Thermostat to power up.
Many Smart Thermostat models walk you through basic setup on-screen, including language, Wi‑Fi (if available), and heating/cooling mode. Follow the prompts one screen at a time.
First-use example: basic heating test
Once powered and configured, you can run a simple test to be sure the Smart Thermostat talks nicely with your system.
- Set the system mode to Heat.
- Raise the target temperature to about 2–4 °F above the current room temperature.
- Within a short time, the heating system should start, and you should feel warm air at the vents or radiators begin to warm within about 10–20 minutes.
- Lower the set temperature back below the room reading to be sure the system turns off correctly.
Know your parts without guessing
Most units have
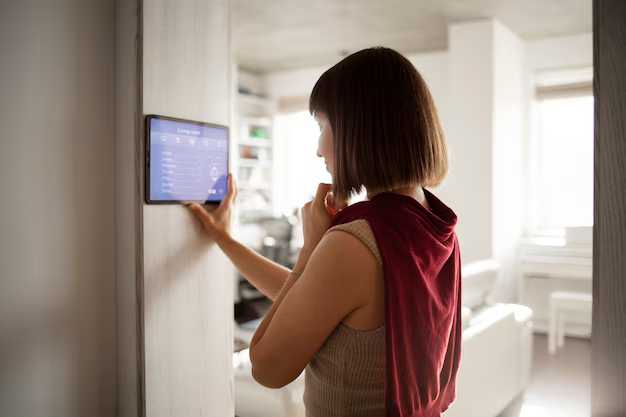
- Display screen: Shows room temperature, set temperature, mode, and status icons.
- Touch buttons or touchscreen: Lets you change temperature, mode, and settings directly on the Smart Thermostat.
- Wall plate / base: The part screwed to the wall that holds the wiring terminals and, often, the level for straight mounting.
- Wiring terminals: Small labeled connectors (such as R, C, W, Y, G) where your system wires attach.
- Temperature sensor: Built‑in sensor that measures room temperature near the Smart Thermostat.
- System mode control: Switch or on‑screen option to choose Heat, Cool, Auto, Off, and sometimes Fan‑only.
- Fan control: Sets the fan to Auto (runs with heat/cool) or On (runs continuously).
Some units have
- Wi‑Fi connectivity: Allows control of the Smart Thermostat from a phone app or voice assistant.
- Learning or adaptive schedules: Automatically adjust setpoints based on your past behavior.
- Humidity display or control: Shows indoor humidity and can manage compatible humidifiers or dehumidifiers.
- Proximity or occupancy sensor: Detects motion to adjust comfort when you are home or away.
- Remote room sensors: Small wireless sensors to average temperature from several rooms.
- Battery backup: Internal or replaceable batteries to keep settings or power the Smart Thermostat if there is no common wire.
You do not need every feature to get solid comfort. Focus on the basics first, then add advanced options when you feel ready.
Safety that actually prevents problems
- Turn off power at the breaker before touching thermostat wiring. This protects both you and your furnace or air handler controls.
- Use only low‑voltage Smart Thermostat equipment on low‑voltage systems. Do not connect it directly to high‑voltage baseboard heaters.
- Do not let bare wires touch each other or metal parts; short circuits can damage system control boards.
- Mount the Smart Thermostat on an interior wall away from direct sun, drafts, or heat sources so it can read room temperature accurately.
- Avoid installing above supply vents or near exterior doors where frequent drafts can confuse temperature readings.
- Keep the Smart Thermostat dry and do not spray cleaners directly on the screen or wall plate.
- Do not bend or cut thermostat wires excessively; damaged wiring can cause intermittent operation or failure.
- If you smell burning from your HVAC equipment or see visible damage, turn off the system at the breaker and stop using the Smart Thermostat to control it.
- Use stable, secure mounting so the Smart Thermostat does not wobble or pull on the wires.
- If your system behaves erratically after installation, switch the system to Off and verify wiring instead of repeatedly cycling equipment.
Daily use for better results
Once installed, the Smart Thermostat becomes your comfort remote. A simple daily rhythm keeps things stable and efficient.
- Check the screen for current room temperature, setpoint, and mode (Heat, Cool, Auto, Off).
- Adjust the set temperature a few degrees at a time rather than extreme swings; this reduces wear on your HVAC system.
- Use a consistent schedule if available: warmer when you are home and awake, cooler when asleep or away.
- Use Fan Auto in most cases; use Fan On only when you specifically want constant air circulation.
- Make gradual seasonal changes; for example, heat set around 68–72 °F and cooling around 72–76 °F as a starting point.
- If you use an app, double‑check that changes made on your phone match what you see on the Smart Thermostat display.
- Glance at status indicators: icons for heating, cooling, or Wi‑Fi help you confirm what the system is actually doing.
Common Smart Thermostat uses and starting settings
| Use case | Starting settings / ranges | What “done” or “right” looks like | Common mistakes |
|---|---|---|---|
| Comfortable daytime heating | Heat mode, setpoint around 68–72 °F | Room temp stabilizes near setpoint without frequent rapid cycling | Cranking heat to 80 °F expecting faster warm‑up; it only overshoots |
| Nighttime energy savings (heating) | Lower setpoint by about 3–6 °F at night | You feel cooler but comfortable with blankets; system runs less | Dropping setpoint extremely low so the system has to work hard in the morning |
| Comfortable daytime cooling | Cool mode, setpoint around 72–76 °F | Air feels dry and cool; room temp near setpoint | Setting 60 °F hoping to “turbo cool”; it will not cool faster, just longer |
| Vacation or away mode | Heat around 55–60 °F; cool around 80–85 °F | Home protected from extremes without wasting energy | Forgetting to exit away mode when you return and wondering why it’s uncomfortable |
| Fan circulation | Fan set to On for a few hours | Air feels more mixed; fewer hot or cold spots | Leaving fan On continuously and wondering about higher energy use |
| Allergy or filter use | Fan Auto with moderate runtime; clean filter | Less dust at vents; comfortable airflow | Trying to “fix” poor airflow only with thermostat instead of changing filters |
Cleaning and maintenance that doesn’t ruin parts
The Smart Thermostat does not need much attention, but a little goes a long way in keeping readings accurate and buttons responsive.
After each use (really, every time you fiddle with it)
- Wipe visible fingerprints or smudges from the screen with a soft, dry, lint‑free cloth.
- Avoid pressing the screen with sharp fingernails, pens, or tools.
Weekly or monthly quick care
- Lightly wipe the Smart Thermostat housing and screen with a barely damp cloth if needed, then dry it.
- Check that the Smart Thermostat is firmly attached to the wall plate and not loose or crooked.
- Glance at any filter reminders; replace HVAC filters as indicated, not years later.
When it smells weird or performs poorly
- If rooms feel much hotter or colder than the Smart Thermostat reading, use a small standalone thermometer to compare.
- Check that nothing is blocking airflow around the Smart Thermostat, such as furniture, curtains, or decor.
- Inspect that vents and returns are not blocked; many “thermostat problems” start at the vents.
- Review the schedule or app settings to be sure an aggressive energy‑saving mode is not causing discomfort.
What not to do
- Do not spray cleaner directly on the Smart Thermostat; spray on a cloth first if you must.
- Do not pry the display off the wall with metal tools unless specifically required; use gentle hands.
- Do not tape over the Smart Thermostat or cover it with decorations; this traps heat and skews readings.
- Do not tug on wires or force them into terminals; damaged connections can cause intermittent failures.
Two common maintenance complaints and quick checks
If you find yourself wrestling with these, here’s a fast checklist to try before calling for help.
Complaint: “The Smart Thermostat temperature is always wrong.”
- Compare with another thermometer placed next to the Smart Thermostat for at least 15–20 minutes.
- Check for drafts, lamps, electronics, or direct sun affecting the Smart Thermostat.
- Look for any on‑screen temperature calibration or offset feature and adjust by a small amount if needed.
Complaint: “System runs too often / not often enough.”
- Verify the mode (Heat, Cool, Auto) and setpoint are reasonable for the season.
- Make sure schedules are not fighting your manual changes.
- Check fan setting (Auto vs On) so you are not mistaking fan noise for constant heating or cooling.
Troubleshooting that gets you unstuck fast
Use this as a quick map: notice the symptom, think through the likely cause, then try the simple fix.
| Symptom | Likely cause | Fix |
|---|---|---|
| Smart Thermostat will not power on | Breaker off, loose display, missing common wire or dead batteries | Check breaker, reseat display on wall plate, confirm C wire or replace batteries if your model uses them |
| Display is on, but heat never starts | Incorrect wiring on heat terminal, wrong system type setting, or safety lockout in equipment | Turn power off, verify heat wire on correct W terminal, check system type in settings, then restore power |
| Display is on, but cooling never starts | Cooling wire not connected or miswired, mode not actually in Cool, or delay timer active | Confirm Cool mode and setpoint below room temp; wait several minutes; verify Y wire connection if safe to do so |
| Fan runs but no heating or cooling | Fan set to On, but equipment not commanded, or system fault inside furnace / air handler | Set fan to Auto, then adjust setpoint; if no change, contact an HVAC technician |
| Smart Thermostat reading is far from actual room temperature | Mounted in draft, near sun, or heat source; sensor offset needed | Check placement, block direct sun, adjust calibration offset in settings if available |
| System cycles on and off very frequently | Setpoint too tight, cycle rate too high, or oversized equipment | Widen temperature swing slightly in settings if available, or adjust setpoint to reduce rapid toggling |
| Smart Thermostat loses Wi‑Fi connection (if equipped) | Weak signal, router issues, or firmware glitch | Restart router, move access point closer if possible, reconnect network from thermostat settings |
| Schedule changes do not seem to “stick” | App and thermostat fighting, hold setting enabled, or multiple schedules overlapping | Disable temporary hold, align schedules in app and on‑device, then save one clear schedule |
| System still running in cooling when set to Off | Stuck relay in equipment or incorrect wiring | Turn off HVAC breaker; if problem persists with Smart Thermostat removed, call an HVAC professional |
| Screen is slow or unresponsive | Dust, grime, or software lag | Gently clean screen, then restart the Smart Thermostat if a restart option or power cycle is available |
If the Smart Thermostat will not start your system at all
Use this mini decision path to avoid chasing your tail.
- Check the main HVAC breaker and any switch near the furnace or air handler; restore if off.
- Look at the Smart Thermostat display; if blank, reseat the display and check for batteries or common wire issues.
- Confirm the Smart Thermostat is set to the correct mode (Heat or Cool) and the setpoint is on the “demand” side of room temperature.
- Wait several minutes; cooling especially can have built‑in delays.
- If the system still does not start, turn everything off and inspect wiring connections only if you are comfortable; otherwise, it is time for professional service.
When comfort does not match what you set
- Verify there is not an active Hold or temporary override set lower (for heat) or higher (for cool) than you expect.
- Check whether a schedule changed your setpoint in the background.
- Look for any “eco” or “away” mode icon that might be enforcing bigger setbacks than you want.
When to stop and get service
The Smart Thermostat is the messenger between you and your HVAC system. If the system itself is unhappy, it is time to pause and get help.
- Smart Thermostat frequently loses power even though breakers and switches stay on.
- Heating or cooling runs continuously regardless of setpoint or mode.
- System trips breakers or blows low‑voltage fuses after wiring changes.
- Unusual noises or strong burning smells come from your furnace, air handler, or outdoor unit.
- Visible damage, melted insulation, or corrosion is present on wires near the Smart Thermostat or equipment.
- Condensation or moisture appears inside the Smart Thermostat housing.
- You are unsure about wiring changes, especially on older or multi‑stage systems.
In these situations, set the Smart Thermostat to Off, turn off the HVAC breaker, and contact a qualified HVAC technician for diagnosis.
Smart habits that save time
A few small habits make your Smart Thermostat feel “set and forget” instead of “tap and hope.”
- Keep the area around the Smart Thermostat clear of shelves, tall furniture, or decorative covers.
- Use a simple, predictable schedule instead of constant manual changes.
- Coordinate Smart Thermostat away settings with any security or automation system you use.
- Change HVAC filters regularly so the Smart Thermostat does not have to fight poor airflow.
- If your Smart Thermostat uses batteries, replace them at the first low battery warning, not when the screen finally dies.
- Store any installation tools, wire labels, and wiring photo in a safe place for future upgrades.
Storage and accessories
- If you remove the Smart Thermostat for painting or remodeling, label the wires and gently cap or tape them individually.
- Keep the Smart Thermostat display in a clean, dry drawer or box if temporarily removed.
- Use only accessories that match your system type, such as compatible remote sensors or humidifier controls, if your Smart Thermostat supports them.
| Habit | Benefit | How often |
|---|---|---|
| Glance at Smart Thermostat once a day | Catches odd modes or setpoints before you get uncomfortable | Daily |
| Review schedules seasonally | Keeps comfort aligned with changing weather and routines | Every few months |
| Check filter reminders | Protects equipment and keeps airflow steady | Monthly |
Quick FAQ
Why does the Smart Thermostat not react instantly when I change the temperature?
Most systems have built‑in delays to protect compressors and burners. The Smart Thermostat also avoids rapid cycling, so it may wait a short time before turning equipment on or off.
Can the Smart Thermostat save me money on energy bills?
Yes, if you use reasonable setpoints and schedules. Modest setbacks at night and when away, plus good filter maintenance, typically lower energy usage without sacrificing comfort.
Where is the best place to install the Smart Thermostat?
On an interior wall, about chest height, away from direct sunlight, exterior doors, vents, and electronics that give off heat.
What if I do not have a common (C) wire?
Some Smart Thermostat models can use batteries or adapters. If yours requires a C wire, you may need an adapter kit or a new wire run, which an HVAC technician can help with.
Why does my Smart Thermostat show “heat on” or “cool on” but I do not feel anything?
There may be a safety delay, equipment issue, or airflow problem. Wait a few minutes, then check vents and listen for the furnace or outdoor unit. If nothing runs, follow the troubleshooting steps or seek service.
Is it bad to change the temperature a lot during the day?
Constant, large swings can cause extra cycling and discomfort. Small adjustments are fine; for bigger changes, use the built‑in schedule instead of rapid manual changes.
Do I need Wi‑Fi to use the Smart Thermostat?
No. Wi‑Fi features are convenient, but the Smart Thermostat can usually control temperature directly at the device without any network connection.
Why does the Smart Thermostat screen dim or turn off?
Many models dim to save power or avoid being a nightlight. Touching the screen, pressing a button, or walking nearby (if there is a proximity sensor) usually wakes it up.
Can the Smart Thermostat control humidity?
Some Smart Thermostat models can manage compatible humidifiers or dehumidifiers. If you see humidity readings or humidity setpoints, your unit likely supports this feature.
How often should I reset or reboot the Smart Thermostat?
Only when it freezes, misbehaves, or after major network changes. Routine reboots are not necessary when everything is working normally.
What happens if the power goes out?
The Smart Thermostat stops controlling the system while power is off. When power returns, it usually remembers your settings and returns to the previous mode and schedule.
Can I move the Smart Thermostat to a different wall later?
Yes, but you will need to move wiring or use wireless solutions if supported. Moving it often makes sense if the current location gives poor temperature readings or comfort.
Discover More
- Air Conditioner
- Air Fryer
- Air Purifier
- Automatic Soap Dispenser
- Barbecue Grill
- Beverage Cooler
- Beverage Dispenser
- Beverage Fridge
- Blender
- Boiler
- Bread Maker
- Bread Slicer
- Bread Toaster Oven
- Can Opener
- Carpet Cleaner
- Ceiling Fan
- Ceiling Heater
- Ceiling Mounted Heater
- Ceiling Mounted Vent Fan
- Central Vacuum
- Charcoal Grill
- Citrus Juicer
- Clothes Dryer
- Clothes Steamer
- Coffee Grinder