Snow Blower Owner’s Help Guide: Use, Care, and Quick Fixes
Quick start you can finish fast
You’ve got snow, you’ve got a Snow Blower, and you’d like your driveway back. Let’s get you to that point without the drama.
Fast setup checklist
- Remove all packaging, tags, and transport brackets from the Snow Blower, including any padding around the auger and chute.
- Check that all loose parts are present: chute crank or lever, shear pins, spark plug boot cover, and starting cord or switch.
- Verify engine oil level using the dipstick and add the recommended oil type to the “full” mark if needed.
- Fill the fuel tank outdoors with fresh gasoline appropriate for small engines; do not use old or stale fuel.
- Inspect the auger housing and chute to make sure no packing material, tools, or ice chunks are stuck inside.
- Adjust the skid shoes so the scraper bar clears the surface by about 0.3–0.8 cm for paved drives, slightly higher for gravel.
- If your Snow Blower is electric or battery powered, confirm the cord is rated for outdoor use or the battery is fully charged and latched in place.
First-use example: clearing light driveway snow
This example assumes dry, light snow up to about 15–20 cm deep on a paved driveway.
- Move the Snow Blower outside, on a level surface, pointed away from people, vehicles, and windows.
- Set chute direction to throw snow downwind and away from driveways, walks, and neighboring areas.
- Start the Snow Blower: use choke and primer on gas models or switch/button on electric models, letting it warm for about 2–3 minutes.
- Engage the drive (if equipped) at a slow ground speed and then gently engage the auger or impeller control.
- Work in straight passes, slightly overlapping each path so you do not leave ridges of snow between strips.
- Watch the discharge stream: if it starts dropping close to the machine, slow down to give the Snow Blower time to process the snow.
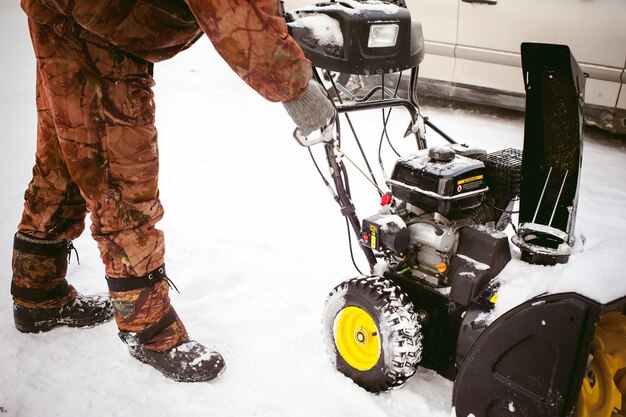
Know your parts without guessing
Most units have
- Auger housing – The front scoop where snow enters. It contains the rotating augers that chew up the snow.
- Auger – The rotating blades at the front. On single-stage units it both gathers and throws snow; on two-stage units it feeds snow to the impeller.
- Impeller (two-stage) – A high-speed fan behind the auger that throws snow out the chute.
- Discharge chute – The vertical tube that directs where snow is thrown.
- Chute control – A crank, lever, or joystick that turns the chute left or right; some also adjust chute angle up and down.
- Engine or motor – Gas engine or electric motor that powers the auger and drive system.
- Drive system – Wheels or tracks powered by the engine or motor to pull the Snow Blower forward.
- Handlebars and control panel – Where you stand and use levers for auger, drive, chute control, and speed.
- Skid shoes – Adjustable pads on the sides of the auger housing that set the working height above the ground.
- Scraper bar – Horizontal bar at the bottom rear of the housing that scrapes snow from the ground.
Some units have
- Headlight – Integrated light to see the clearing path in low light.
- Electric start – A plug-in or battery-assisted start system for gas engines so you do not have to pull-start.
- Heated handles – Warmed grips to keep your hands more comfortable.
- Multiple forward and reverse speeds – Gear settings to match different snow depths and conditions.
- Folding handlebars – For more compact storage in tight garages or sheds.
- Drift cutters – Metal bars above the housing to help knock down tall drifts into the auger.
- Clean-out tool – A plastic shovel-shaped tool clipped to the machine to clear packed snow from the chute safely.
Safety that actually prevents problems
- Always shut off the Snow Blower and remove the key or battery before clearing clogs or making adjustments. This prevents sudden auger movement while your hands are near moving parts.
- Use the clean-out tool or a stick for packed snow; never use hands or feet inside the chute or auger housing, even if everything seems off.
- Keep children and pets well away from the Snow Blower’s front and discharge area; thrown snow can hide ice, rocks, and debris.
- Wear traction footwear and snug clothing; loose items can get caught and slippery surfaces can cause falls around moving equipment.
- Clear the area first of hoses, doormats, newspapers, and extension cords that can be grabbed by the auger.
- Never direct the chute toward windows, vehicles, people, or public roads. The Snow Blower can launch chunks of ice or gravel at high speed.
- Use only appropriate fuel for gas Snow Blowers and refuel outdoors with the engine shut off and cool to prevent fumes from building up.
- Avoid operating on very steep slopes; the machine can slide or pull you, especially on ice.
- Do not bypass safety interlocks or tie down control levers; these are there to stop the auger and drive if you lose your grip.
- In deep or wet snow, take thinner passes so the Snow Blower does not stall, strain, or clog.
Daily use for better results
Once you’ve got the hang of it, running your Snow Blower can be almost satisfying. Almost.
- Scan the driveway and walkways quickly, removing hoses, toys, newspapers, and obvious debris.
- Adjust skid shoes for the surface: low for smooth concrete or asphalt, higher for gravel or uneven stone.
- Plan a path that throws snow away from the area you have not cleared yet, working with the wind, not against it.
- Start the Snow Blower and let it warm for a couple of minutes so the engine or motor runs smoothly.
- Begin with a test pass along one edge, adjusting chute angle to throw snow a safe distance without hitting anything important.
- Use lower speeds in wet, heavy snow and slightly higher speeds in light, powdery snow.
- Overlap each pass a bit to avoid leaving narrow ridges that freeze into hard lines later.
- Watch and listen: change in sound, vibration, or discharge distance is an early sign of clogs, broken shear pins, or belt issues.
- After finishing, run the Snow Blower for a short time with no load to clear remaining snow from the housing and chute.
- Store the Snow Blower indoors or under cover to reduce icing of controls and rust on metal parts.
Typical snow jobs and starting settings
| Snow situation | Suggested approach | Finish cues | Common mistakes |
|---|---|---|---|
| Light, dry snow up to about 10 cm | Use medium drive speed, full auger speed; chute aimed downwind at medium angle. | Driveway surface shows cleanly with little residue; snow throws several meters. | Driving too slow, causing snow to fall too close and drift back onto cleared areas. |
| Moderate snow about 10–20 cm | Use low to medium drive speed; overlap passes slightly; keep chute angle higher for distance. | Even discharge stream; no bogging or surging from the engine or motor. | Trying to clear full-depth passes at high speed, leading to clogs and uneven clearing. |
| Heavy, wet snow around 10–20 cm | Use slowest drive setting; keep chute angle lower to reduce clogging; take narrower cuts. | Snow still exits chute in a continuous stream, even if thrown a shorter distance. | Raising chute too high in wet snow, which packs the chute and stops discharge. |
| Deep drifts about 30–45 cm | Take partial-height “bites” into the drift; use drift cutters if available. | Drift gradually disappears with no engine stalling or belt squeal. | Driving straight into deep drifts at full height, overloading augers and breaking shear pins. |
| End-of-driveway plow pile | Approach from the side; work from the top layer down in smaller sections. | Chunky snow and ice throw clear without frequent stops or clogs. | Attacking the entire pile head-on at once, maxing out the Snow Blower’s capacity. |
| Gravel driveway snow | Raise skid shoes so scraper bar is off the gravel; go slowly to reduce rock pickup. | Minimal gravel thrown; mostly snow in discharge stream. | Setting the housing too low and “mining” half the driveway into your lawn. |
Cleaning and maintenance that doesn’t ruin parts
After each use
- Shut off the Snow Blower, remove key or battery, and let moving parts stop fully.
- Brush loose snow and slush off the housing, controls, and engine with a broom or gloved hand.
- Use the clean-out tool to clear any packed snow from the chute or auger area.
- Store the Snow Blower under cover so it can dry and not freeze solid for the next use.
Weekly during heavy use
- Check engine oil level and top off if needed; change oil according to usage hours.
- Inspect shear pins or bolts on the auger; replace any broken or missing ones immediately.
- Look over belts for cracking or glazing and adjust belt tension if there is obvious slipping.
- Verify tire pressure on wheeled models or track tension on tracked models.
When it smells odd or performs poorly
- If you smell burning rubber, stop and inspect belts, pulleys, and the auger for jams.
- If discharge distance drops dramatically, look for ice buildup in the chute or auger housing.
- If starting is suddenly difficult, inspect spark plug, fuel freshness, and air filter (on gas models).
- If electric controls feel sluggish, check for moisture or ice around cables and linkages.
What not to do
- Do not use metal scrapers, hammers, or shovels inside the housing or chute. This can bend parts, chip paint, and damage coatings.
- Do not pressure-wash the engine area; excess water can get into bearings, cables, and electrical components.
- Do not use gasoline or harsh solvents to “clean” surfaces; they can damage plastic parts and paint.
- Do not store the Snow Blower with untreated fuel for long off-season periods; use fuel stabilizer or drain the tank.
Two common complaints and quick checks
If you hear these often in your head, you are not alone.
“The Snow Blower won’t throw snow very far.”
- Inspect chute and auger for packed snow or ice; clear with tool.
- Verify you are not moving forward too quickly for wet or deep snow conditions.
- Check for broken shear pins on the auger shaft.
- Inspect belts for slipping or damage.
“The Snow Blower is hard to push or steer.”
- Confirm drive control is properly engaged and speed setting is appropriate.
- Check tire pressure or track condition and clear ice around wheels or axles.
- Ensure skid shoes are adjusted evenly on both sides so the housing is not digging in.
Troubleshooting that gets you unstuck fast
Quick decision path: Snow Blower will not start
- Check that the key is inserted, switch is on, and any safety interlocks are engaged, such as handlebar controls.
- Confirm fuel level (for gas) or battery charge / power cord connection (for electric).
- On gas models, verify choke and primer are set for a cold start and that the fuel is fresh.
- Inspect spark plug boot connection and look for obvious loose or damaged wires.
- If it still will not start after a few attempts, stop to avoid flooding or overheating and arrange for service.
Common Snow Blower problems and fixes
| Symptom | Likely cause | Fix |
|---|---|---|
| Engine cranks but does not start | Old fuel, incorrect choke setting, or spark plug issue | Drain and refill with fresh fuel, set choke for cold start, clean or replace spark plug. |
| Electric Snow Blower will not power on | No power, tripped breaker, or loose connection | Check outlet with another device, reset breaker, confirm extension cord is rated for outdoor use and fully plugged in. |
| Engine starts then stalls under load | Clogged chute or auger, carburetor or air filter restricted | Shut off, clear snow clogs, clean or replace air filter, check fuel and carburetor for contamination. |
| Auger does not turn, but engine runs | Broken shear pins or loose / broken auger belt | Inspect auger shaft; replace missing shear pins; inspect and replace or tension the auger belt. |
| Snow only drops near the machine | Chute or impeller packed with snow or belt slipping | Clear chute using clean-out tool, slow down forward speed, check belt condition and tension. |
| Snow Blower pulls to one side | Unequal tire pressure or skid shoes set at different heights | Inflate tires evenly; adjust skid shoes so both sides match the same height. |
| Drive wheels do not move when drive lever is engaged | Drive belt loose or broken, or drive cable out of adjustment | Inspect drive belt for damage and replace if needed; adjust drive cable tension according to recommended range. |
| Controls feel frozen or stiff | Ice buildup on linkages or cables | Move Snow Blower into a warmer area to thaw; gently clear visible ice and apply a suitable lubricant to pivots. |
| Excessive vibration while running | Foreign object stuck in auger or bent auger components | Shut off immediately; inspect and remove debris; if vibration continues, have auger and shaft inspected professionally. |
| Black smoke from exhaust | Overly rich fuel mixture or choke left on | Turn choke off once engine warms; if smoke persists, check air filter and have carburetor mixture adjusted. |
| Snow leaks from sides or front of housing | Worn scraper bar or improperly set skid shoes | Inspect scraper bar for wear and replace if needed; adjust skid shoes for correct clearance. |
| Chute will not rotate or sticks | Ice buildup or damaged chute gear / cable | Clear ice by hand with engine off; inspect gears or cable; lubricate moving parts and replace damaged components. |
When to stop and get service
- Any time the Snow Blower makes sudden grinding, metal-on-metal, or banging noises after hitting an object.
- When repeated belt replacements or shear pin failures happen in normal snow, not packed ice or debris.
- If the engine runs very rough, surges heavily, or backfires even with fresh fuel and a clean air filter.
- When you notice oil leaks, fuel leaks, or visible cracks in the engine block or fuel tank.
- If major components like the auger housing, frame, or handlebar assembly are bent or cracked.
- When any safety control, such as the auger lever or drive lever, will not disengage fully.
Smart habits that save time
Better storage habits
- Store the Snow Blower in a dry, covered spot with the chute turned down to limit dust and debris entering.
- During off-season, add fuel stabilizer or drain fuel; run the engine briefly to empty the carburetor on gas units.
- Hang extension cords neatly near electric Snow Blowers to avoid tripping and tangling during storms.
Using accessories wisely
- Use only traction aids and tire chains designed for Snow Blower wheels or tracks.
- Apply non-stick spray made for snow equipment to the housing and chute if your area gets frequent wet snow.
- Keep a dedicated plastic shovel or clean-out tool near where you park the Snow Blower for quick clog removal.
Habits that reduce mess and improve results
- Clear snow in layers during heavy storms instead of waiting until it is extremely deep.
- Start clearing before vehicles pack snow into ice, which is harder for the Snow Blower to handle cleanly.
- Make a final “cleanup pass” with a slightly lower skid shoe setting for a cleaner surface once major snow is removed.
Quick FAQ
Can I use my Snow Blower on gravel?
Yes, but raise the skid shoes so the scraper bar does not dig in and go slowly to reduce throwing rocks.
How far should my Snow Blower throw snow?
Under good conditions, many units throw dry snow several meters; heavy, wet snow may only throw a short distance. Consistency matters more than maximum distance.
Do I need to warm up the engine?
A short warm-up of about 2–3 minutes helps gas engines run smoothly and respond better under load, especially in very cold weather.
Why does the chute clog in wet snow?
Wet, heavy snow packs together and sticks to cold metal, especially if you move too fast or set the chute angle very high. Slower speed and a lower chute angle help.
How often should I replace shear pins?
Only when they break, which usually happens when the auger hits a solid object. If they break frequently in normal snow, something else is wrong and needs inspection.
Is it normal for the Snow Blower to leave a thin layer of snow?
A slight dusting can be normal, especially on rough or uneven surfaces. Adjusting skid shoes lower and checking scraper bar wear can improve clearing.
Can I run the Snow Blower in slush or rain?
It can move slush, but performance drops and clogs increase. Avoid heavy standing water and be extra cautious with footing and electrical components on electric models.
What should I do before the first big storm of the season?
Check oil and fuel, test-start the Snow Blower, inspect belts and shear pins, adjust skid shoes, and clear the driveway of objects that could jam the auger.
Why does my Snow Blower pull me forward?
Drive speed may be too high or the surface may be icy. Use a lower speed and keep a firm grip on the handlebars.
How long will a Snow Blower last?
With reasonable maintenance, many Snow Blowers serve for many winters. Regular oil changes, clean fuel, and timely belt and scraper replacements make the biggest difference.
Discover More
- Air Conditioner
- Air Fryer
- Air Purifier
- Automatic Soap Dispenser
- Barbecue Grill
- Beverage Cooler
- Beverage Dispenser
- Beverage Fridge
- Blender
- Boiler
- Bread Maker
- Bread Slicer
- Bread Toaster Oven
- Can Opener
- Carpet Cleaner
- Ceiling Fan
- Ceiling Heater
- Ceiling Mounted Heater
- Ceiling Mounted Vent Fan
- Central Vacuum
- Charcoal Grill
- Citrus Juicer
- Clothes Dryer
- Clothes Steamer
- Coffee Grinder