Steam Iron Owner’s Help Guide: From First Use To Fuss-Free Pressing
Quick start you can finish fast
Your Steam Iron doesn’t need a full ceremony to get going, just a short welcome routine.
- Place the Steam Iron on a stable, heat‑resistant, flat surface with the cord relaxed and untangled.
- Remove any stickers or protective films from the soleplate and body.
- Open the water tank cover and fill with clean water (ideally distilled or demineralized in hard‑water areas) up to the max line.
- Wipe the soleplate gently with a soft, slightly damp cloth, then dry it.
- Plug in the Steam Iron and set the temperature dial to a mid‑range fabric (often around “••” or “•••”).
- Wait until the indicator light shows it has reached temperature (usually goes off or changes color).
- Hold the Steam Iron over a sink or old towel and press the steam burst button a few times to clear any residues from manufacturing.
First-use example: pressing a cotton shirt
This quick run gets you comfortable with the Steam Iron and its steam output.
- Fill the tank and heat to a cotton setting, usually in the range of about 150–200 °C.
- Let the iron preheat for about 2–4 minutes until the indicator light cycles.
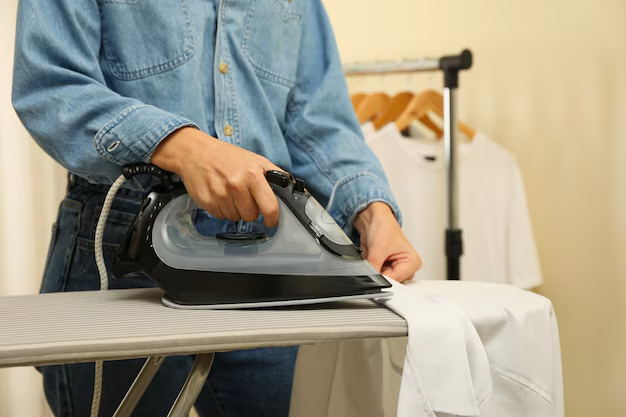
- Lay a clean cotton shirt on an ironing board.
- Start with a test area like the bottom hem, using light pressure and a slow glide.
- Use continuous steam or short bursts for stubborn wrinkles, keeping the iron moving.
- Expect a typical cotton shirt to take about 5–10 minutes the first time while you get used to the Steam Iron’s feel.
Know your parts without guessing
Most units have
- Handle – Where you grip and guide the Steam Iron; often includes buttons for steam burst and spray.
- Water tank – Holds water for steam; has a max fill line to prevent leaks and spitting.
- Water fill opening / cap – Flip or slide cover where you pour water in; must close securely.
- Temperature dial or slider – Sets heat based on fabric type, often with symbols for synthetics, silk, wool, cotton, and linen.
- Soleplate – Flat heated bottom plate that contacts fabric; may be stainless steel, ceramic, or non‑stick coated.
- Steam vents – Small holes in the soleplate where steam exits to relax fabric fibers.
- Indicator light – Shows when the Steam Iron is heating or at temperature.
- Cord and strain relief – Power cord exit area designed to flex; avoid pulling here to prevent damage.
- Base or heel rest – Back end where you safely stand the Steam Iron upright when not actively ironing.
Some units have
- Spray nozzle and spray button – Mists water onto extra‑stubborn wrinkles or dry fabrics.
- Steam control slider – Adjusts steam level from dry ironing to stronger continuous steam.
- Self-clean button – Flushes hot water and steam through the vents to clear mineral buildup.
- Anti-drip system – Reduces water dripping when ironing at lower temperatures.
- Anti-scale filter or cartridge – Helps reduce limescale if you use tap water.
- Cord reel or swivel – Lets the cord pivot or retract for easier handling and storage.
- Vertical steam function – Allows steaming of hanging clothes or curtains while holding the Steam Iron upright.
Safety that actually prevents problems
- Always unplug before filling, emptying, or cleaning. This keeps water and electricity from mixing in the worst way.
- Set the Steam Iron on a stable, heat‑resistant surface, never on soft bedding or unstable boards that can tip.
- Keep fingers and skin away from the soleplate and steam vents; steam can be hotter than boiling water.
- Route the cord so you and others will not trip or pull the Steam Iron off the board.
- Avoid overfilling the tank; filling past the max line often leads to dripping and spitting onto clothes.
- Never leave a hot Steam Iron face-down on fabric. Always stand it on its heel when pausing.
- Do not iron directly over zippers, snaps, or metal decorations without a pressing cloth to protect the soleplate.
- Use distilled or low‑mineral water in hard‑water areas to reduce limescale and keep vents clear.
- Let the Steam Iron cool fully before wrapping the cord or storing it to prevent melting or kinks.
- Keep the Steam Iron and cord away from children and pets while hot or plugged in, even if you have “just one more sleeve” left.
- If you ever see smoke from the body (not just harmless steam), unplug immediately and stop use.
Daily use for better results
Think of each ironing session as a short routine: prepare, heat, press, and cool.
- Check the water level before you start; refill to the max line if needed.
- Set the temperature dial for the most delicate fabric you plan to iron and work from cooler fabrics to hotter ones.
- Plug in the Steam Iron and wait until the indicator shows it has reached temperature.
- Test on a small hidden corner of the garment if you are unsure about heat tolerance.
- Use light, steady pressure and keep the iron moving to avoid creating shiny spots.
- Use steam on natural fibers like cotton and linen; go easy or use a pressing cloth on delicate synthetics.
- For vertical steaming, hold the Steam Iron upright a few centimeters from the fabric and use short bursts of steam.
- When finished, turn the temperature to minimum, switch off if you have a separate power switch, unplug, and let it cool upright.
- Empty leftover water into a sink once it is cool to reduce mineral buildup and stale odors.
Typical fabrics and settings guide
| Fabric / task | Starting heat / steam setting | What “done” looks like | Common mistakes |
|---|---|---|---|
| Delicate synthetics (polyester, rayon blends) | Low heat, little or no steam; use a pressing cloth | Wrinkles relaxed, fabric stays matte without shine or rippling | Heat too high causing shine, or pressing directly over prints and logos |
| Silk blouses | Low–medium heat, steam off or very light; press inside out | Smooth surface with gentle drape, no water spots | Using spray water and leaving marks, staying too long in one spot |
| Wool trousers | Medium heat with steam, pressing cloth recommended | Crisp creases, wrinkles gone, fabric texture not flattened | Pressing directly without cloth, creating shiny seams |
| Cotton shirts | Medium–high heat with moderate steam | Collar and cuffs flat, body smooth, seams lying neatly | Ironing too fast so wrinkles remain, or overcrowding the ironing board |
| Linen garments | High heat with strong steam or repeated bursts | Wrinkles greatly reduced; some natural texture may remain | Under‑steaming, then overheating to “chase” wrinkles |
| Denim jeans | High heat with strong steam | Seams flattened, pocket areas smooth, hem crease defined | Ironing over hard metal details without care, scratching soleplate |
| Vertical steaming of jackets | High heat with continuous or burst steam upright | Wrinkles softening, lapels neatened without sharp press lines | Pressing soleplate directly onto fabric instead of hovering slightly away |
Cleaning and maintenance that doesn’t ruin parts
After each use
- Turn the temperature to minimum, unplug the Steam Iron, and let it cool while standing upright.
- Once warm but not hot, empty leftover water from the tank into a sink.
- Wipe the soleplate with a soft, slightly damp cloth to remove fibers or starch, then dry it.
- Check the cord for tangles and store it loosely without tight wraps to avoid internal wire stress.
Weekly care (for frequent users)
- Inspect steam vents for lint or mineral flakes; gently wipe with a cotton swab if needed.
- If your Steam Iron has a self‑clean function, use it with the tank partially filled per its markings.
- Use distilled water for at least some refills each week in hard‑water areas to slow limescale.
When it smells weird or performs poorly
- If there is a musty or “stale water” smell, empty the tank completely, refill with fresh distilled water, and run a short steam cycle over a sink.
- If steam output is weak, try a self‑clean cycle or run the Steam Iron at high heat with bursts of steam to flush vents.
- If you see brown or white residue on clothes, clean the soleplate and consider descaling the system.
What not to do
- Do not scrub the soleplate with metal pads or abrasive cleaners. This can scratch coatings and cause fabric snagging.
- Do not pour vinegar or harsh chemicals directly into the tank unless your unit specifically allows it; it can damage internal seals.
- Avoid wrapping the cord tightly around the Steam Iron while it is still warm; this can deform insulation over time.
- Do not store the Steam Iron flat with water still in the tank; this encourages leaks and mineral deposits.
Two common complaint checklists
Steam Iron spitting water instead of steam
- Confirm the temperature is set high enough for steam; low heat produces water droplets.
- Check that the tank is not overfilled past the max line.
- Empty the tank, refill with clean water, and run several steam bursts over a sink.
- Use the self‑clean function if available to clear scale from vents.
Soleplate dragging or sticking on fabric
- Inspect the soleplate for residue from starch, glue, or melted synthetic fibers.
- Wipe warm (not hot) soleplate with a soft cloth dampened with mild soapy water, then wipe again with plain water and dry.
- Lower the heat setting if the fabric is synthetic or delicate.
- Use a pressing cloth between the Steam Iron and very delicate materials.
Troubleshooting that gets you unstuck fast
Quick decision path when it “won’t behave”
- If the Steam Iron will not heat: check the outlet with another device → inspect the plug and cord for damage → verify any power switch is on → let it cool and try a different outlet → if still cold, stop use and seek service.
- If there is no steam: make sure there is water in the tank → confirm temperature is at a steam‑capable level → adjust the steam control to higher output → clean vents or run self‑clean → if steam never appears, get professional help.
- If it leaks heavily: confirm the tank is not overfilled → ensure the water cap is fully closed → avoid using strong steam at very low temperatures → try emptying, refilling, and testing upright.
Common symptoms, causes, and fixes
| Symptom | Likely cause | Fix |
|---|---|---|
| Steam Iron does not heat up | Unplugged, faulty outlet, internal thermostat or element issue | Check outlet with another appliance, firmly plug in, verify any power switch; if still cold, stop using and arrange service. |
| Indicator light never turns off | Thermostat cycling behavior or control failure | See if temperature feels stable and fabrics are not overheating; if it stays constantly hot or unstable, unplug and get service. |
| No steam even with full tank | Temperature too low, steam control set to “dry,” clogged vents | Increase temperature to a steam‑capable range, adjust steam control, run self‑clean or flush with strong steam bursts. |
| Spitting water or large droplets | Overfilled tank, low temperature, sudden strong steam on a cool soleplate | Reduce water to below max line, raise temperature, wait until fully heated, then use steam cautiously. |
| Brown or rusty spots on fabric | Mineral deposits or corrosion in tank/vents, dirty soleplate | Empty tank, refill with distilled water, use self‑clean; clean soleplate gently; avoid very old or contaminated water. |
| White flakes from vents | Limescale from hard water breaking loose | Run repeated steam bursts over a sink, perform descaling or self‑clean, switch to distilled or filtered water. |
| Soleplate sticking or dragging | Residue buildup, incorrect heat for fabric | Clean warm soleplate with soft cloth and mild detergent; lower heat for synthetics or use a pressing cloth. |
| Fabric getting shiny patches | Too much heat, pressing directly on delicate or textured fabrics | Reduce temperature, iron inside out, or add a pressing cloth; avoid lingering in one spot. |
| Water leaking from tank when stored | Stored with water, cap not closed, internal seal wear | Always empty tank after use, close cap fully, store upright; if leaks continue even empty, seek service. |
| Steam Iron shuts off unexpectedly | Auto shut‑off feature triggered by inactivity or safety sensor | Move or tilt the Steam Iron as recommended to reactivate; if it cuts off during active ironing, cord or internal fault may need service. |
| Burning or unusual plastic smell | New unit “burn‑in” or overheating component | Light smell on first few uses can be normal; strong or worsening smell requires unplugging and professional inspection. |
When to stop and get service
- The cord is frayed, cracked, or hot to the touch during normal use.
- You see sparks, smoke, or charring on the body, plug, or cord.
- The Steam Iron trips circuit breakers or repeatedly blows fuses when plugged in.
- The soleplate is cracked, severely warped, or separating from the body.
- Water leaks from areas other than vents or tank cap, even when properly filled and stored upright.
- The Steam Iron stays hot even when turned to minimum or switched off and unplugged, indicating stored heat issues.
- Self‑clean or steam functions no longer work at all after you have tried basic cleaning steps.
Smart habits that save time
- Group ironing by fabric type so you adjust the Steam Iron temperature less and move through garments faster.
- Use hangers near the ironing board so each finished piece goes straight up, not back into a wrinkling pile.
- Keep a small spray bottle of clean water handy for stubborn wrinkles rather than overusing steam on delicate fabrics.
- Store the Steam Iron upright, completely cool and dry, with the cord loosely coiled to extend its life.
- For frequent ironing, keep a lint‑free cloth nearby to quickly wipe starch or residue off the soleplate mid‑session.
- Use distilled or mixed (half distilled, half tap) water as a routine in hard‑water areas to drastically reduce descaling chores.
Quick FAQ
Can I use tap water in my Steam Iron?
In soft‑water areas, tap water is often fine. In hard‑water regions, use distilled or a mix of distilled and tap to reduce limescale and extend the Steam Iron’s life.
Why does my Steam Iron sometimes click or the light cycle on and off?
That is usually the thermostat cycling to maintain temperature. Occasional clicks and light changes are normal as long as heat feels stable.
Is vertical steaming as effective as ironing on a board?
Vertical steam is great for refreshing and softening wrinkles, especially in jackets and curtains, but it will not create the sharp creases that a flat ironing board can.
Can I use fabric softener or scented additives in the water tank?
No. Additives can gum up the Steam Iron’s internal channels and vents. If you like fragrance, use scented starch or fabric sprays applied directly to clothes instead.
How long should a typical ironing session be with a full tank?
It depends on tank size and steam level, but many Steam Iron models give about 20–40 minutes of active steaming before refilling.
Why does my Steam Iron drip when I iron on low heat?
At lower temperatures the water may not turn fully to steam, so it can drip. Use little or no steam for low‑heat fabrics and increase heat when you need strong steam.
Can I iron over buttons, zippers, and embellishments?
Yes, but do it carefully. Work around them or cover them with a pressing cloth to protect both the fabric and the soleplate from scratches.
How often should I use the self‑clean function?
For frequent use with tap water, running self‑clean about once every 1–2 weeks is a good habit. With mostly distilled water, you can do it less often.
Is it okay if my Steam Iron leaves a faint smell the first few times?
A mild “new appliance” smell during the first few heating cycles is common and usually fades. Strong, sharp, or worsening odors are not normal and mean you should unplug and investigate.
Can I travel with my Steam Iron while it has water inside?
It is best to empty the tank completely before packing. Movement and pressure during travel can force water into places it should not go and cause leaks later.
Do I really need an ironing board, or can I use a table?
You can use a sturdy table covered with a thick, heat‑resistant pad or folded towel, but a dedicated ironing board makes steam flow and positioning much easier and safer.
What’s the best way to remember to unplug the Steam Iron?
Make it part of your finishing ritual: last garment off the board, Steam Iron onto heel, dial to minimum, unplug, then empty the tank. Same order every time becomes automatic.
Discover More
- Air Conditioner
- Air Fryer
- Air Purifier
- Automatic Soap Dispenser
- Barbecue Grill
- Beverage Cooler
- Beverage Dispenser
- Beverage Fridge
- Blender
- Boiler
- Bread Maker
- Bread Slicer
- Bread Toaster Oven
- Can Opener
- Carpet Cleaner
- Ceiling Fan
- Ceiling Heater
- Ceiling Mounted Heater
- Ceiling Mounted Vent Fan
- Central Vacuum
- Charcoal Grill
- Citrus Juicer
- Clothes Dryer
- Clothes Steamer
- Coffee Grinder
