Wall Oven Help Guide: A Practical Manual For Real-Life Cooking
Quick start you can finish fast
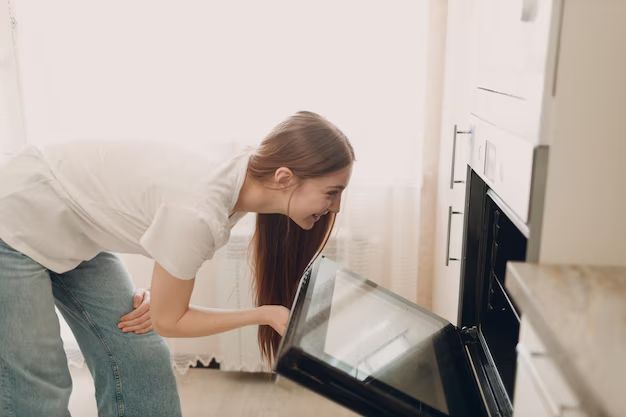
Your Wall Oven is built to make cooking easier, not more mysterious. Here’s how to get from “just installed” to “baking something” without a lot of drama.
First setup checklist
- Remove all packaging from inside and outside the Wall Oven, including any cardboard, films, and tape from racks or doors.
- Take out the racks and any included trays or pans, wash them in warm soapy water, rinse, and dry thoroughly.
- Wipe the inside cavity, door glass (if present), and door seal gently with a damp, soft cloth; then dry with a lint-free cloth.
- Make sure there is enough clearance around the Wall Oven cabinet front for air to circulate and the door to swing fully open.
- Confirm the Wall Oven is properly installed and level; doors should close smoothly and not swing open or shut on their own.
- Turn on power at the breaker or wall switch if your kitchen uses one; verify the display or indicator lights come on.
First empty heat cycle
Running the Wall Oven empty helps burn off factory residues and reduces “new appliance” smell later.
- Remove all cookware and racks except one rack positioned in the center.
- Close the door fully.
- Set the Wall Oven to a standard bake or similar mode at about 375–425°F.
- Let it run for about 30–45 minutes with the kitchen window cracked open if possible.
- After it cools, wipe any light film from the interior with a damp cloth.
First-use cooking example: sheet pan vegetables
This is a gentle, forgiving way to get to know your Wall Oven while making something actually useful.
- Place a rack in the middle position.
- Spread chopped vegetables on a light-colored baking sheet with a small amount of oil and seasoning.
- Set the Wall Oven to bake at about 375–425°F.
- Cook for about 18–30 minutes, checking a couple of times.
- They are done when edges are browned, centers are tender, and you can pierce them easily with a fork.
Know your parts without guessing
Most units have
- Control panel: Buttons, dials, or a touch surface where you set temperature, time, and cooking modes.
- Display or indicator lights: Shows temperature, time, or status such as preheating and active heating.
- Oven cavity: The main cooking space, usually with enamel coating for easier cleaning.
- Racks: Metal shelves that slide in and out on support rails; different levels change how food browns and cooks.
- Door with inner glass: Seals in heat and allows you to peek inside if glass is present.
- Door gasket or seal: Soft material around the opening that keeps heat from leaking out.
- Heating elements: Hidden or visible elements at the top and bottom that provide heat for baking and broiling.
- Interior light: Lets you check doneness without opening the door and dropping the temperature.
Some units have
- Convection fan and vent: Circulates hot air for more even baking and faster roasting.
- Temperature probe: A removable sensor you can insert into meat to monitor internal temperature.
- Self-clean mode: A high-heat or steam-clean program that loosens baked-on residues.
- Telescopic racks: Racks that glide smoothly on rails for easier access to heavy dishes.
- Child lock feature: Prevents accidental changes to settings or door opening using controls.
- Double Wall Oven configuration: Two separate cavities with independent controls stacked vertically.
Safety that actually prevents problems
- Keep combustibles away: Do not store paper, cardboard, or plastic in or on top of the Wall Oven; they can overheat when the oven is on.
- Use proper cookware: Only use oven-safe metal, ceramic, or glass; avoid plastic and non-oven-safe lids that can warp or melt.
- Watch door clearance: Make sure the door can open fully without hitting cabinets, knees, or pets; forced doors can damage hinges and seals.
- Keep the door closed while cooking; frequent opening drops temperature and can overwork heating elements.
- Use dry oven mitts or potholders; damp fabric can let heat through much faster than you expect.
- Allow the Wall Oven to cool before wiping the interior; rapid cooling with wet cloths can damage glass or enamel surfaces.
- Do not line the entire bottom with foil; this can block airflow and damage coatings or elements.
- Check racks are fully seated before placing heavy cookware to avoid tipping or uneven cooking.
- Keep kids from leaning on or hanging from the oven door to protect hinges and prevent tip risk in some installations.
- If you smell a sharp electrical or burning insulation odor, or see smoke not coming from food, turn off the Wall Oven and let it cool before checking further.
Daily use for better results
A consistent routine makes your Wall Oven predictable and your meals less stressful.
- Confirm racks are in the positions you need before preheating; moving racks in a hot Wall Oven is no fun.
- Preheat for about 10–15 minutes for baking and roasting unless your model indicates it is ready sooner.
- Use the middle rack for most baking, upper levels for faster browning, and lower levels for crisp bottoms on items like pizza.
- For convection modes, reduce recipe temperature by about 25°F and start checking doneness a little earlier.
- Avoid overcrowding pans; leave some space around dishes to help heat circulate.
- Check doneness using visual cues and, for meat, a food thermometer rather than trusting time alone.
- When cooking is done, turn the Wall Oven off, open the door slightly to release excess heat if safe for your kitchen, and let it cool.
- After cooling, wipe obvious spills so they do not bake on during the next use.
| Food / Task | Starting settings | Doneness / finish cues | Common mistakes |
|---|---|---|---|
| Frozen pizza | Bake at 400–450°F on middle or lower rack | Cheese fully melted and bubbly, crust browned and firm on bottom | Placing on a cold, thick pan so the crust stays pale and soft |
| Roast chicken pieces | Bake or roast at 375–425°F on middle rack | Skin browned, juices run clear, internal temp about 165°F | Crowding pieces together so they steam instead of roast |
| Cookies | Bake at 325–375°F on middle rack, light-colored sheet | Edges set and lightly golden, centers just set but still soft | Using a dark pan on a low rack, leading to burnt bottoms |
| Casseroles / lasagna | Bake at 350–375°F on middle rack, covered then uncovered near end | Center hot and bubbling, cheese lightly browned on top | Skipping a rest time after baking, causing runny slices |
| Sheet pan vegetables | Roast at 375–425°F on middle rack | Edges nicely browned, fork-tender centers | Layering vegetables too thick; top burns before bottom cooks |
| Broiling steaks or chops | Broil on upper rack position | Well-browned surface, desired internal temp reached | Walking away; broiling goes from perfect to overdone quickly |
Cleaning and maintenance that doesn’t ruin parts
After each use
- Once the Wall Oven is just warm, wipe fresh spills from the interior with a soft damp cloth and mild dish soap if needed.
- Wipe crumbs from the door gasket area and rack supports to prevent burning smells next time.
- Dry any cleaned surfaces so moisture does not sit in corners or on the door seal.
Weekly or frequent-use routine
- Remove racks and wash them in warm soapy water; dry completely before sliding them back in.
- Clean the interior walls with a non-abrasive sponge and a mild, non-caustic cleaner suitable for enamel surfaces.
- Gently wipe the door seal with a damp cloth, avoiding pulling or stretching it.
- Clean the control panel with a soft, slightly damp cloth; avoid spraying cleaner directly onto controls.
When it smells weird or performance drops
- Check for spills on the bottom surface or near heating elements and clean them once the Wall Oven is fully cool.
- If your unit has a convection fan, look for buildup on the cover and wipe the surface (not the internal fan blades) gently.
- If smoke appears at normal temperatures, inspect racks, drip pans, and the lowest surface for old grease.
- Use a self-clean or steam-clean cycle only as directed for your unit, and only when the interior is free of large food pieces.
What not to do
- Do not use steel wool, metal scrapers, or harsh abrasives on interior coatings, racks, or glass; these can scratch and make future cleaning harder.
- Do not remove the door unless the design clearly allows it and you are following the proper procedure; misaligned doors leak heat.
- Do not spray cleaner directly into vents, fans, or control gaps; apply to a cloth first.
- Do not immerse racks with sliding mechanisms or telescopic rails in water if their design prohibits it; wipe them instead.
Mini maintenance checklist for common complaints
Complaint: “My Wall Oven takes forever to heat up.”
- Confirm the door closes fully and the gasket is intact with no gaps or tears.
- Check that the Wall Oven is not in a low-power or eco mode that limits preheat performance.
- Look for heavy buildup on the bottom or near heating elements and clean thoroughly.
Complaint: “Food cooks unevenly.”
- Verify the rack is level and not sagging or installed backward.
- Avoid crowding pans; leave some space between dishes and walls.
- Rotate pans halfway through longer bakes if your Wall Oven has hot spots.
Troubleshooting that gets you unstuck fast
Use this section when your Wall Oven seems to have an attitude. It is usually something simple.
| Symptom | Likely cause | Fix |
|---|---|---|
| Wall Oven will not turn on | No power at outlet or breaker tripped | Check the breaker panel and any wall switch controlling the Wall Oven; restore power and test again. |
| Display on but no heat | Cook mode or temperature not actually started | Confirm a cooking mode and temperature are selected and that you pressed the start or confirm button. |
| Very slow preheating | Poor door seal or door not fully closed | Verify nothing is blocking the door, inspect the gasket for damage, and close the door firmly. |
| Uneven baking (one side darker) | Pan placement near one wall or known hot spot | Center the pan, use the middle rack, and rotate the pan halfway through the cook time. |
| Bottoms burn before tops are done | Rack too low or pan too dark | Move foods to a higher rack and use light-colored bakeware when possible. |
| Food never browns on top | Rack too low or broil element not used | Move rack higher and use a broil or higher-heat finish for the last few minutes. |
| Strong burning smell each use | Grease or spills on bottom or near elements | Allow the Wall Oven to cool, then clean the interior thoroughly, paying attention to the lowest surfaces. |
| Door will not close fully | Racks misaligned or large pan blocking | Remove pans, reseat racks properly, and check hinges for obvious obstructions. |
| Light not working | Burned-out bulb or loose socket connection | Replace the oven-safe bulb as specified for your unit, with power off and the Wall Oven cool. |
| Display shows an error code | Control system detected a fault | Note the code, switch power off for a few minutes, restore power, and see if it clears; persistent codes usually require service. |
| Clicks and fan noise after turning off | Normal cooling cycle and metal contraction | Allow the fan to run; it usually shuts off on its own after the interior cools. |
Mini decision path: Wall Oven will not start
- Check the display:
- If the display is off, verify the breaker and any wall switch are on.
- If the display is on, continue below.
- Look for control lock or child lock indicators:
- If lock is on, follow the unlock combination shown near the controls or in your reference card.
- If no lock is shown, continue below.
- Confirm a mode and temperature are set:
- Select a basic bake mode and set a temperature such as 350°F, then press start.
- Listen for relays or fans:
- If you hear nothing and still have no heat, power the Wall Oven off at the breaker for a few minutes, then try again once restored.
- If it still will not start, it is time to involve service.
Mini decision path: Food is consistently undercooked
- Check rack position:
- Move to the middle rack for standard baking, then retest with a familiar recipe.
- Verify preheat:
- Wait for the preheat indicator or allow at least 10–15 minutes before placing food inside.
- Test with an oven thermometer:
- Place a simple oven thermometer in the center, set 350°F, and compare after preheating.
- If actual temperature is far off, you may need a temperature adjustment or service.
When to stop and get service
- Persistent electrical smells, smoke not related to food, or visible sparking from inside the Wall Oven.
- Cracked or shattered interior glass, including the inside of the oven door.
- Door that will not latch or stay closed, even after clearing racks and pans.
- Severe damage or gaps in the door gasket that allow heat to escape noticeably.
- Repeated tripping of the circuit breaker when the Wall Oven is in use.
- Error codes that return immediately after a full power reset.
- Heating elements that glow unevenly, create bright hot spots, or do not heat at all while others do.
- Any signs of melted components, scorched wiring insulation, or loose internal parts visible through vents.
Smart habits that save time
- Keep a dedicated oven-safe pan or tray on a lower rack to catch drips from bubbly dishes; it is easier to wash a pan than scrub the bottom of the Wall Oven.
- Group oven tasks: Bake multiple dishes in one session when possible to make the most of a single preheat.
- Use parchment paper or oven-safe silicone baking mats on baking sheets to reduce stuck-on messes.
- Store only oven-safe items inside the Wall Oven between uses, or better, keep it empty so surprise preheats do not ruin anything.
- Note favorite settings on a small magnet or nearby pad so you do not have to rediscover the “perfect” temperature each time.
- Check the Wall Oven before bed to be sure it is off, especially on busy cooking days.
Quick FAQ
Do I always need to preheat my Wall Oven?
Preheating is important for baking and most roasting because it gives predictable results. For reheating or very long braises, a shorter or no preheat can be acceptable, but times will shift.
Can I use foil in my Wall Oven?
You can use foil on pans or loosely over dishes, but avoid covering the entire bottom surface or blocking air vents, since that can damage parts and affect cooking.
Why does my Wall Oven fan run after I turn it off?
The fan helps cool internal components and is normal to run for several minutes after cooking; it usually stops automatically once temperatures drop.
Is it okay to leave racks in during self-clean?
High-heat self-clean cycles can discolor or damage some racks and coatings. If your unit offers self-clean, remove any parts the instructions say to take out before starting the cycle.
Why does the temperature seem off compared to recipes?
Home ovens, including Wall Ovens, often run slightly hotter or cooler than their settings. Using an oven thermometer and adjusting temperature by about 10–25°F usually solves recurring issues.
Can I bake on multiple racks at once?
Yes, especially if your Wall Oven has convection. Rotate pans between racks partway through baking if you notice uneven browning.
How full can I load the Wall Oven?
Leave space between dishes and do not press pans against the back or sides; a nearly full oven is fine as long as air can still move around food.
What kind of cleaner is safe for the interior?
Use mild dish soap and water or a cleaner specifically marked for oven interiors and enamel. Avoid harsh abrasives, strong caustic chemicals, and metal scouring pads.
Can I remove the door to clean it?
Some Wall Oven doors are designed to be removable for cleaning, but hinges are delicate. Only remove it if the design clearly supports removal and you are comfortable aligning it correctly afterward.
Why does the glass on my Wall Oven door get cloudy?
Steam and fine grease can work between layers of glass over time. Mild exterior cleaning helps, but internal haze usually requires partial disassembly that is best left to a technician.
Is it normal for the outside of the cabinet to get hot?
The front and nearby trim can get warm during heavy use, but surfaces should not feel dangerously hot to a quick touch. Excessive exterior heat is a reason to call for service.
With a few steady habits and the tips in this guide, your Wall Oven becomes a predictable partner instead of a finicky mystery box. You have got this.
Discover More
- Air Conditioner
- Air Fryer
- Air Purifier
- Automatic Soap Dispenser
- Barbecue Grill
- Beverage Cooler
- Beverage Dispenser
- Beverage Fridge
- Blender
- Boiler
- Bread Maker
- Bread Slicer
- Bread Toaster Oven
- Can Opener
- Carpet Cleaner
- Ceiling Fan
- Ceiling Heater
- Ceiling Mounted Heater
- Ceiling Mounted Vent Fan
- Central Vacuum
- Charcoal Grill
- Citrus Juicer
- Clothes Dryer
- Clothes Steamer
- Coffee Grinder
